How To Dehydrate Apples
This post may contain affiliate links. We may earn a commission if you purchase via our links. See the disclosure page for more info.

Today, it’s all about dehydrating apples and having healthy snacks in your home. If you have a FoodSaver, you can preserve them for a year in mason jars or FoodSaver bags, as long as they’re airtight containers. Apples are being harvested right now and delivered where I live. That’s one reason I decided to update this post to help my readers get their dehydration projects started.
Yes, some people have freeze-driers, but for some, the price is too expensive, so I still dehydrate fruits and vegetables throughout the year. I will not be purchasing a freeze dryer at my age. It doesn’t make sense to me. I have already purchased a significant amount of freeze-dried food over the past 15 years. Life is good. I have been blessed.
If you missed my post, you should check this out. Apples: Everything You Need To Know. You really need to look at how to store apples, so I decided to update the post with additional information for you.
A dehydrator remains an affordable food preservation appliance. I believe the freeze-dryer units are a great idea, but for me, they’re way too expensive at this time in my life. Please remember, you can dehydrate food this year, eat it now and during the following year, and then start all over next year, dehydrating those foods you love to dehydrate.
If buying canned goods is easier for you, then buy them as you can afford them. Canned foods are going to go up in price based on some of the weather pattern challenges this year; that is no surprise to any of us. We have had droughts, flooding, hurricanes, and many natural disasters. Please stock up on what you can afford. Of course, only buy what you and your family will eat, so nothing goes to waste.
How Long Does It Take to Dehydrate Apples?
You may be wondering how long it takes to dehydrate apples. You’re looking at around 6-8 hours in the dehydrator. That doesn’t count the time it takes to wash, peel, and slice the apples.
If you plan to use the oven to dehydrate apples, it won’t take nearly as long, possibly even 2-3 hours, depending on the oven temperature and the humidity in your area. However, you’ll have to keep a closer eye on them to make sure they don’t get too crisp! To use your oven, set the temperature to the lowest setting possible, place the apple slices on a baking sheet, and keep the oven door ajar using a wad of foil. Keep a close eye on the process to prevent the apples from becoming too dry or crisp.
Are Dehydrated Apples Good for You?
You may be wondering if dehydrated apples are good for you. Since the dehydrated apples have zero fat, just like fresh apples from the tree, they are just as healthy. They also have tons of vitamins and minerals that your body needs. Just because they are dehydrated doesn’t mean they’re missing any vital nutrition.
You’ll also get lots of antioxidants and fiber from your dehydrated apples. And don’t worry, there is still plenty of fiber there, since the main thing the process removes is the water/moisture. So, if you are looking for something nutritious and delicious, then these apples are for you!
Additionally, apples would qualify as a vegan food item and are generally free from gluten issues.
Tools For Dehydrating Apples:
- Apple peeler
- Sharp knife
- Medium-sized bowl
- Lemon juice
- Cutting board
- Dehydrator
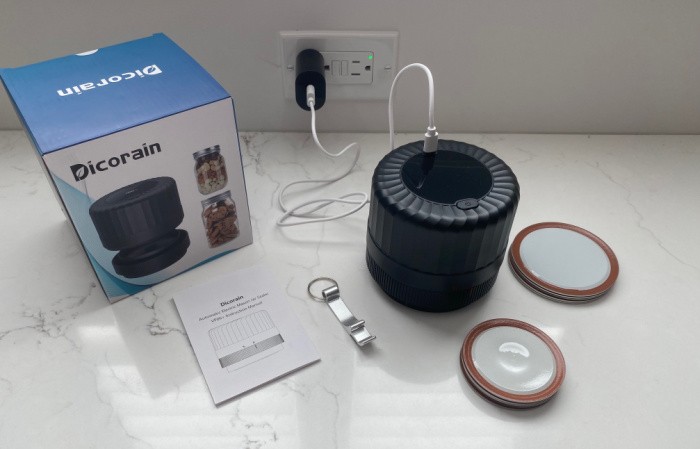
- Dicorain FoodSaver
The Best Apples To Dehydrate:
- Winesap
- Jonathan
- Granny Smith
- Pippin
- Rome Beauty
- McIntosh Red
- Baldwin
- Other options to consider include Gala, Honeycrisp, Fuji, Pink Lady, and Golden Delicious.
How to Dehydrate Apples
Dehydrating apples is probably one of the easiest things to do, once you learn how. I’m going to walk you through a step-by-step process for dehydrating apples. You truly never know when you may need these apples to tide you over during an emergency. But the great thing is that a dried apple slice is a delicious snack anytime!
They work great for a snack, but they are also great for storing in your pantry. I’ve always enjoyed dehydrated apple chips as a snack, but they’re an excellent nutritional source for your family any day and any time of the year, since you’ll have them stored and ready to use.
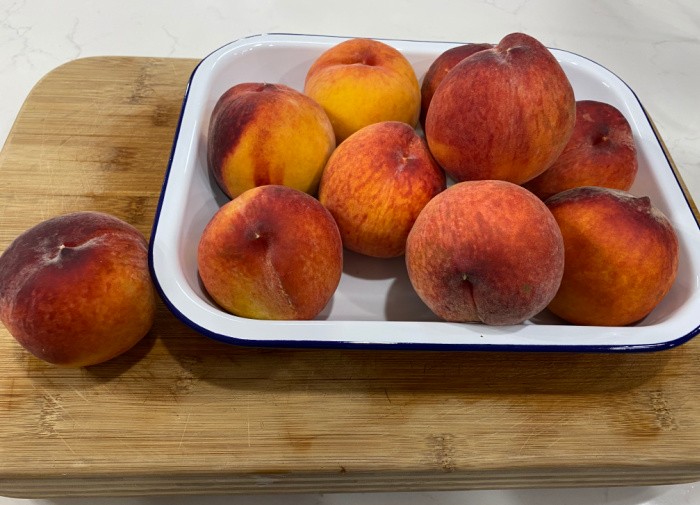
Step One – Sort Through the Apples, and Get Them Ready
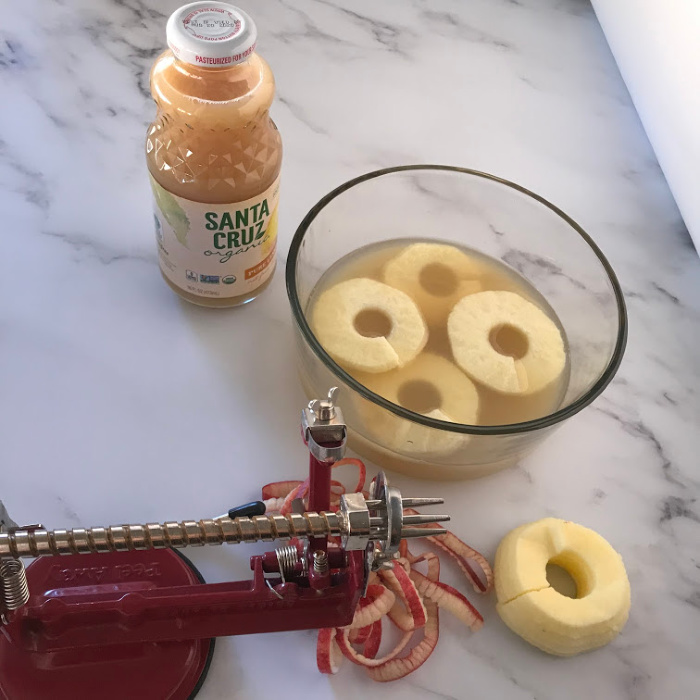
You can use just about any variety of apples to dehydrate. Just sort through the apples, remove the stems, wash them, and pat them dry. I use an apple peeler to peel, slice, and core mine. I believe my Johnny Apple peeler has been in use for about 20 years.
If you decide to use a knife, cut the slices 1/4 to 3/8 inches thick. The apple peeler is nice because all the slices are the same width.
I love that peeler kitchen tool this time of year. The unit cuts them ever so carefully to keep the rings intact. I also love how they look, and they taste fabulous with flavors changing based on the variety of apples used with each batch!
Step Two – Consider Treating Them With Lemon Juice
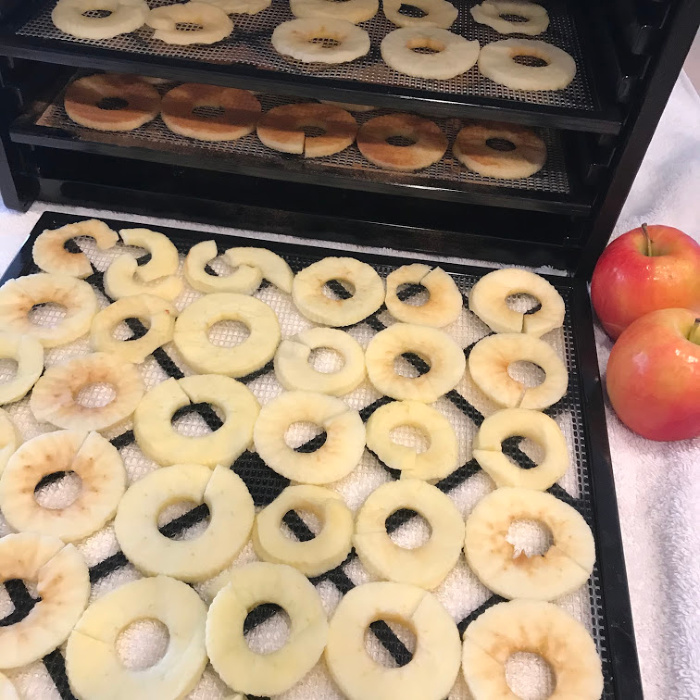
To keep your slices fairly white, use one cup of lemon juice to one cup of water for dipping. You don’t have to use the lemon juice/water treatment, but it does make them look a lot prettier since they aren’t as prone to turning brown from oxidation. After dipping the cut apple slices, spread them out on the dehydrator sheets/trays in a single layer.
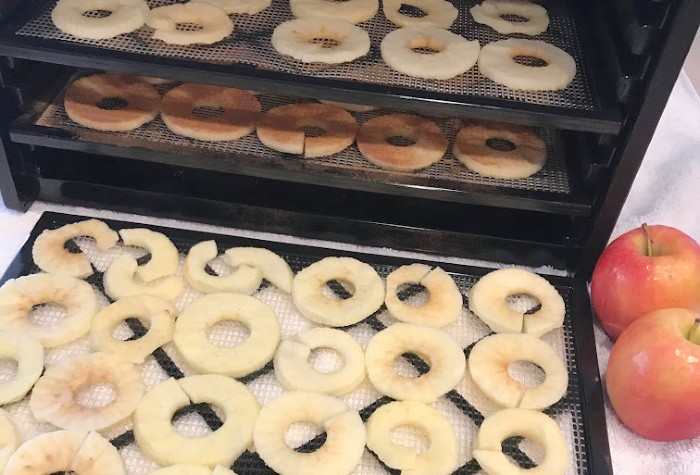
Step Three – Space the Apple Slices on the Dehydrator Trays
I have an Excalibur Dehydrator with nine trays, and it has a timer. For me, the timer is a must-have because I often have multiple projects underway simultaneously. That’s how I roll. My book states to set the temperature at 135 degrees. Spread the slices out so they aren’t touching each other, and the dehydrator’s air circulation isn’t restricted.
I check on the apples a few times to make sure the process is working as expected.
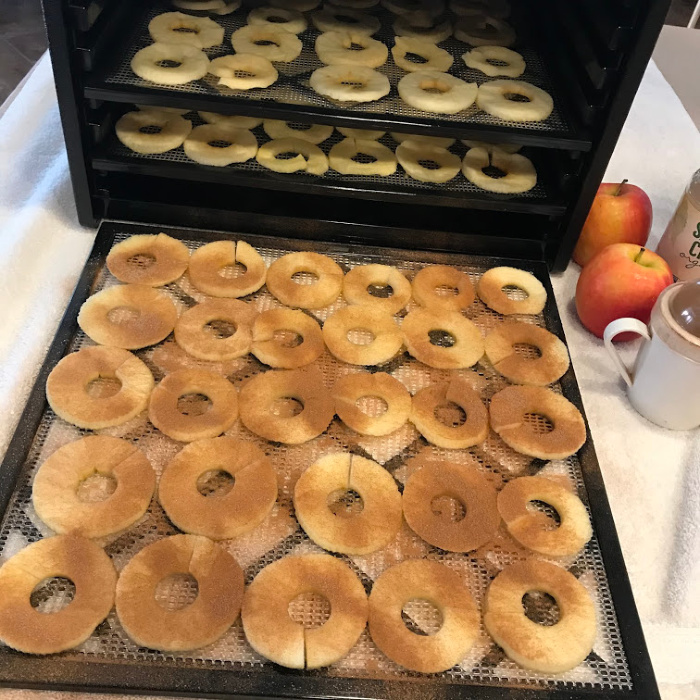
Step Four – Consider Sprinkling the Slices With Cinnamon & Sugar
You can dehydrate them plain or with cinnamon and sugar as shown above. This step shouldn’t affect the drying time or the ultimate texture you want. Other spices to consider include nutmeg and pumpkin pie spice. Be ready, you will be hooked on eating these treats, I promise!
Step Five – Set the Timer Based on Your Dehydrator Brand’s Guide
Each dehydrator brand will work differently. I set my timer to 4 hours as per my Excalibur handbook, and they took an additional 2 hours to dehydrate them to a pliable state that our family likes. Pliable means they aren’t crispy, and they aren’t moist either.
The time also depends on the humidity of the room you are dehydrating them in and the temperature setting you’re directed to use for each type of food product to be dehydrated. Some people will flip their dry apples over during the dehydrating process. I’ve never done that, and mine come out fine.
Step Six – Prepare Your Dehydrated Apples for Storage
How Do You Store Dehydrated Apples?
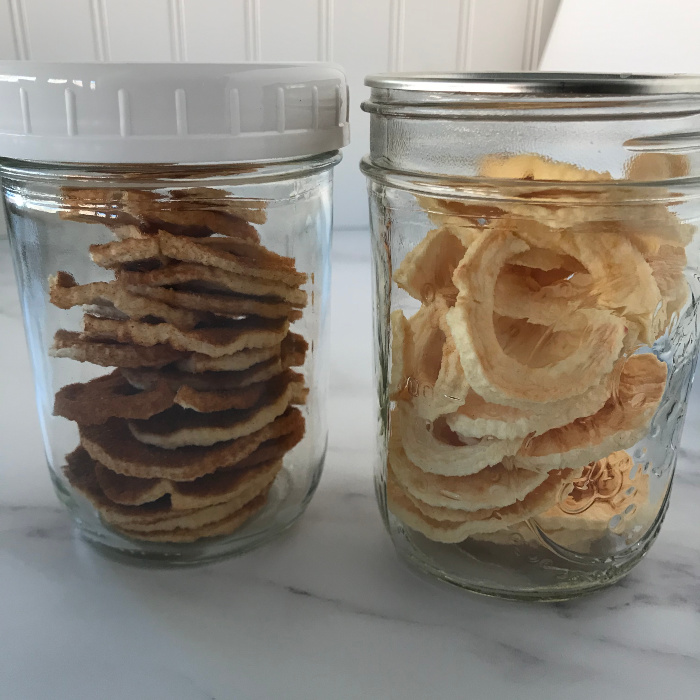
Once you have dehydrated the apples, you need to store them safely. It’s simple. You can store these for one year in sealed mason jars or in FoodSaver bags. Something to note about dehydrated apples is that they don’t take up much space.
You’ll want to pack the fruit in there tightly. I feel as though this is an excellent way to use up apples that would otherwise go to waste.

- 6-8 apples
- 2 cups lemon water (optional-1 cup water to 1 cup lemon juice)
- cinnamon or cinnamon and sugar (optional)
-
Remove the stems from your apples, and wash them.
-
I used an apple peeler to peel and slice mine and 1/4 to 3/8 inches thick.
-
If you want to keep your slices fairly white, use one cup of lemon juice to one cup of water to dip them in. You don’t have to use the lemon juice/water treatment, but it does make them look a lot prettier since they aren’t as prone to turn brown.
-
Place the apple slices evenly on your dehydrator racks and place them evenly so they don't touch either on the racks.
-
My Excalibur Dehydrator book states to set the temperature at (135°F) = (57°C) degrees.
-
Each dehydrator brand will work differently. I set my timer on 4 hours as per my Excalibur handbook, and they took an additional 2 hours to dehydrate them to a pliable state that our family likes. Pliable means they aren’t crispy and they aren’t moist either.
-
The time also depends on the humidity of the room you are dehydrating them in and the temperature setting you’re directed to use for each type of food product to be dehydrated.
-
If you live where it's HUMID: "To condition the fruit, take the dried fruit that has cooled and pack it loosely in plastic or glass jars. Seal the containers and let them stand for 7 to 10 days. The excess moisture in some pieces will be absorbed by the drier pieces. Shake the jars daily to separate the pieces and check the moisture condensation." https://nchfp.uga.edu/how/dry/pack_store.html
I used to live in the DRY DESERT: I set my fruit and vegetables on my countertop for 5-7 days. Ten days is even better to make sure everything is dry before using your FoodSaver unit.
How To Condition Your Fruit or Vegetables
If you live where it’s HUMID: “To condition the fruit, take the dried fruit that has cooled and pack it loosely in plastic or glass jars. Seal the containers and let them stand for 7 to 10 days on cooling racks. The drier pieces will absorb the excess moisture in some pieces. Shake the jars daily to separate the pieces and check the moisture condensation.” https://nchfp.uga.edu/how/dry/pack_store.html
I used to live in the DRY DESERT: I set my fruit and vegetables on my countertop for 5-7 days. Ten days is even better to make sure everything is dry before using your FoodSaver unit. I use the Dicorain FoodSaver. If you missed this post: Dicorain™ A New Way To Vacuum-Seal Some Foods.
Do Dehydrated Apples Go Bad?
After you have dehydrated apples, they will last 6-12 months, as long as they are stored correctly at normal room temperature. You need to make sure the apples are appropriately stored for them to last this long.
How Do I Know When Dehydrated Fruit Is Done?
Well, when the dehydrated fruit is done, you will know. How? Well, a simple taste test! The fruit will feel dry when you touch it. When you taste it, it will have the right amount of crispiness, and it will taste just right without being crunchy! Of course, we all have our own preferences, but as mentioned, I like mine to be pliable and not too dry and crispy. You may feel differently.
Why Should We Consider Dehydrating Fruits and Vegetables?
I’m always looking for ways to stay prepared for emergencies. Many people are at a loss when it comes to feeding their families during and after a disaster. If you have a plan in place, as all preppers should, you’ll have your pantry, or another storage area, stocked with non-perishable foods. This could mean commercially canned products, freeze-dried foods, or dehydrated foods, as illustrated here.
Are Dehydrated Foods Good for You?
The dehydration process is designed to remove moisture from the food product, thereby preserving the food’s original nutritional qualities. Any stored food will lose its nutritional value over time, so no matter how it’s prepared or processed, food won’t be as good for you the longer it stays on your shelves.
Besides eating the dried apple slices as a snack, how else can I use them?
Some things to consider are:
- Cut them into small pieces and use the bits as a topping for ice cream, in yogurt, and with oatmeal or other cereal.
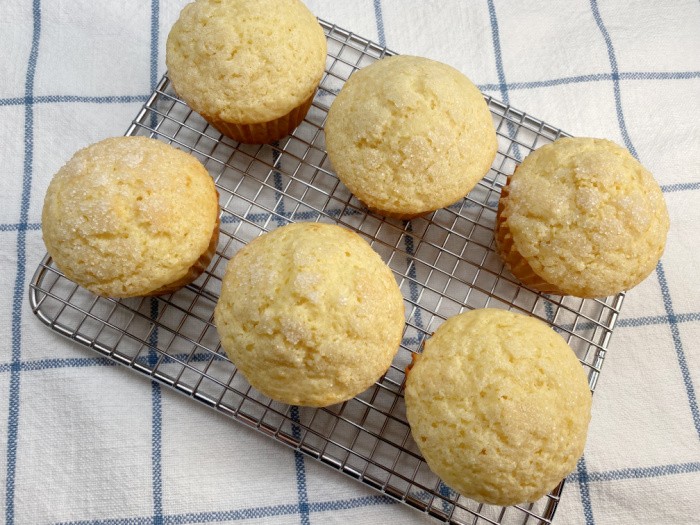
- Bake the small bits in cupcakes, muffins, and pancakes.
Be wise and store a wide variety of foods, and be sure to rotate them periodically as needed.
Here is a list of the Dehydrating Posts I have written:
- Dehydrating Apples
- Dehydrating Bananas
- Dehydrating Blackberries and Powder
- Dehydrating Blueberries and Powder
- Dehydrating Cilantro
- Dehydrating Cucumbers and Powder
- Dehydrating Ginger and Powder
- Dehydrating Grapes
- Dehydrating Green Onions and Powder
- Dehydrating Kale and Kale Powder
- Dehydrating Kiwi
- Dehydrating Lemons and Powder
- Dehydrating Marshmallows
- Dehydrating Peppermint Marshmallows and Powder
- Dehydrating Mushrooms and Mushroom Powder
- Dehydrating Onions and Powder
- Dehydrating Pears
- Dehydrating Pineapple
- Dehydrating Raspberries and Powder
- Dehydrating Spinach and Powder
- Dehydrating Strawberries
- Dehydrating Tomatoes and Powder
- Dehydrating Watermelon
Final Word
Let me know if you try dehydrating apples. I love to hear from you. Be sure to let me know if you snack on them or use them in recipes. Life is so good when we have a few jars of these in the pantry. May God bless this world, Linda


I love to dehydrate apples – they are by far the easiest to do. The lemon water I drop my slices in is not nearly as heavy as yours. I generally just squeeze half a lemon in 2-3 quarts of water! Then, I pat them dry before putting them on the trays. I also sprinkle some with cinnamon and I found organic maple sugar (pretty expensive) that I sprinkle on some of the slices.
This post reminded me that I need to get busy on these for Christmas gifts for my grandkids.
Hi Leanne, I better cut back my lemon then!! LOL! Thanks for the tip! I want to try using maple syrup, the good stuff! The grandkids love these! Linda
Linda – I don’t use maple syrup. I use maple sugar. I cannot recall the brand but it is organic and I just sprinkle a tiny bit on the apple slices. Yum!
Hi Leanne, oh my gosh, I need to find some of that!!! Thanks for the tip!!! Linda
Can I rehydrate apples for pies or any other recipes?
Hi Patty, I bet you could, they are just apples that will be rehydrated and baked. I can almost smell the apple pie from here. Yummy! Linda
Yes you can rehydrate apples for pie. Pioneer women did it all the time. Just place your slices in a bowl and cover with hot water. Cover and let stand – not sure how long it will take. Drain if necessary and proceed as you would for fresh apple pie.
Hi! Can u dehydrate in an oven or toaster oven if u don’t have a dehydrator?!?!
It’s hard to keep the temperature low enough in a toaster oven or a full sized oven, although you might get away with keeping the oven door cracked open (like when you broil.) But I would say use an oven thermometer that goes that low and try it with an empty oven before you waste a lot of time if you can’t keep the oven in the right temperature range.
The same way people use powders to add to bread, cookies and so on, I like the idea of adding tiny bits of chopped up fruits to baked goods, granola bars or to make a pie filling/ fruit sauce after being rehydrated. Dry veggies let us make quick soups.
Anything you dry for nibbling or make into chips is a healthier snack than what one might purchase.
Dry foods (Ramen, raisins, berries, chips, jerky, bullion and powdered food) are a good choices for lightweight backpack meals or a grab and go tub or bucket of emergency food.
Also in addition to your usual list of items to stock I think dehydrating food opens up more possible food items since you can store fruits, vegetables, herbs and even make jerky without refrigeration and even a commercial dehydrator or DIY solar unit does not cost a lot. Plus you can repurpose or reuse jars unsuitable for canning or even plastic and Mylar bags along with vacuum sealing which is also another low cost, easy to do process.
Even just learning how to repackage food for long term storage and increased shelf life really ups a prepper’s level of preparedness. I really understand now why you love to dehydrate things.
HI Frank, I love dehydrated anything that I can get my hand on. Life is good when you have extra food for your family! Linda
Linda, I’ve given up on using lemon juice. I always get too much lemon flavor and acidity. Now I just use the apples, some with cinnamon sugar (okay, MOST with cinnamon sugar).
But I don’t do this very often as I prefer to use apples for applesauce and apple pie filling.
HI Ray, it’s all about which lemon juice, maybe? I’m fussy it can’t be fake lemon juice. But to be honest, cinnamon sugar apples are the best!! But I have a sweet tooth! Yummy! Linda
Linda:
can I dehydrate fruit in the oven. I had one once but my oldest boy used it for all sorts of funky things (NOT ILLEGAL THINGS) he just liked funky teas and he would mix teas and some were really nasty tasting and I would not want to use it for anything else now.
Hi Jackie, oh my gosh, this is so funny, at least he was trying to be creative in the kitchen I guess! Linda
Linda,
Except for time at the hospital with Jane, I’ve been dehydrating, canning and giving away apples for a month now. Today I’m canning more apple pie filling, apple/cranberry compote and sliced apples. Tomorrow I’m loading another batch into my antique Harvest Right dehydrator–the thing is at least 30 years old. It’s a 5 tray type along the lines of your Excalibur (envy, envy) but not as nice. Still, it works.
I use a peeler/corer almost identical to the one you use when I’m canning apples and SOMETIMES when I’m dehydrating them, but for the most part I’ve found using a Mandoline, which will slice them ribbon thin, works better for dehydrating.
I’ve gone back to using lemon juice but only from real lemons I juice myself–and only about a quarter cup per cup of water to dip them in.
Oh, I also recently learned that blanching apple slices I’m canning for pies or compote drives more air out of the fruit and allows them to absorb more flavor from the sugar and cinnamon.
Hi Ray, thank you for the 5 stars, my friend! Oh my gosh, my mouth is watering! I haven’t made pie filling for years! You are so lucky because Jane makes the best pie crust!! My old dehydrator years ago was about 24 inches high, wide, totally square! It worked like a charm. Not sure what happened to it. I bet I gave it to someone who needed a dehydrator. Whatever works is awesome! Linda
Hi Linda and readers! Got a couple of suggestions: consider using Fruit Fresh powder and very cold water to keep browning down. Fruit Fresh powder can last for many years so I consider it a good prepping item. Second, for bruised apples, I cut away the bruise, then cube the rest of the apple. Soak cubes in Fruit Fresh or lemon juice, then drain well. Can be dehydrated or put in food saver bags to freeze. Easy to rehydrate the smaller cubes to use in recipes.
HI Wendy, oh I forgot about Fruit Fresh! Thanks for the remminder!!! Linda
I’ll have to try dehydrating apples. Just finished apple butter.
Ray, I’m jealous! Not a great garden yr in KY: too much rain for weeks, then extreme heat and drought Not a single green bean due and not enough tomatoes to replace last yrs canning. Bumper crop of butternut and spaghetti squash and best yr for cucumbers, though, but not a family fav♀️ Volunteer pumpkins from compost
Hi Marilynne, thank you for the 5 stars, my sweet friend! Ray does have an awesome garden, I love it when he shares what he’s growing. My neighbor said she had the best year ever with cucumbers as well! We love those bumper crops, yes!! Love it, Linda
Linda,
This year we had a bumper crop of Anna, Dorsett Golden and Gala Apples so I’ve been busy canning and dehydrating apples, giving bushels away to friends and neighbors and chowing down on fresh apples.
Since I got the Dicorain vacuum sealer I’ve started using it on my dehydrated apple slices. I think that will significantly extend their shelf life.
Still harvesting squash, tomatoes and cucumbers and now I’m harvesting my third crop of green beans. It rained hard last night (and the day before) for several hours so I’m planting more carrots, lettuce, bok choi and other cool weather crops today.
Soon I’ll have t pull the squash, Kajari Melon and Tuscan cantaloupe plants to make room for more fall crops. Also, because of the rain, I’ll wait several dry days before harvesting my Cal Bush Wonder and Charleston Gray watermelons. Otherwise, if I harvested them now I fear their flavor would be diluted.
Oh, the Kajari melons are a honeydew and tasty but I won’t be growing them again. They are mostly seed cavity. Thus they take up too much space in my beds for the amount of food they produce. The Tuscan melons, however, are keepers. They are heirlooms and I’ve saved seed for next year.
Because I’ve been so busy with apples and other garden tasks my sprouting operation has been on hiatus. But now that we’re heading into Fall I’ll start it up again. Hard for me to believe more people don’t grow sprouts since it’s so easy, so nutritious, and can be done even if you can’t have a garden. I use them on sandwiches, in stir fry’s and salads.
Hi Ray, oh my gosh, you have been blessed with a bumper crop of apples! SQUEAL! I just added the Dicorain to the post, since you told us about that fabulous Foodsaver unit it’s all I use when doing jars! It’s awesome! And inexpensive for all to buy. You know I love hearing about your garden, it makes me so happy! Hopefully next year, we shall see if I can get a garden going again. It’s the one thing I love to do is work my hand in the earth and harvest food. Linda