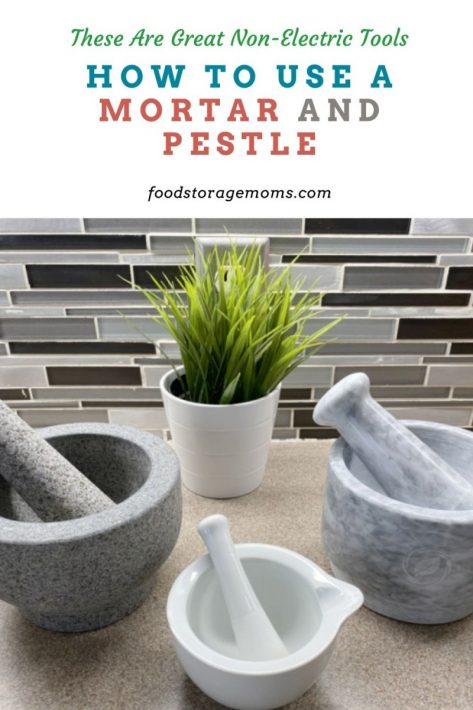
How to Use a Mortar and Pestle
This post may contain affiliate links. We may earn a commission if you purchase via our links. See the disclosure page for more info.

I love getting new kitchen tools, and today I have an ancient kitchen tool to share! I recently received a Mortar and Pestle, and I’m absolutely thrilled to teach you how to use one! I loved it so much, I bought two more. I love learning new skills.
What is a Mortar and Pestle?
A mortar and pestle is a set of tools that have been used since the Stone Age! They are used to prepare ingredients or substances by crushing and grinding them into a fine paste or powder.
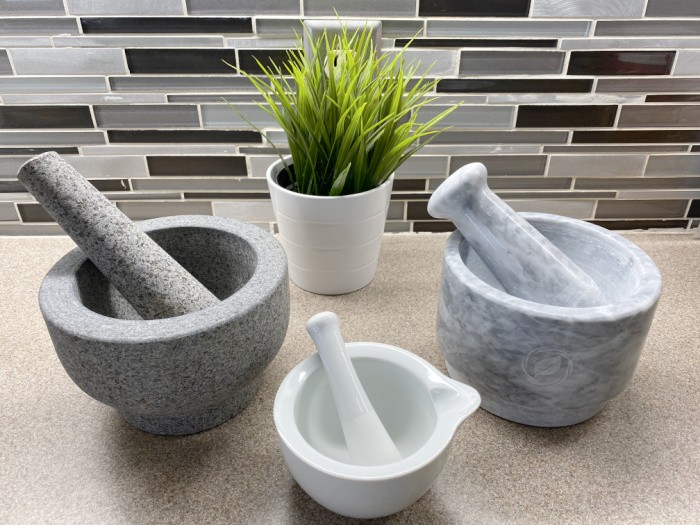
- The mortar: This is similar to a bowl. It’s typically made of hardwood, metal, ceramic, or stone. I have one each of granite, marble, and porcelain.
- The pestle: This is a club-shaped object. You use it to crush and grind whatever you put into your mortar.
You can crush and grind wet or dry items using your mortar and pestle. This ancient tool will allow you to create healthy foods, bring out essential oils, and generate the flavors from herbs and spices in a natural way. As preppers, we are always looking for natural ways to do things in the event we can’t get what we need from the store.
How to Choose the Best Mortar and Pestle
If you don’t have one of these ancient tools in your arsenal, you should really consider getting one. They are great for mixing spices, grinding tablets and medications, and making sauces. I have three, which allow me to use them for different purposes.
With this being said, not all mortar and pestles are created equal. Some are absolutely amazing and last a lifetime, while others just make you wish you never spent the money. Size, texture, material, and shape are all important factors when choosing a mortar and pestle. Let’s break it down:
Size
You can get large, medium, and small mortars, but for general purposes, you want one that is 6 to 8 inches in diameter. If you want one for smaller tasks, such as crushing garlic, you should consider getting a smaller size. If you don’t have one at all, I suggest the large mortar.
Texture/Material
As stated above, you can get mortars made from hardwood, metal, ceramic, granite, or stone. However, you want one that is rough, but not too porous so that you can use it for a variety of purposes. If it is too porous, you won’t be able to use it when making oily pastes such as pesto or chili oil.
I would recommend steering clear of smooth mortars such as porcelain or ceramic. The best mortars and pestles are made out of heavy-duty granite or marble. Wood ones work as well, but they retain smells and aroma, so you can only use them for specific tasks.
Shape
The idea is to keep everything in your mortar as you are crushing and grinding. With that being said, you want a mortar that has a deep, round shape. It should keep the ingredients in place rather than allowing them to jump around.
My Recommendation
Taking size, texture, material, and shape into consideration, I have three recommendations for the best mortar and pestle set. Here are my recommendations:
How to Season Your New Mortar and Pestle
Once you have gotten your new mortar and pestle, you first need to season it. This process will clean out the stone dust that is left during the manufacturing process. Follow the steps below to season your new mortar and pestle:
- First, wash your new tool in clean water, without soap. In fact, you should never clean a mortar and pestle with soap. Then, let it air dry, completely.
- Next, place a handful of white rice in your mortar. Grind it using the pestle. Once it is ground into a powder, discard the rice, and repeat the process 3-times.
- Then, add in some garlic cloves, mash it, and muddle it together.
- Add a teaspoon of cumin, salt, and pepper. Then, grind everything together.
- Enjoy the aroma, and discard everything.
- Wash the mortar and pestle with clean water, again. Then, allow it to air dry.
How to Use a Mortar and Pestle
Once you’ve cleaned and seasoned your mortar and pestle, it’s time to learn how to use it properly. If you need something ground into a paste or a powder, that is when you should use your mortar and pestle. Here’s how you use it:
- Place raw ingredients into the mortar. If you are following a recipe, measure out your dry ingredients, but fill the mortar no more than ⅓ full. If you fill it too full, you won’t get an even grind.
- Use the pestle to grind the ingredients. Hold your mortar with one hand, take the pestle in the opposite hand, and twist it against the ingredients. You want to make sure they are ground against the bottom and sides of the mortar.
- Continue to grind and mash. Keep grinding and mashing all of the ingredients using the pestle until everything in the mortar has the same consistency.
- Store ingredients. Once you’ve finished, store your ingredients in a glass spice jar with a tight fitting lid.
Ingredient Tips
If you are trying to grind different textures, you will need to do it in a specific order to ensure you get the consistency you want. Here’s the order you will want to use:
- Dry Ingredients. First, you will want to grind and crush your dry ingredients, such as dried herbs, spices, flour, etc.
- Moist ingredients. Next, you can add moist ingredients. These would be things like garlic, onion, brown sugar, and fresh herbs.
- Oily ingredients. You will then do oily ingredients such as anchovies, nuts, oils, cheese, butter, etc.
- Wet ingredients. Then, you will add the wet ingredients to the mixture such as lemon juice, stock, vinegar, honey, or soy sauce.
Other Techniques
For most spices and herbs, you can use the grinding technique, however, different recipes may call for different techniques. For example, you may need to pound larger spices or crush other spices.
Pounding Spices and Seeds
For larger ingredients, you may need to use the pounding technique. This is a firm, yet gentle pounding or bashing. It helps to crack the spices, allowing you to get a finer grind. Here’s how you do it:
- First, use the grinding action. This will catch any ingredients that will crush easily.
- Then, pound or bash the ingredients using the broad end of the pestle. Use short, sharp pounds.
- Finally, grind again, if needed to finish it off.
Crushing Technique
If a recipe calls for crushed spices or herbs rather than ground, this means that you don’t want them pulverized into a powder. You want your ingredients mostly intact. This is a great technique for crushed garlic. Here’s how you do it:
- Place the ingredients in the mortar.
- Then, roll the pestle across the ingredients so that they crush and burst.
- Continue to roll the pestle until all the ingredients have been crushed, but not finely ground.
10 Things to Prepare with a Mortar and Pestle
You may not think that a mortar and pestle would be that useful, other than grinding and crushing spices and herbs, but it can actually be used for a variety of different purposes and recipes. Here are just a few things you can prepare with a mortar and pestle (note the blue name link for the recipe):
- Pesto– This is one of the most classic things that’s prepared using these ancient tools.
- Caesar dressing– Your new tool is perfect for crushing those anchovies and garlic into a paste.
- Guacamole– It’s perfect for mashing the avocados. You will need a large mortar and pestle due to the size of avocados.
- Chimichurri– This is a herby Argentina sauce that is delicious over steak, chicken or fish.
- Spice blends– You can make all kinds of different spice blends that are sure to be potent in both aroma and flavor.
- Aioli– This is a garlicky mayonnaise that makes just about everything taste better!
- Hummus– If you like a chunkier version, hummus and pesto were both originally made using this tool.
- Curry paste– Nothing beats the flavor of a homemade curry paste, and it comes together perfectly in your mortar and pestle.
- Gremolata– This is a classic zesty Italian condiment that adds a great flavor to fish and roasted veggies.
- Flavored salts– Don’t spend an arm and a leg buying flavored salts at the grocery store. You can easily make your own using your mortar and pestle.
More “Ancient” Kitchen Tools You Need
Final Word
There are tons of things we can use to grind, mash, and crush things, but most of them require electricity. What happens when the power goes out? As a prepper, it’s imperative that you not only have “ancient” kitchen tools like a mortar and pestle at your disposal, but that you know how to use them! May God Bless this world, Linda


I do have two mortar and pestles. One is ceramic with a rough bottom. The other is wood. I got the wooden one in Jamaica. I love them both.
Hi Deborah, they are so fun to use! Wow, one in Jamaica!!! Love it! Linda
Linda:
I have a ancient mortar and Pestle. My husband worked for the fire service one year and at one place where he was digging he found a really old Mortar and Pestle. I’m afraid to use it because I’m afraid I will break it. They are made out of lava rock. I never knew what to do with it but I have it put up in a cabinet in the back safe. When I get something to keep things like that in I will put it on display.
Hi Jackie, oh that would be an antique, maybe??? Now, that’s a treasure! Linda
I was told by someone who worked with antiquities that it was at least 2,000 years old. I don’t know if he was right or not but I treasure it. You see it was made by Native Americans and it reminds me every time I see it of my husbands ancestry. He is part Cherokee and I love Indian things. I have several things my son had collected before he died and I treasure those also
Hi Jackie, wow, 2000 years old. I love hearing about these treasures and your husband’s ancestry. Thank you for sharing. Linda
I have 3. One is an antique that my Mom gave me that was used by Native Americans in her area in NV. It was for grinding corn. One is wood and the other is marble. I have use both of them depending on what I need to grind. The antique one is stored for safe keeping.
Hi Cheryl, oh my gosh, I LOVE hearing this! Grinding corn would be so awesome! Antiques are treasures. Linda
I had my Kindergarten class try to grind some corn that I had grown for cornbread and boy did they have a hard time! It takes a lot of time and pressure to make enough for bread . Great lesson for them!
Hi Cheryl, what a great experience, though!! Linda
So informative! Everything I didn’t even realize I needed to know (seasoning). Thank you for the recipes!
Hi Vicky, thank you for your kind words. You are so welcome! Linda