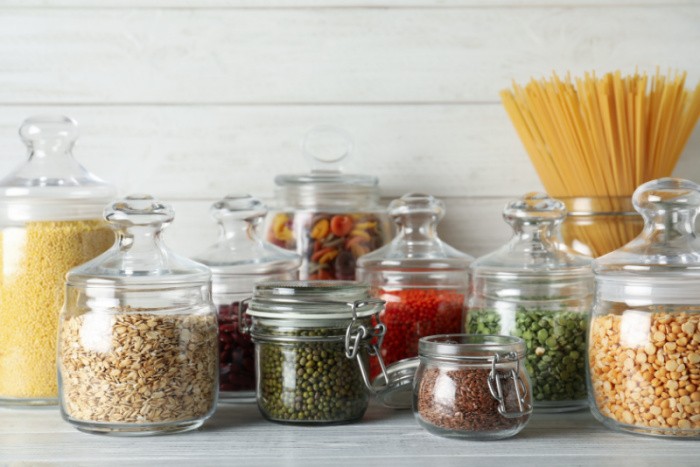
20 Staple Pantry Items for Making Cheap Meals
This post may contain affiliate links. We may earn a commission if you purchase via our links. See the disclosure page for more info.

It’s all about stocking up on staple pantry items we need today. We live in challenging times, where many families struggle to stay ahead. Eating out at restaurants or fast food joints may be convenient for families who are always on the go, but the cost has increased significantly over the past few years.
Afterward, you may feel that you paid too much money, but to make matters worse, you may have that one child complaining that they’re “still hungry.” Grrrrr! Check out these staple pantry items for making cheap meals.
I’m here to encourage you if you’re on a tight budget and looking for cheaper meal solutions. Everyone should have 20 staple pantry items to make cheaper meals. In case you missed this post, Canned Foods I Highly Recommend You Store
20 Staple Pantry Items
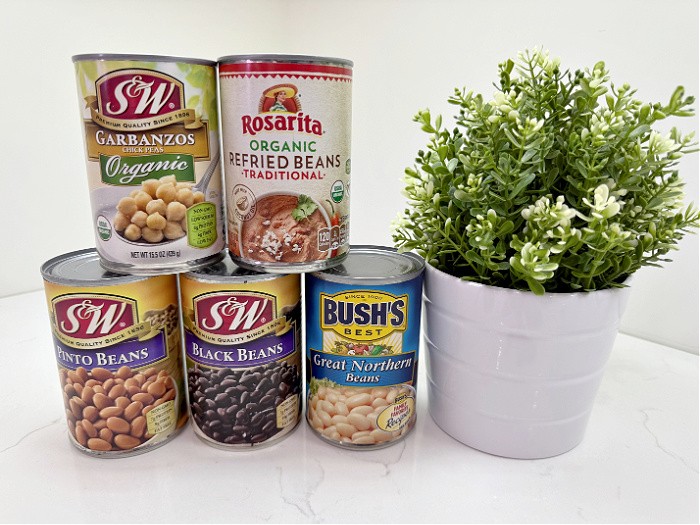
1. Dry or Canned Beans
Dried or canned beans are at the top of my list of essential pantry items. Whichever way you prefer them, they’re highly affordable and packed with protein. Beans are the magical fruit that you’ll need in your pot of chili, burritos, or refried beans.
I noticed our local Kroger/Smith’s grocery store had a case lot sale that started this past weekend. They had black beans and green beans by the case, along with other high-quality canned foods, such as soups. Finding a case lot sale is a great way to stock your pantry with affordable items for inexpensive meals.
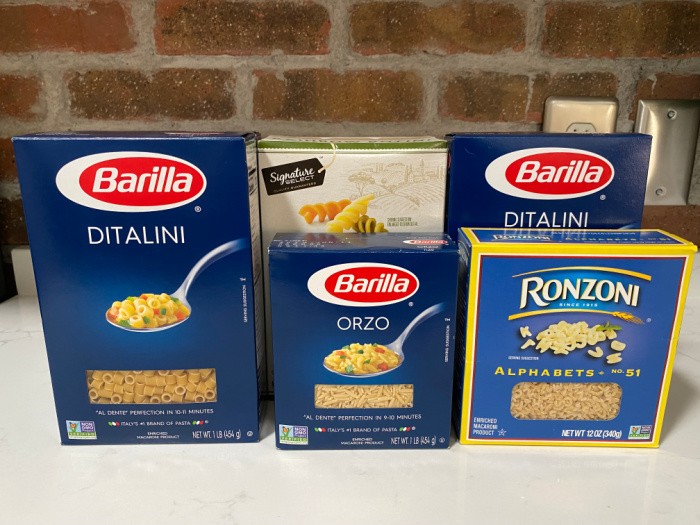
2. Pasta
Pasta is another filling pantry item that costs around $1 or less per meal. You can enjoy it in all different shapes and sizes. It can be stored in your pantry for an extended period, and you can also pour different types of sauces over it to add variety to your dishes.
It’s incredible how filling pasta meals can be, and a handful of pasta goes a long way when it’s cooked. We have spaghetti all the time, and our family enjoys the variations of meats and cheeses we use.
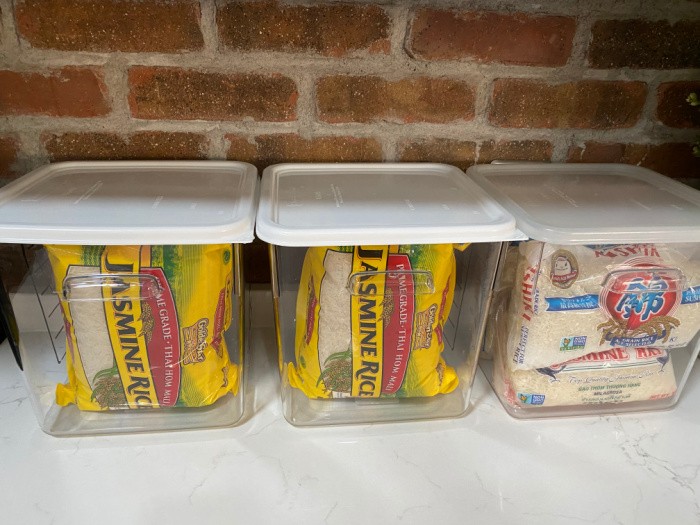
3. Rice
Buying rice in bulk is a great way to make any meal more filling while costing you less—rice pairs well with soup, skillet dishes, or as a side dish. Rice is a staple in the pantry used in various cuisines, including Mexican, Italian, and Asian meals. Like pasta, it goes a long way once cooked. I appreciate that it’s also shelf-stable, so you know it will last you a long time as a pantry staple.
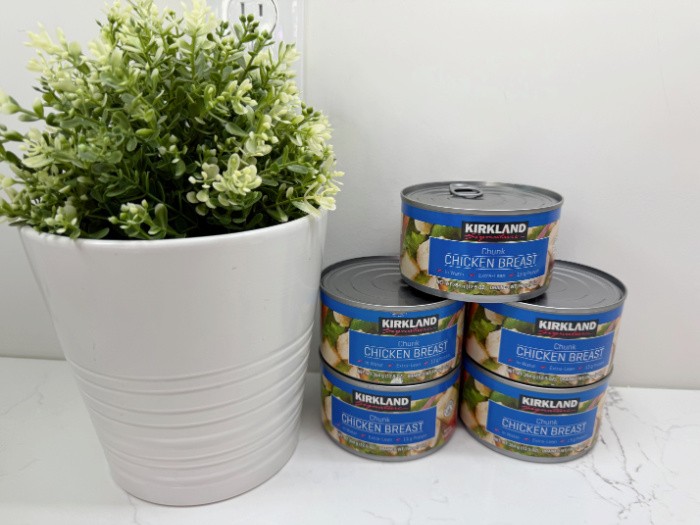
4. Chicken
Chicken is cheap in terms of meat, but even more so if you’re patient and wait until the family packs or cases go on sale. It pairs well with almost any meal, and any leftovers you don’t use can be stored in the freezer for later use.
I like to buy the canned chicken breast at Costco. We use it to make chicken salad sandwiches, chicken divine with broccoli, and chicken tacos and burritos. We also purchase the Costco rotisserie chicken in the bags. It saves having to debone the chicken, and it goes a long way. It does need to be refrigerated.
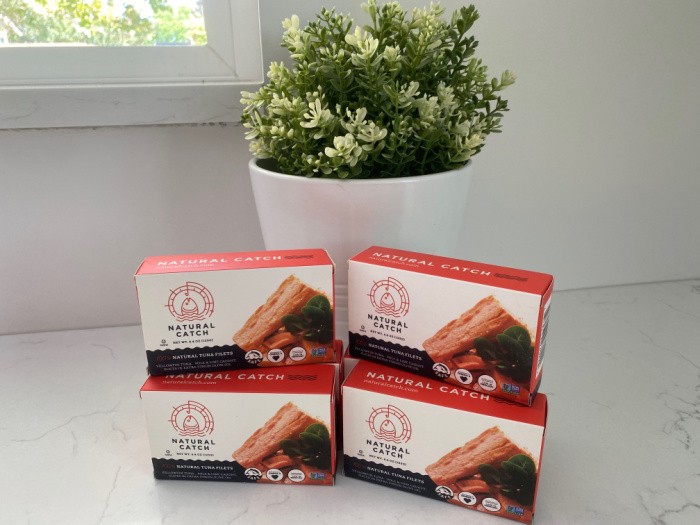
5. Canned Tuna
A can of tuna can be enjoyed straight out of the container or added to other ingredients to make tuna salad. It, too, comes with an abundance of protein and other vital nutrients. I buy canned tuna as part of my weekly groceries if I haven’t found it as part of a case lot sale. UPDATE: I now only purchase tuna from Natural Catch Tuna. Thank you, Harry, for introducing me to this product.
6. Ground Beef
Ground beef is another staple pantry item that can be used to make several cheap meals. Although not as cheap as chicken, it’s still cost-effective compared to most other meats, and it, too, can be purchased in bulk at a great sale price and then stored in your freezer. You’ll need it to make sloppy joes, tacos, chili, soups, stir fry, and hearty casseroles.
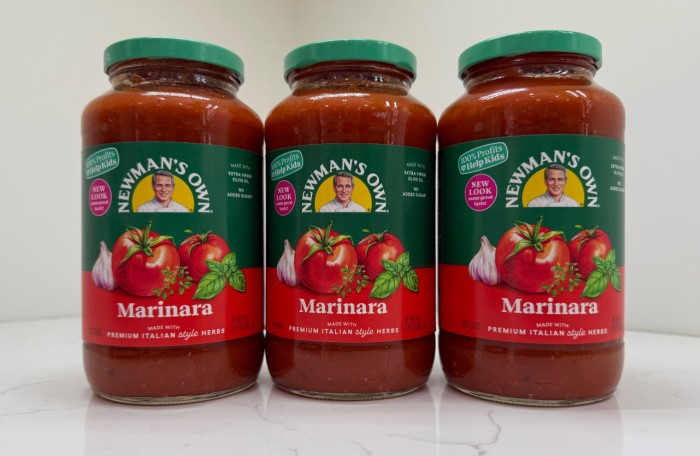
7. Pasta Sauce
A jar of pasta sauce that can be poured over your spaghetti noodles can create an entire meal for your family for under $3. It doesn’t get any cheaper than that.
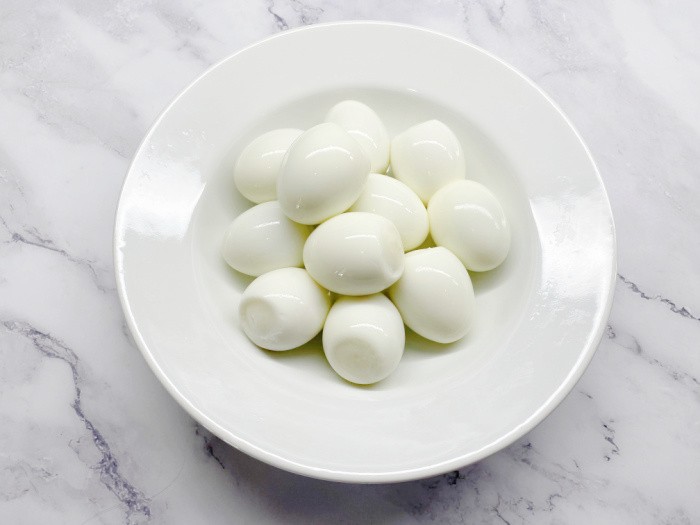
8. Eggs
Oh, how I love eggs! They’re full of protein while costing you very little. They are one of the cheapest staple foods on this list. Whether you prefer scrambled or sunny side up, or maybe you’re in the mood for some French toast for breakfast, eggs will do your body good. You’ll also need eggs to make homemade baked goods.
Last year, eggs were relatively expensive due to the loss of egg-producing chickens from the Avian Flu. Eggs are now much more plentiful and available at pre-flu prices. Check out the pricing on the five-dozen packages of eggs at Costco. I think you’ll be surprised at the low cost.
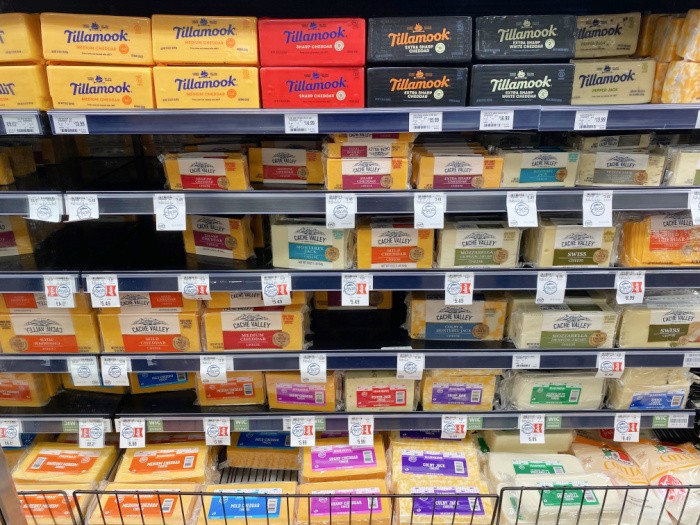
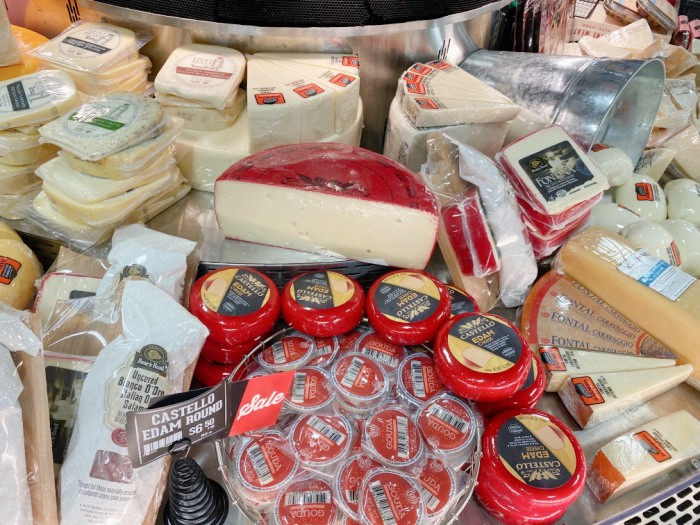
9. Cheese
Cheese can be expensive, so you may want to wait until it goes on sale. If you enjoy cooking from scratch, it will be hard to survive without it. (At least, I think so.) You’ll need it for salads, sandwiches, homemade pizza, and yummy cheesy quesadillas. Believe it or not, it can also be frozen if desired.
We like to buy the Tillamook cheese in the large brick. We slice off what we need each time we make cheese sandwiches, add it to spaghetti or other pasta dishes, or use it in tacos and other Mexican meals. I do not freeze the brick cheese; it crumbles.
We also purchase shredded cheese and freeze it in pint jars or use my FoodSaver bags in portions we typically use.
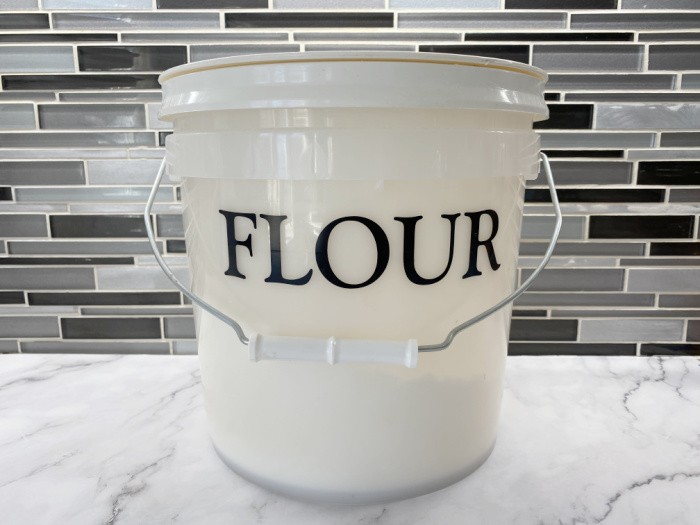
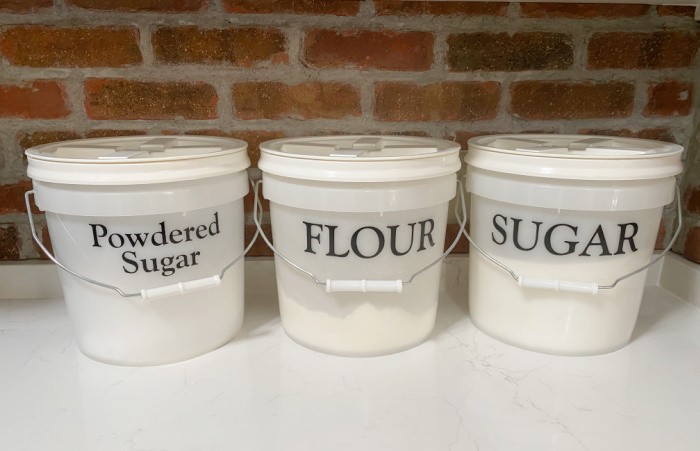
10. Flour or Cornstarch
Flour or cornstarch will be essential for those who whip up everything from scratch. It also thickens sauces and soups, but most importantly, we need flour when making mouth-watering baked goods, such as my favorite homemade bread.
I use bread flour rather than all-purpose flour. I’ve found it not only works great with my no-fail bread recipe but also with other flour-based recipes.
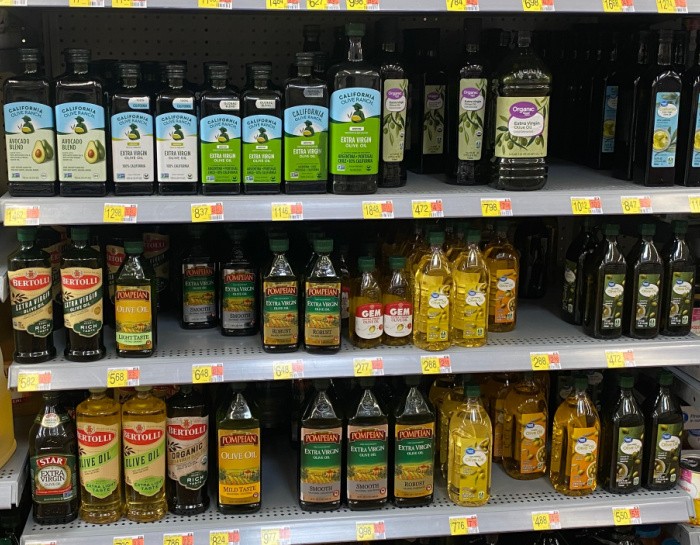
11. Oil
You may be scratching your head on this one because oil certainly isn’t cheap, but it will provide you with more cooking options besides simply baking or frying, and you’ll notice the taste difference, too. Olive oil is the healthiest way to go, while providing several health benefits for you and your family. I still buy vegetable oil for many recipes, I like the flavor more.
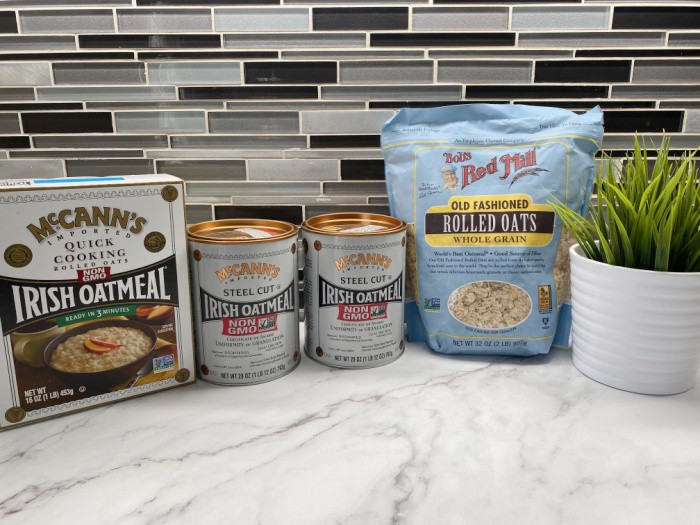
12. Oatmeal
Oatmeal offers a filling and frugal breakfast option. You can also use it to make oatmeal cookies or homemade granola. If stored properly, oats in various forms will last a long time in your pantry and can be added to many of your favorite recipes as a filling ingredient.
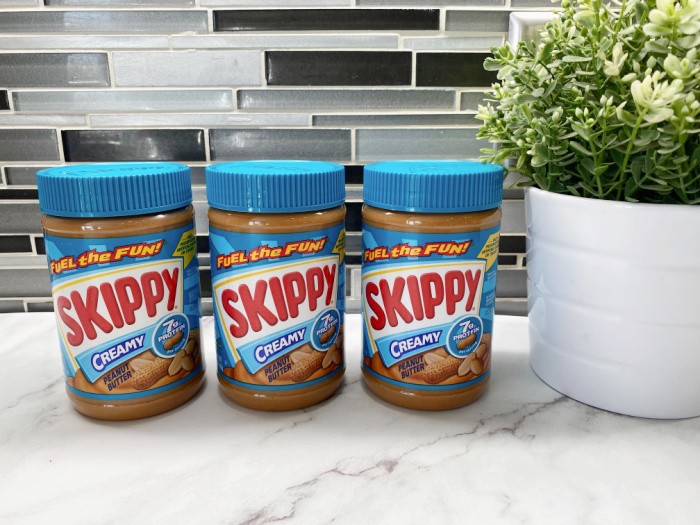
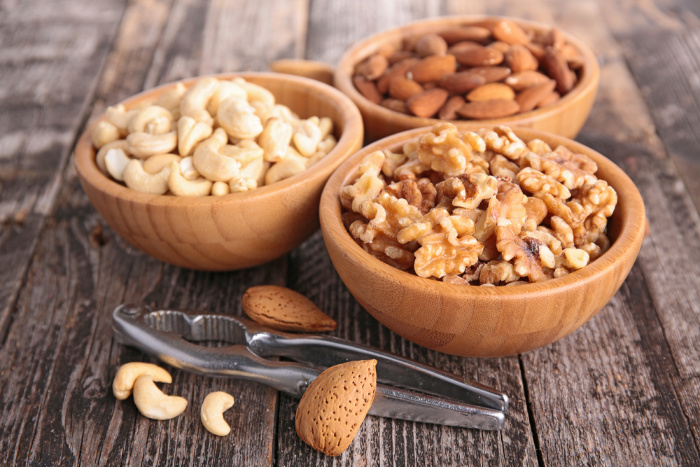
13. Peanut Butter
Peanut butter is undoubtedly one of those food items that most families can’t live without, especially if you have children who love eating peanut butter and jelly just about every day of the week. Or maybe you’re the guilty culprit who eats it by the spoonful for a snack in the middle of the night? Regardless of the circumstances, peanut butter is an excellent source of protein at a relatively low price.
I don’t buy the huge containers, but have found that the smaller containers tend to cost more. Buy the size that will satisfy your family for a few weeks, as it lasts a reasonable amount of time on your pantry shelf.
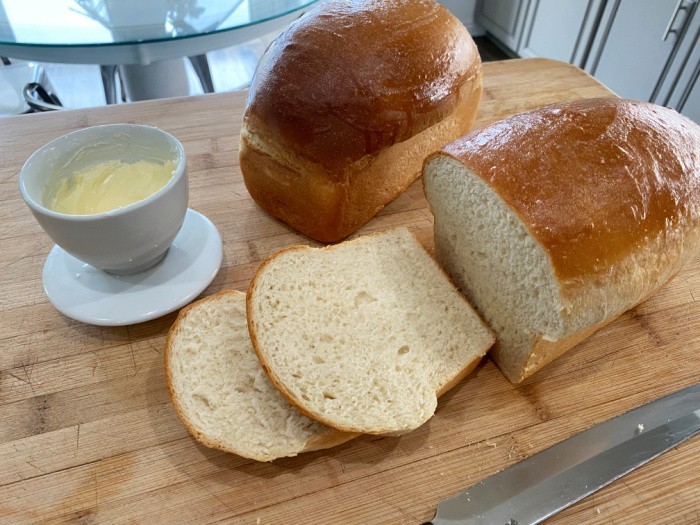
14. Bread
Bread is another essential item for making affordable meals, such as sandwiches, toast, or incorporating it into a casserole. I like my homemade bread made with bread flour. I keep mine in the freezer until it’s time to use the loaf. I’ve found that bread freezes well, and I don’t have to worry about preservatives or mold.
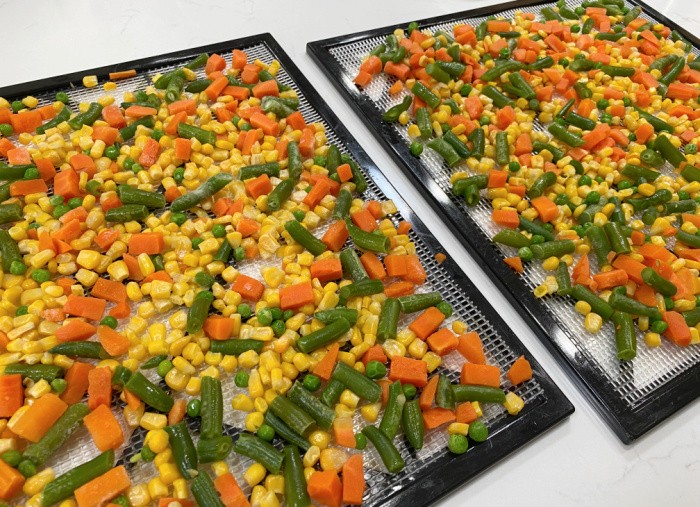
15. Frozen Vegetables
Sometimes, you’ll find that frozen vegetables come cheaper than fresh ones and last much longer, too! Frozen vegetables, such as corn, green beans, broccoli, and cauliflower, work great as a side dish but can also be used to make a delicious vegetable beef soup or a pot pie. Don’t forget you can dehydrate frozen vegetables, no washing, peeling, or chopping. How to Dehydrate Frozen Vegetables
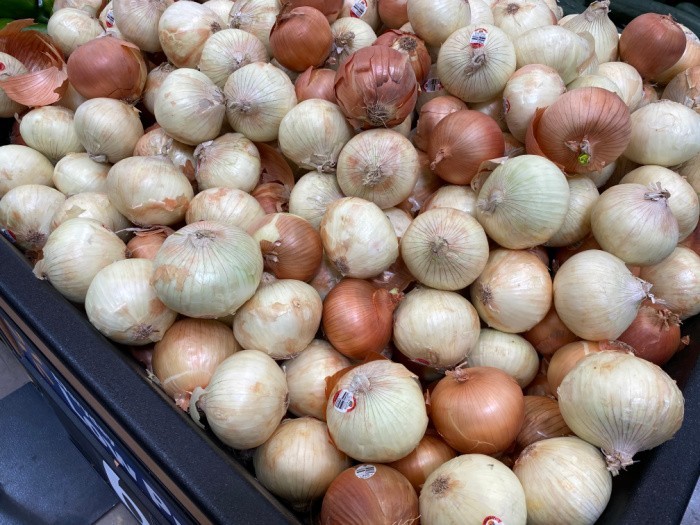
16. Onions
Onions are not only inexpensive, but they can also be used to add plenty of flavor to a wide variety of dishes. They taste great in soups, salads, skillets, or on top of burgers and sandwiches. I typically pick up ten bags of frozen chopped onions if they are on sale. I can use part or all of each bag I open. Onions: Everything You Need To Know
17. Potatoes
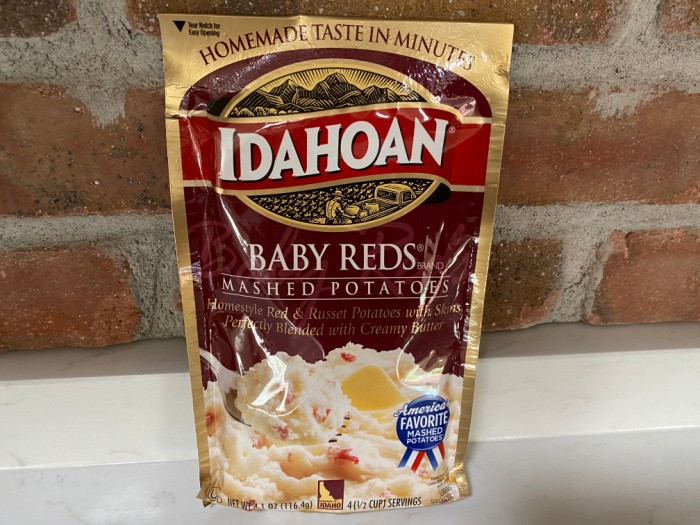
A small bag of potatoes will cost you well under $5.00, but you can get several meals out of it. Potatoes are another versatile item that can be enjoyed as a side dish, in a soup or casserole, and also as well-seasoned breakfast potatoes.
We’ve also been buying a product called Idahoan Mashed Potatoes. They’re made from real potatoes and taste great. They come in a small pouch and can be prepared as quickly as boiling 2 cups of water. They also come in a variety of flavors to keep all your family members smiling at dinner time.
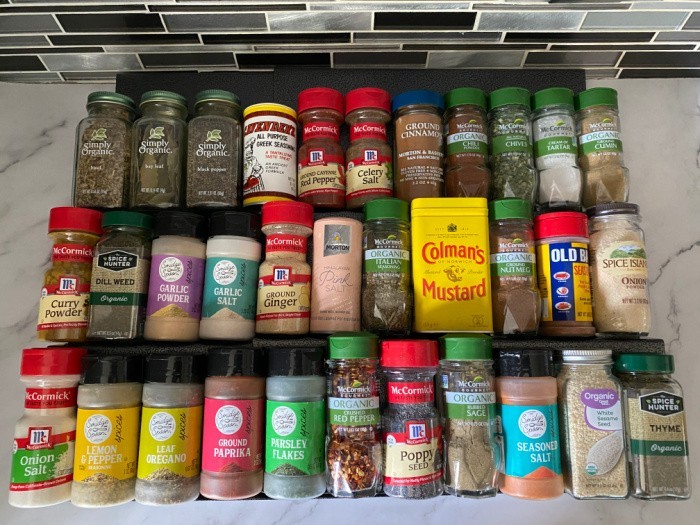
18. Spices and Herbs
You’ll need these to add flavor to all your favorite meals and recipes. They’ll run you a bit more in cost, but if you shop for the right spices and herbs, you can get them for a low price. Ones that you’ll find yourself using most often include chili powder, garlic powder, onion powder, parsley, paprika, basil, oregano, Italian seasoning, red pepper, cumin, nutmeg, and cinnamon.
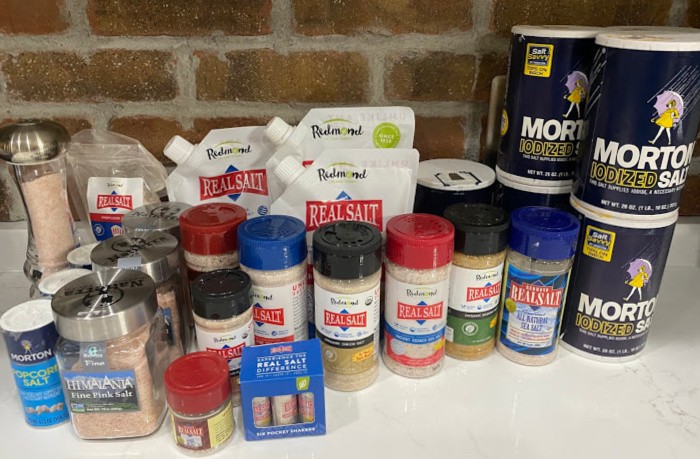
19. Kosher or Sea Salt
Much healthier than table salt, kosher or sea salt will add robust flavor, while you won’t have to worry about those undesired additives. My favorite salt is Redmond Salt
You’ll also want some condiments, including ketchup, mustard, pickles, mayonnaise, and sauces such as sweet and sour sauce and taco sauce.
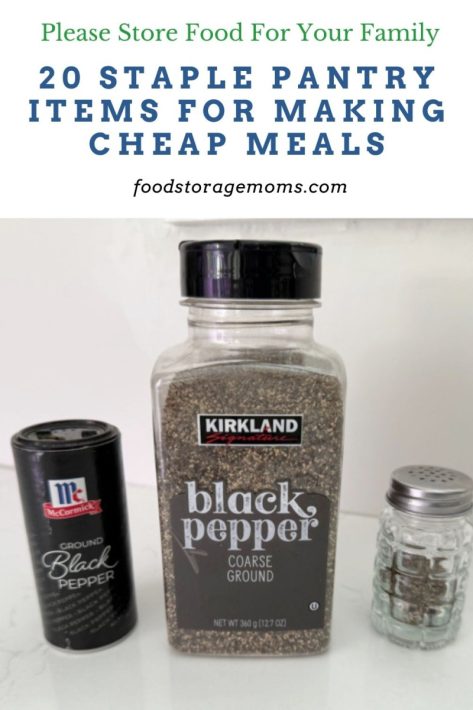
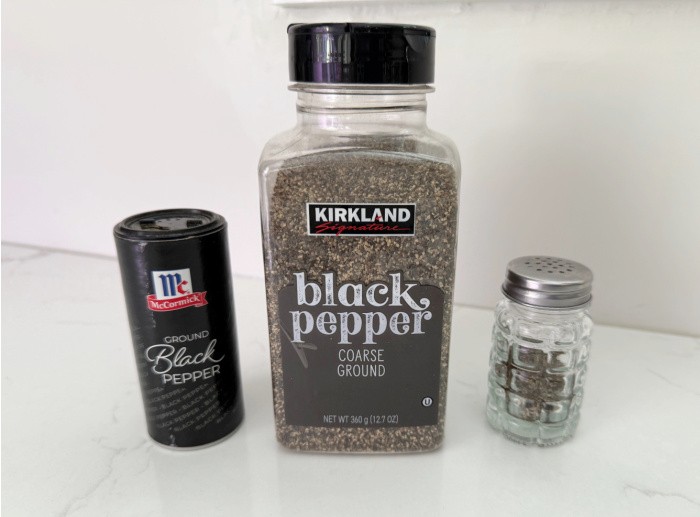
20. Peppercorn
Lastly, don’t forget to get yourself a grinder of peppercorns. Pepper that has already been ground up tends not to retain its flavor or aroma as well as a peppercorn. Additionally, pepper goes well with just about everything. UPDATE: Now I only buy ground black pepper.
Is there a cheap fruit I should consider?
Of all the fruits available, we’ve found bananas to be our best buy. We’ve been buying them for $ 0.49 to $ 0.79 per pound at most local stores. Mark has bananas with his cereal each morning and loves them. If you buy them green at the store, they should last you four or five days or longer, depending on how ripe you like them. We store them in the refrigerator to extend their shelf life.
Final Word
There’s no reason to feel guilty about finding ways of saving your family money while feeding them healthy meals. Making meals that cost very little is a great way to do just that. These 20 staple pantry items are just a few among many others that you’ll want to consider to make cheaper meals. What are other staple foods that your family could not live without that didn’t make my list? Let me know so I can share your ideas with my readers. May God bless this world, Linda.
Copyright Images: Glass Jars With Food Storage AdobeStock_304691216 by New Africa


One of the things I liked best about this article was the links you included to other articles I’d missed. Your information is always spot on and while I may be a seasoned Prepper I always learn something valuable from you. (I’ve always used fresh onions or dehydrated onion and never even considered the frozen variety until now).
One addition to pantry preps should be sprout seeds. I grow alfalfa, broccoli, and clover sprouts year round for use on sandwiches and salads. I actually grow all three at the same time and mix them together (the more clover you add to the mix the spicier it gets). Mung bean sprouts and pea sprouts are great in stir frys. There is almost no limit to the types of seeds that can be sprouted. Sprouts are cheap and easy and a great source of vitamins if TSHTF and you can’t get fresh greens at the store.
Hi Ray, thank you, my friend, for your kind words. Now, please teach me, I bought a sprout deal years ago. I’ve since donated it. What kind do you have and where do you get your seeds. This may take some work to talk Mark into eating those! LOL! Linda
Obvious Ray is much more into sprouting than I am, since I only do it from time to time, but here’s what I bought:
3-pack of sprouting lids from Amazon https://www.amazon.com/Sprout-Ease-Econo-Sprouter-Toppers-Set-Piece/dp/B005P0SM8W/ref=sr_1_12?dchild=1&keywords=sprouting+lids&qid=1603981319&sr=8-12
And I get mung beans in 1 to 5 pound packages depending on pricing. They are super easy to sprout and add a nice crunch to a salad or sandwich without much space, but decent nutrition. Will definitely have to try adding them to our next fried rice batch, thanks for the tip Ray!
Hi DMWalsh, I’m going to check these out. I’m trying to grow lettuce and spinach year-round (covered in the winter). I would love to try sprouting seeds. Thank you for the link. Linda
SPROUTS
Sprouts are the easiest thing to grow, usually only taking 3-7 days. They need no soil and no sunshine—only a jar, some cheesecloth and water. Best of all you can grow them in a closet or under your sink. If you aren’t eating sprouts on your sandwiches and salads, you are seriously missing out on a taste treat that is full of nutrition. I grow them year round. Here are some links.
sproutpeople.org/ You can learn everything you need to know from them.
motherearthnews.com/organic-gardening/growing-sprouts-at-home-zmaz77zbon
https://www.thespruce.com/how-to-grow-sprouts-in-a-jar-2540007
eatwithinyourmeans.com/grow-sprouts-at-home/
https://wellnessmama.com/36686/how-to-grow-sprouts/
I bought my first sprouting kit at a Preppers trade show in Las Vegas many years ago from a Utah firm called Lifesprouts but I can’t find them on the internet anymore. The kit I bought is now available from:
https://drchristophersherbshop.com/collections/life-sprouts
I originally bought four of the sprouter trays and am still using them for sprouting small seeds like alfalfa, broccoli, radish and clover. (The Alfalfa Plus Mix and Pro Vita Mix are both outstanding, but I make my own mixes now).
For larger seeds like peas, chickpeas, lentils or mung beans I just use a quart mason jar, cheesecloth and the ring or band for such jars.
Virtually any vegetable sprouts are safe to eat and most are delicious. The exceptions are tomato and potato sprouts which are said to be poisonous if eaten in quantity.
The most important thing about growing sprouts is to soak the seeds overnight, then rinse them off before putting them in the sprouter tray or jar. Then rinse them twice a day–I do morning and evening. The sprouter trays I have stack on top of one another and I keep them on my kitchen counter. The jars I keep under the kitchen sink. For alfalfa, clover and broccoli sprouts I expose them to a few hours of sunlight after they grow enough to harvest to “green” them up.
Also, here’s a correction to my original post. It’s radish seeds (not clover) that make a mix of alfalfa, clover, and broccoli spicy–so I don’t put many radish sprouts into my personal mix.
Since I grow my own heirloom vegetables, I get most of my sprout seeds from my garden, but I still buy alfalfa and some other sprouting seeds from either local health food stores or from a variety of online suppliers (Burpees, Park Seed, etc) or from:
https://www.amazon.com/Sprout-House-Assorted-Organic-Sprouting/dp/B005LRBGEQ/ref=as_li_ss_tl?ie=UTF8&linkCode=ll1&tag=wellnessmama-20&linkId=217b0de2a500541f8d98437f6bf27332
I hope this helps. And if you hubby likes lettuce, he’ll like most sprouts.
Hi Ray, I will have to get on board doing this! Thanks for all the links! Linda
When we were sailing to the Bahamas’ out islands, I carried 2 quart sized jars that had special tops for growing sprouts. The grids were fine, medium, and coarse….so you could rinse the seeds. A tablespoon made a nice amount of sprouts.
Now, I still have 2 jars going at home. This keeps me in fresh sprouts. I get seeds from trueleafmarket.com/ Amazon has a decent selection, too.
My understanding is that broccoli sprouts are far more nutritious than eating broccoli. Sprouting takes very little water or space. It’s a year round thing.
I live in the sub tropics. Our growing season is about over now until early fall. I use a tower garden that I bought used. It’s pretty neat. Keeps us in produce most of the year. Also, I don’t have to worry about thieves of the human or animal kind. It does need power to run the aquarium pump….so not great in an extended grid down situation. I can put it on the porch of our stilt house.
Hi CAddiison, I need to get back to sprouting, I love it! I have heard really good things about the Garden Towers, that was a ood find, my friend! Yes, it uses power but we have to live today and deal when the power goes down. Great reminder about sprouting. Linda
If you’re eating on a budget, using iodized salt might be a better bet for health than sea salt or kosher salt, since it’s hard to get enough iodine without a lot of fish or dairy products in your diet. The National Institutes of Health has an article about it online: https://ods.od.nih.gov/factsheets/Iodine-Consumer/
And while I have iodized salt in my LTS, I mostly store plain salt or kosher salt, since iodized salt has a 5 year shelf-life. I fill our salt shakers for eating with iodized salt, but keep regular salt in the kitchen for cooking.
Hi DMWalsh, thanks for the tip on Iodized salt. I want to read that article, thank you!!! Linda
I have iodized salt in 5 gallon buckets since 2008. It is still fine as I get it from different buckets when I do refill my container in kitchen. Nothing is added to each bucket.
Like sugar..I store lots of salt.
Hi JayJay, I store more sugar than salt, that might be an indication I love to bake sweet things! Stay safe, Linda
Good to know. I was taking the online warnings on various sites as gospel, but I guess as long as we keep moisture away from it then it will last a lot longer than advertised. Thanks!
I have all of these items. Yay for me? We have frozen onions, bell pepper and seasoning blend. Hubby makes omelets for breakfast some days. I use it in soups, stews and other casseroles. I need to grow some and make my own. In vacuum bags. Love my vacuum sealer! It’s used quite a bit.
Today, I’m planning on making SF mounds for dear husband. He’s diabetic, so everything has to be sugar free. I use Stevia for my sweetener of choice.
Hi Deborah, I have bought that blend as well. It’s so convenient and no waste. Plus, it’s washed and chopped. Love it! What are SF mounds? Linda
Sugar Free. Everything in it is Sugar Free.
Deborah ~
How about a recipe for your SF Mounds??? I love Mounds bars!
Linda, here’s the recipe. Enjoy!
Sugar Free Mounds
1/3 cup coconut oil
1/3 cup coconut milk
1/2 cup Confectioners style Swerve or other erythritol based sweetener
1 cup unsweet finely shredded coconut
8 Oz dark chocolate
Combine coconut oil, coconut milk, and sweetener.
Heat over low heat, constantly mixing until coconut oil is me,Ted.
Add the shredded coconut and mix until well mixed.
Pout into a 9 X 5 inch silicone loaf pan. Press mixture tightly and evenly into the bottom of the pan.
Refrigerate for 3 hours or until mixture is solid.
Turn the pan upside down, gently press the bottom of the pan so the solid mixture pops out.
Cut into bars.
Chop the coconut into small pieces.
Melt 3 Oz of the chocolate in water bath or double boiler. Do t let chocolate get too hot. Heat it gently just until melted, stirring every now and then.
Remove melted chocolate from the heat. Add 1 Oz chopped chocolate to the melted chocolate and mix every once in awhile to get a smooth mixture.
Dip bars in melted chocolate, put on parchment (or waxed paper) and let the chocolate set.
When the chocolate is completely set, melt 3 Oz of chocolate in water bath or double boiler. Heat gently and stir until melted stirring every now and then.
Remove chocolate from heat and add the rest of the chocolate 1oz) to melted chocolate and mix to get smooth mixture.
Dip bars a second time in the melted chocolate, put on parchment of waxed paper and let chocolate set
lowcarbsosimple.com/homemade-sugar-free-mounds-bars-bounty/
Hi Deborah, I need to try this recipe! It sounds like my mom’s mounds bars with sugar, though. Linda
I’m gonna try to make some today. BTW, did you know you can get Sugar Free Hershey’s candies? Hubby bought some from Walmart. Online.
But I’m gonna make some with cocoa powder, coconut oil and some Gulf wax for dipping.
Growing sprouts or microgreens is an easy way to get fresh greens to supplement winter meals. I have used a small company in Colorado (Botanical Interest) to purchase my vegetable seeds and sprouting seeds for years. They have a nice sprout box, which I have 2, that work very well. Web site is: botanicalinterest.com.
God bless you.
Hi Linda, I will check out this website!! Thank you!! Linda
Linda ~
So far, I have everything on the pantry list but sometimes still struggle to make a meal for one!! Forget to take meat out of the freezer, don’t want to drag out the IP!! All excuses I know and I do know I can cook frozen meat in the IP – but I don’t!
I have been sprouting for nearly 50 years now. Stopped for a while because of the scare of some dread disease people were getting from sprouts (salmonella and E. Coli). Started again but now I am into growing microgreens from sprout seeds. I get my seeds from a local garden store in their seed dept! They only sell organic/non-gmo seeds as well. They aren’t as cheap as I could get elsewhere but I like knowing they are organic/non-gmo. My favorite to date is a mix of alfalfa, daikon radish and red clover! So good. The brand is Botanical Interests – they have a website and you can purchase from them directly. Also, cleanliness is next to Godliness when it comes to sprouts – clean water, clean sprouter, clean storage container and in the fridge.
Hi Leanne, I’m so glad you mention salmonella and E.coli I still remember recalls on beans sprouts at grocery stores. I used to love them on sandwiches then I got nervous buying them. I haven’t bought them for years. I really want to start doing this again, thanks for the tip on the company. Cleanliness is truly next to Godliness! Linda
Hey y’all. Sprouts are easy peasy with no need for fancy anything. Get whatever seeds you want. I prefer heirloom and I buy bulk. Place 3 handfuls of seeds in a mason jar, add water, place cheesecloth on and wrap with a rubberband. I put a lid on it daily and swish it around then remove. Sprouts in 7-10 days and yummy. I will try the smorgasbord of seeds next time. Thanks for the info over the years.
Hi Bob, thanks for the tip on the mason jar, you make it sound so easy. That’s my way of doing things! Linda
I am grateful our pantry is in good shape. Sometimes vegetable bullion or broth can be used in place of oil. I did hear that sugar and cocoa are among the food items that will be effected by the disaster in Baltimore.
I have come to realize my husband and I are eating less, so I need to pay more attention to expiration date.
Hi Chris, I thought about you when I saw the bridge fall, yikes! I agree I use chicken or vegetable broth when I sauté vegetables. I’m glad I stocked up on sugar, I will check on my cocoa supply, thanks for the heads up on that. Stay safe, my sweet friend, Linda
You all have gotten me excited about trying sprouts. Our son was recently diagnosed with diabetes so I’m frantically looking for ways to boost his vegetable intake.
HI Kathy, is it Type 1 or Type 2? I’m hearing more and more Type 2 Diabetes. Both are hard on the family and quite an adjustment, I’m sure. I’m glad you caught it so he can get the help he needs. Linda
Love these posts, Linda – always timely in my opinion!!
I have a recipe that I would like to share with you and all our readers.
Mom’s Company Chicken
–The story is: when we processed our meat chickens, mom always kept a few to boil and debone! She then packaged the shredded meat into freezer containers for when company was coming!!
Ingredients:
4 whole chicken breasts, cooked, boned and skinned
–Note, shredded roasted chicken or left over chicken works well, too
OR 2 large cans of chicken (I use the Kirkland brand), drained
1 can cream of celery soup
1 can cream of chicken soup
1 envelope Lipton’s Onion Soup Mix
1 cup sour cream
2 packages stuffing mix (I use Stove Top)
2 cans of French style green beans OR fresh green beans, cut and steamed
Directions:
Preheat oven to 350F. Mix all soups and sour cream together in a bowl. Prepare stuffing according to directions. Shred the chicken or drain the cans of chicken well. Break up any large pieces to make bite sized chicken. In a greased 13 X 9 pan, place 1/2 the chicken. Top with 1/2 the green beans and spread 1/2 the soup mixture over the beans. Repeat layers. Spread the stuffing over the top.
Bake covered for 45 minutes. Uncover and bake an additional 15 minutes.
I don’t think this would freeze well due to the soups and sour cream.
As I mentioned, my mom cooked chicken ahead of time and measured out the amount needed for the recipe. She kept all the shelf stable foods on hand. The only “fresh” item(s) is the sour cream unless you are using fresh green beans. Also, I don’t think you have to use breast meat exclusively! If you find boneless thighs on sale – use that!!
HI Leanne, oh my gosh, I have been thinking about you lately. I try to watch your updates on your new grandson. Thank you for this recipe, I’m going to make this for sure! Leanne’s recipe!! Thank you, Linda
Linda, this is such a helpful post, thank you as always!
We buy Keystone canned ground beef as a backup: have found it tastes just fine in dishes like spaghetti, sloppy joes, tacos etc. So that extends our supply of frozen ground beef.
We have a few shelf stable recipes for canned chicken from Costco, our 2 favorites are chicken enchilada casserole and chicken divan.
I also try to come up with tasty meals using no cheese. Here’s how I make our Simple Tuna Casserole without cheese, we all like it, and it’s mostly shelf stable:
12 oz. noodles, cooked
(Best price I found is $ tree)
2 cans tuna, drained
2 cans cream of mushroom soup
Water
Lemon pepper seasoning
Garlic granules (from Costco)
Sour cream
While the noodles cook, mix together the tuna, cream soups, one soup can water (May want a bit more water), about 1 tsp. or so lemon pepper and 1/2 or so tsp. garlic granules, and about 2/3 cup of sour cream. Drain noodles, stir in tuna mixture, pour into a 9×13 glass pan. Loosely cover with tin foil, bake at 350 for about 30 minutes. Take the foil off for the last 10 minutes.
Also: if I’m almost out of potatoes, I peel, dice, and cook a few, drain/save the potato water, then add hot water or milk to the potato water for 2 cups, put it back in pot and mash (it’s very liquidy of course), then add a packet of Idahoan dry mashed potato mix, stir, let sit 5 minutes, stir in some butter and we have enough mashed potatoes for everyone!!
Hi Janet, thank you for your kind words, my sweet friend. Oh my gosh, this recipe sounds great, thank you for sharing. I love Keystone meats, when we get into our house I am going to stock up with several cans. Great reminder!!!! I have some freeze-dried cheese but it’s so expensive to replace (I’m not using it now, I’m saving it for when we have no other option). I love Idahoan dry instant mashed potatoes, your trick is awesome, thank you! Linda
I love your post!!
We live in the far western part of SD. Everyone is saying the prices are going down for food, not by us. Eggs right now start at $4 a dozen for small up to near $8 for xl. All staples are through the roof. They blame it on transportation cost. Ground beef at $8 a pound.
Gas prices are $3.17 a gallon, it’s nuts here. I order from Sam’s Club and get it delivered.
Everyone is noticing here that the prices are going up, the older people are using the food banks. They are also wanting money to get items for the food banks.
The other day at Walmart, I paid for a older couples groceries as they didn’t have enough money. Just generac items, gr beef, a small bag of potatoes, bananas, cereal and a qt of milk. Over $30. That’s ridiculous!!
Hi Mona, thank you for your kind words. What a blessing that you could help an older couple buy just the basics to get by. $30.00 that’s ridiculous indeed! May God bless you for helping them. I do not know how families are feeding themselves. We are living off our food storage, freeze dried and all canned goods. We have to, our budget does not allow for frills. The prices have been high now for so many years, we just need a break. Linda
Hi Linda,
I now buy my tuna from Natural Catch. ALL the canned tuna I’ve found at grocery stores shows “100% Tuna” on the label, but turn it over and the ingredients say “Tuna, soy.” So, the fish IS tuna, but the rest is soy meal. It doesn’t even look like tuna. Food label guidelines say ingredients are labeled from highest % to low. That means the can can be up to 49% soy. VERY expensive “tuna.” The foil packets are all tuna. I think they keep well enough.
Right now my grocery has lots of good buy1-get1. Even spices. Spices are so expensive, I’ll stock up some. I already have a decent pantry.
The cost of our food from the pantry dollar costs down a lot because I buy food now only to replace what we ate- and I wait until it is on sale. Food we bought a few years ago was lots less expensive. Food in the future will be more. Dollar cost average it down.
This is something people can start doing even now. I did it over a couple of years.
My grocery manager here in Florida says big price increases are coming…some have started. He was warned by HQ. They are not advertising that because they don’t want people to panic. This fall some had to cut out food to pay for school supplies.
Your suggestions are great. Generally, when we eat “cheap,” we eat pretty healthy.
A box of quick cooking Tapioca goes a long way for a nice dessert. I rarely buy anything quick cooking, but that stuff takes forever otherwise. A lot of electricity or gas to make.
I use my slow cooker a lot. It really does a great job converting dried beans to edible.
“Frugal” living is the only way to go for the future. There are lots of free books at the library and plenty online. It was how our ancestors lived. It was normal!
Now, I make a game out of it.
Life is good.
Hi CAddison, I love it when you update me on your grocery store manager. I feel strongly that food prices will escalate even more. We must stock up on the basics, rice, more rice, beans, more beans, pasta, more pasta. We must cook from scratch and learn to stretch our food budget even more. I love slow cooker meals. They are awesome! I’ve got to remember to check the tuna at grocery stores, that’s scary about the soy. Not good. Life is good, my friend! Linda
I now buy coconut oil. I bought some that was not refined. It’s ok in brownies or as a base for body oil, but unless you want to put a pina colada umbrella on whatever you cook, get the refined oil.
Also, I always by the rotisserie chicken with the bones in. We cut the chicken into servings and the scraps for soup or chicken salad.
The bones and meat stuck to the bones go into the slow cooker with water. I don’t put veggies in. Just my preference. I haven’t bought broth in years. It’s “bone broth,” too. I freeze the broth in containers and also in ice cube trays. Pop the cubes out and you have great serving size broth for when you make white sauce or things like that where you only need a small amount. I like a bargain.
Hi CAddison, I love those rotisserie chickens! Great tip on the chicken broth. Linda