
Bread Machine Bread-How To Make It
This post may contain affiliate links. We may earn a commission if you purchase via our links. See the disclosure page for more info.

About 30 years ago, I bought a bread-making machine for each of my daughters when they married or went away to college. They were cheaper than a Bosch Bread Mixer at the time.
The bread maker I’m showing you today is about the same price as a Bosch Bread Mixer. I wanted the girls to be able to make bread and survive on homemade bread and soup with their limited budgets. We all remember those days. Actually, those days are back! LOL!
I wrote a post about making bread and how a bread-making machine can make the process much easier. I can’t remember which post it was, but after reading that post, a reader told me she loved her Zojirushi Bread Maker.
Well, one of my daughters still has her bread machine but has determined it’s on its last leg. I ordered one of the Zojirushi units for us to use, and haven’t looked back.
After reading my reader’s comment, I wish I had written down her name. If you’re reading this and you were the one who commented on the Zojirushi Bread Maker, please remind me who you are so I can get in touch with you. I knew I wanted a bread mixer, but I didn’t know which one to choose.
In case you missed this post, French Bread in One Hour.
Bread Mixer vs. Bread Maker
Let me clarify the difference between a bread mixer and a bread maker.
Bread Mixer
Most of us are familiar with the Bosch bread mixer, which combines and kneads dough for bread. I love mine; I still use it to make the bread dough. We can mold the bread dough once the mixing is complete and the dough has had a chance to rise, then I bake the loaves in the oven.
I can mix and knead eight one-pound loaves in my Bosch. Yes, I freeze a lot of bread for another day.
I wanted to mention that my Bosch has a powerful electric motor. It can mix some fairly large batches of dough. I have to keep an eye on the machine, as it’s been known to shake and shift on the counter while the dough is being mixed.
Yes, it does have suction pads on the unit’s feet, but again, the motor is strong enough to cause the machine to move along the counter. I’m careful to ensure it doesn’t get too close to the edge; I’d hate to see it fall to the floor.
How do I know this? I was teaching a class about making cinnamon rolls, and I asked my “helper” to stand watch over the Bosch. She didn’t realize it could bounce off the counter; it can, not often, but it can. Yes, it cracked the lid. However, the class continued without a lid attached.
Bread Maker
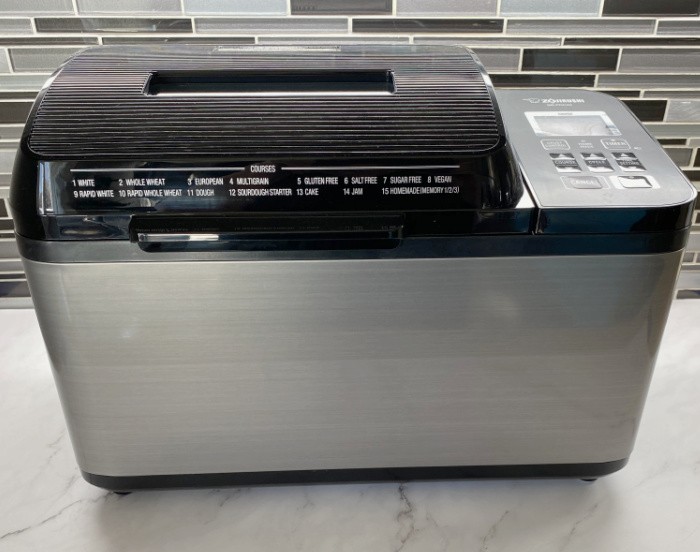
I wanted something to make less bread without having to knead it by hand. This machine produces just two loaves, which is precisely what I needed: small loaves, fewer dinner rolls, and less pizza dough per batch.
A bread maker is a machine, like the one I’m showing you today, that mixes the bread ingredients, kneads the bread dough, lets it rise, and then bakes it. Well, I don’t enjoy the bread baked in a bread maker as much; I like baking my own. More often than not, I’ll let the machine prepare the dough, and then I’ll bake it in the oven.
My daughters and I have always taken the bread dough out after it has been mixed, kneaded, and risen. Then we mold the dough into our greased bread pans and bake it.
Zojirushi Bread Mixer Tips
I’ll be honest, I don’t enjoy going through instruction booklets to figure out how things should work. I don’t like reading them as a means to learn all that goes into a successful result.
BUT, I had to today. I opened the box, washed the measuring cups and spoons, and washed the bread pan. Here’s what I learned:
- The liquid measuring cup is for the liquid ingredients.
- The nested measuring cups are for the dry ingredients.
Items You May Need In The Kitchen:
- Bread Maker
- Cuisinart Bread Maker Machine (reasonably priced)
- Bread Maker
- 2 Bread Pans (I use smaller ones-7.75 x 3.75 x 2.5 Inches)
Bread Machine Bread
Ingredients
- Water
- Bread Flour or White Flour (I only store bread flour)
- Sugar
- Dry Milk (I use Instant)
- Salt
- Butter
- SAF Instant Yeast
Step-By-Step Instructions:
Step One
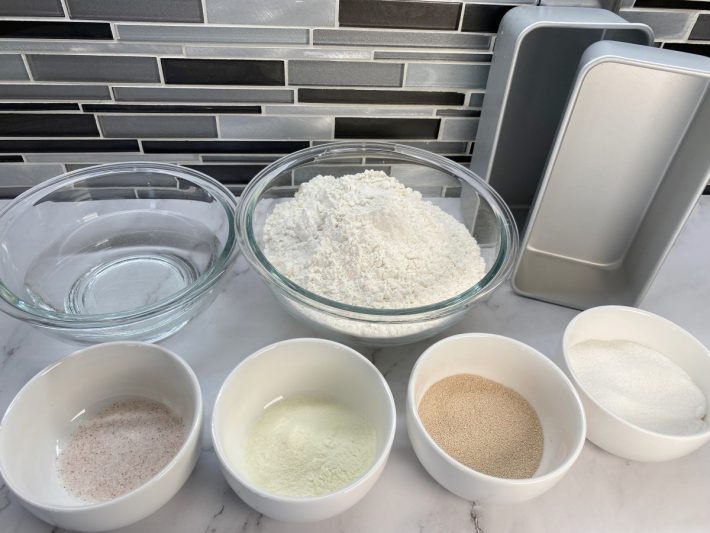
Measure both the dry and wet ingredients before beginning the process.
Step Two
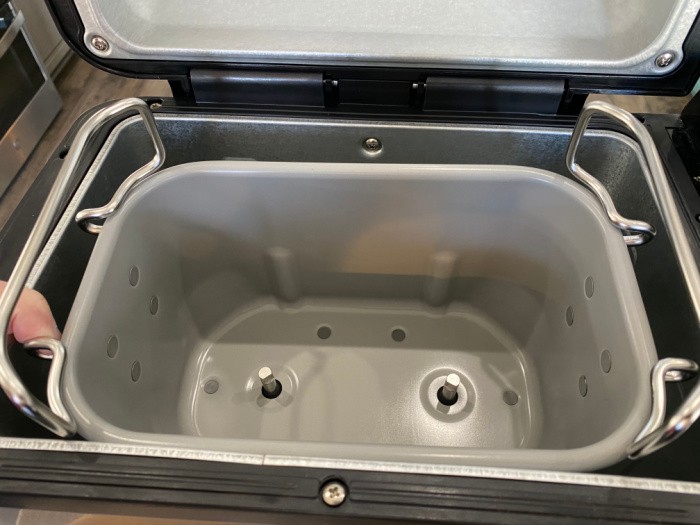
To remove the baking/mixing pan from the machine, hold the Baking Pan Handles and tilt the Pan towards you to unlatch and lift it out. Do NOT pull the bread pan straight up. You can see Mark’s thumb tilting the pan forward.
Step Three
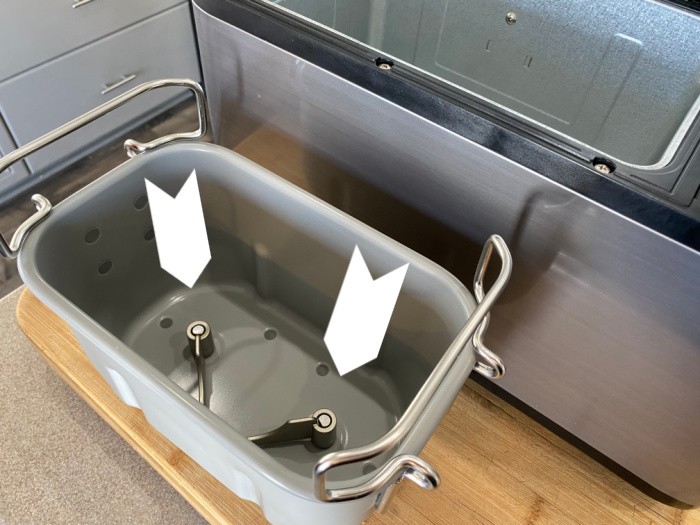
Attach the Kneading Blades to the Rotating Shafts in the Baking Pan (look at page 14) to confirm the blades are positioned correctly.
Step Four
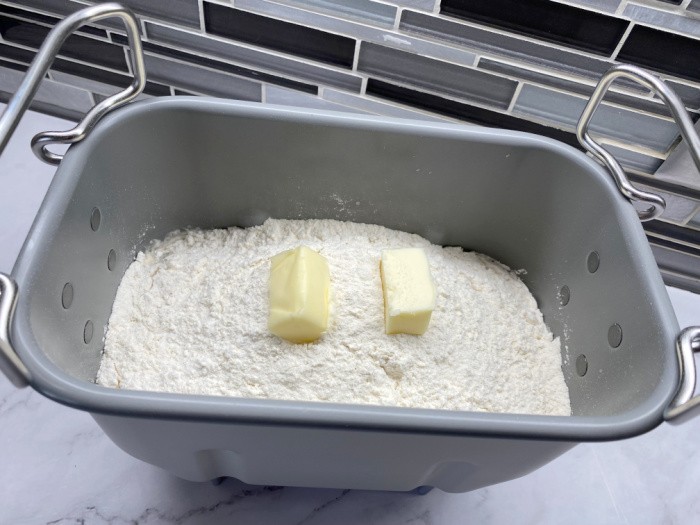
Carefully add the water, then the dry ingredients, to the Baking Pan (the instructions say to make a depression in the flour and add the yeast to the middle of the depression so the yeast doesn’t come into contact with the liquid at the bottom of the pan). I dumped everything in; that’s how I roll.
Step Five
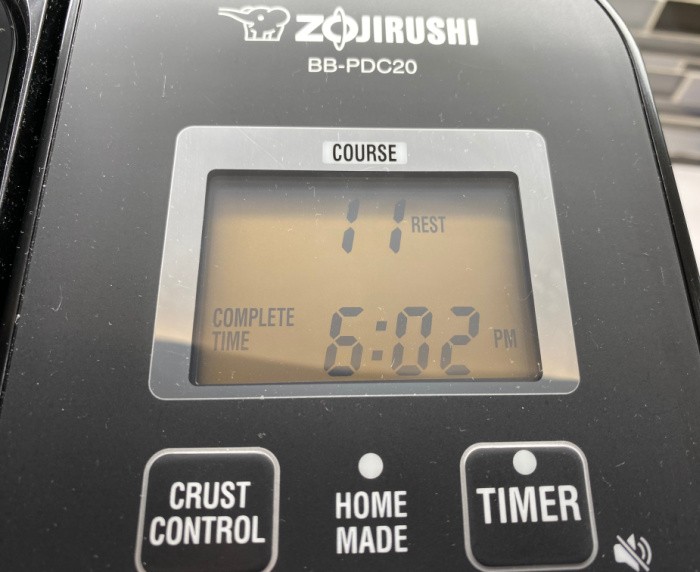
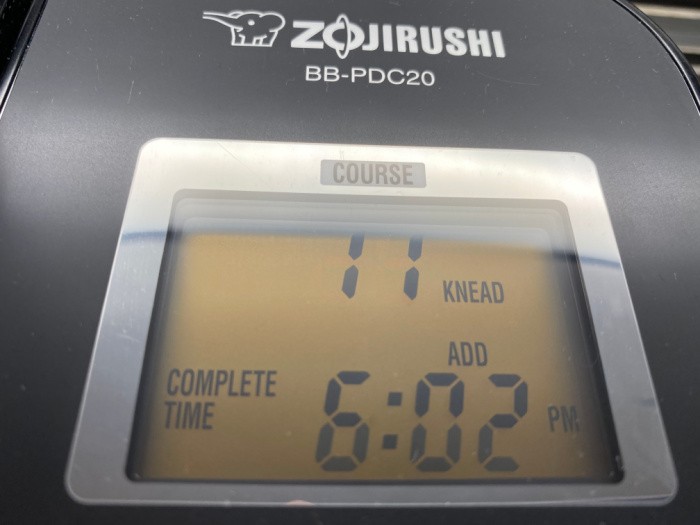
Set the Baking Pan into the Main Body and close the lid. Insert the Power Plug into an electrical outlet. Press the “COURSE” UP button until it reaches Course #11 (for DOUGH ONLY); this is what I did today. Push the Start button.
You’ll also see the word “Rest” next to #11, indicating that it’s in the “rest” phase while the unit warms up the ingredients. This “rest” phase should last about 20-25 minutes. Note the estimated completion time at the bottom of the screen. We started the machine at approximately 4:00 PM, and the unit estimated that the process would end at 6:02 PM.
Step Six
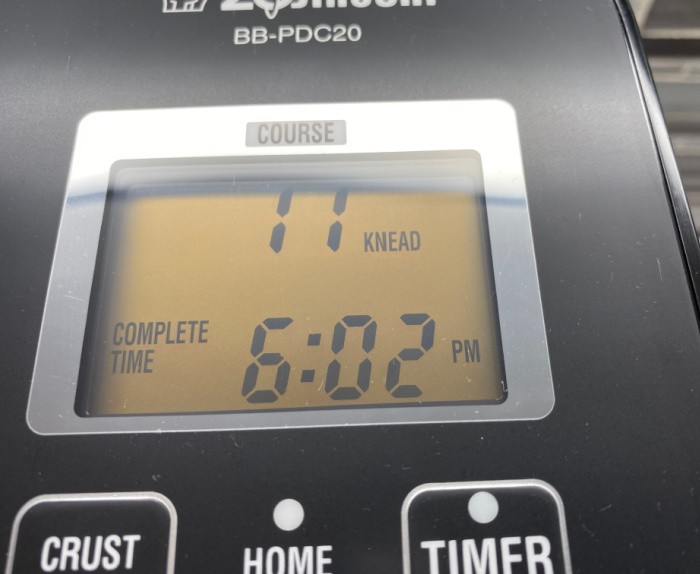
You’ll hear the unit move into the “knead” phase as the kneading blades start spinning to knead the dough. The screen will change from “rest” to “knead” during this period.
Step Seven
After a few minutes, the unit will make a buzzing sound, and you’ll notice the word “add” flashing on the screen. This is the ideal time to add ingredients you want in your dough, such as nuts or raisins.
You can open the lid, add the desired additional ingredients, and close it without changing any settings.
Step Eight
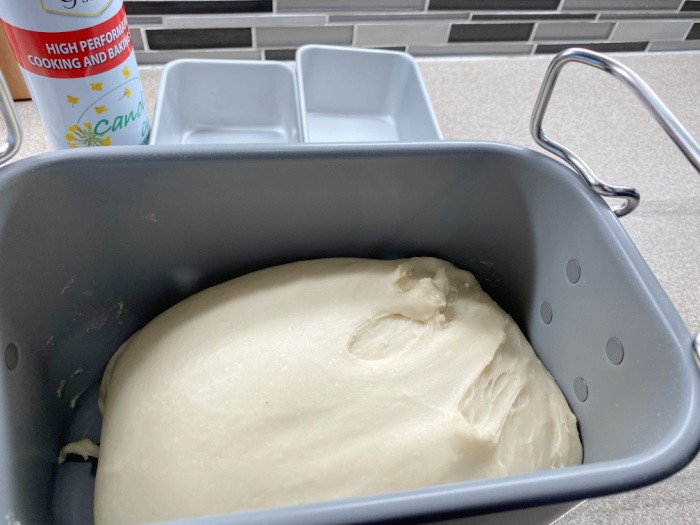
Once the knead phase is complete, you’ll see the word “rise” on the screen next to #11. This is the phase where the yeast kicks in and does its thing. I forgot to take a picture of the screen showing the “rise” phase. I will add it later.
When approximately 30 minutes remain in the dough-making process, the time setting will change from the estimated completion time to 30 minutes, indicating the remaining time. This clock setting will change in 1-minute increments until the dough-making phase is finished.
I turned the machine off (and unplugged it) and pulled the dough out before it reached that phase. I could see through the glass window that the dough was perfect and ready to mold.
After it stopped, I removed the dough from the Dough-Making Bread Pan to the kitchen counter so I could mold it.
Step Nine
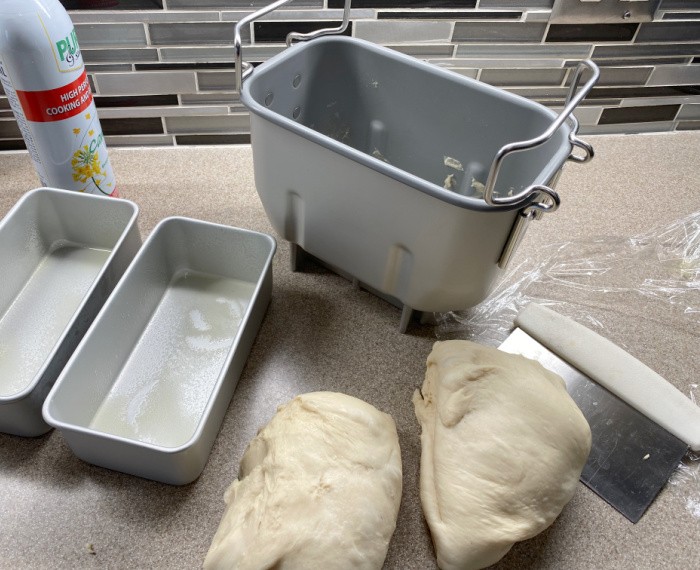
Use a dough scraper to cut the dough into two equal-sized pieces and then mold them into two loaves of bread. (I use bread pans this size: 7.75 x 3.75 x 2.5 Inches.)
Step Ten
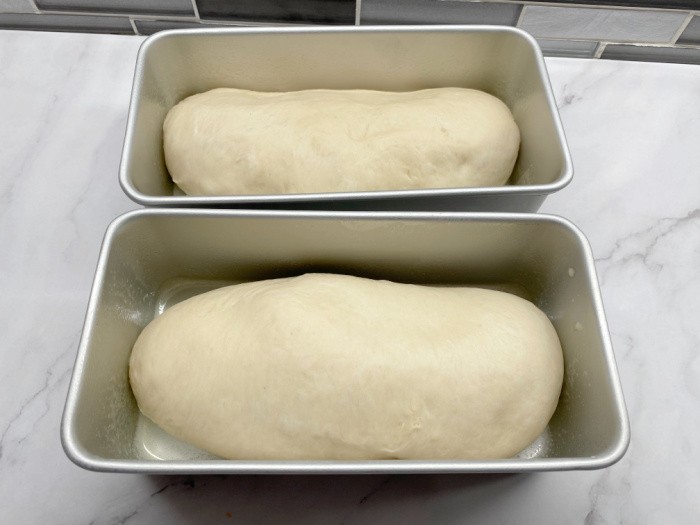
Here are the two molded loaves.
Step Eleven
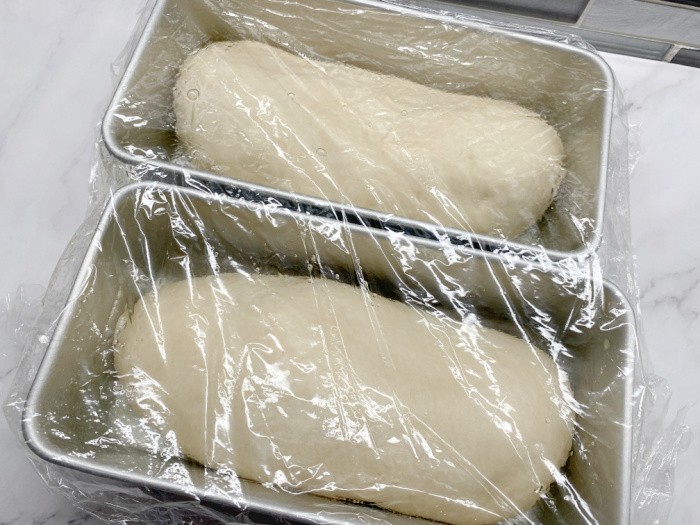
Place the loaves into your greased bread pans, cover with plastic wrap, and let the dough double in size.
Step Twelve
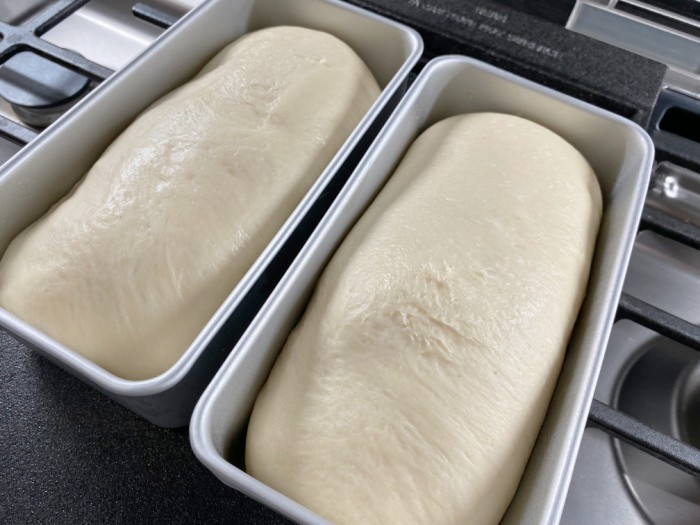
Remove the plastic wrap. Preheat your conventional oven to 350°F (176°C). Bake for 28 minutes, or until the bread is baked through.
Step Thirteen
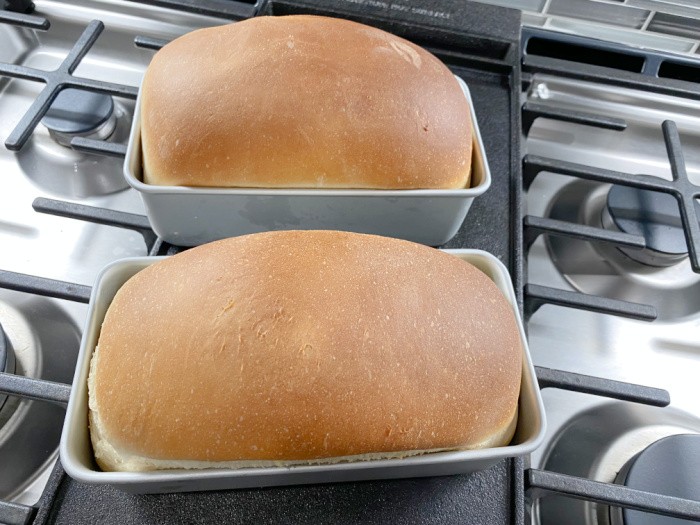
Remove the baked loaves from the oven.
Step Fourteen
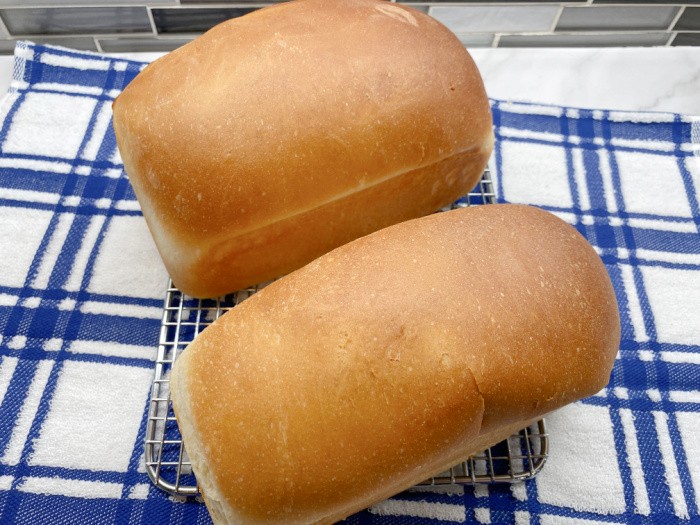
Remove the loaves from the pans and place them on a cooling rack.
Finished Product
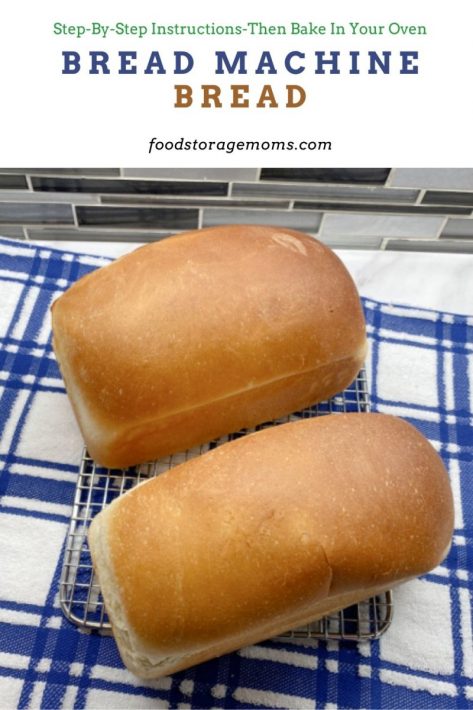
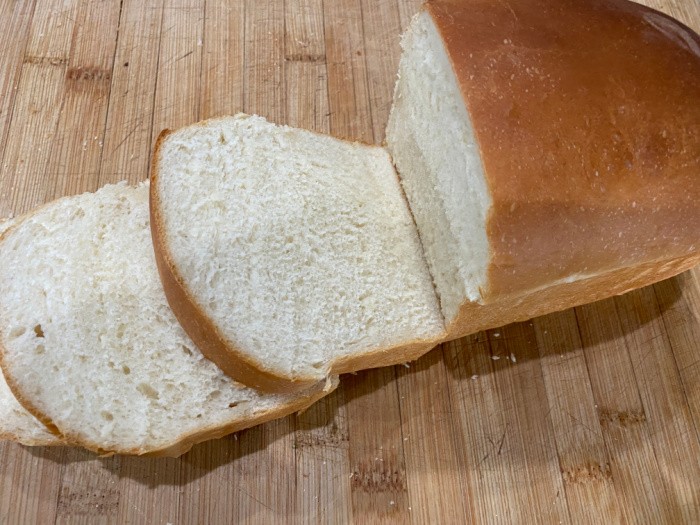
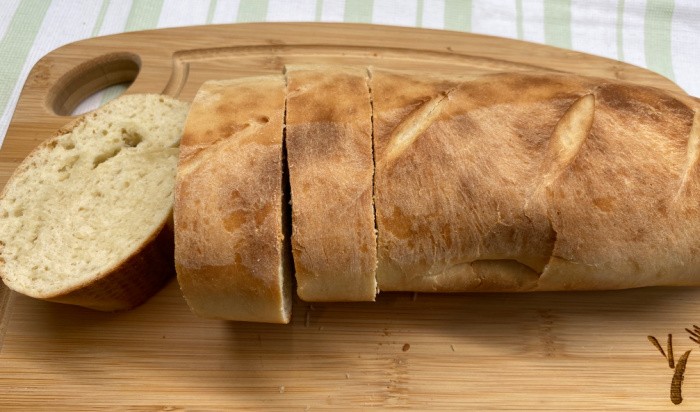
I love this recipe because it’s easy. Once you realize how easy the bread mixer steps are to make bread, you’ll be a pro at making it. Here again, I prefer my dough to be baked in a conventional oven, not in this bread mixer. Here is the bread sliced and ready for butter and jam, which I love.
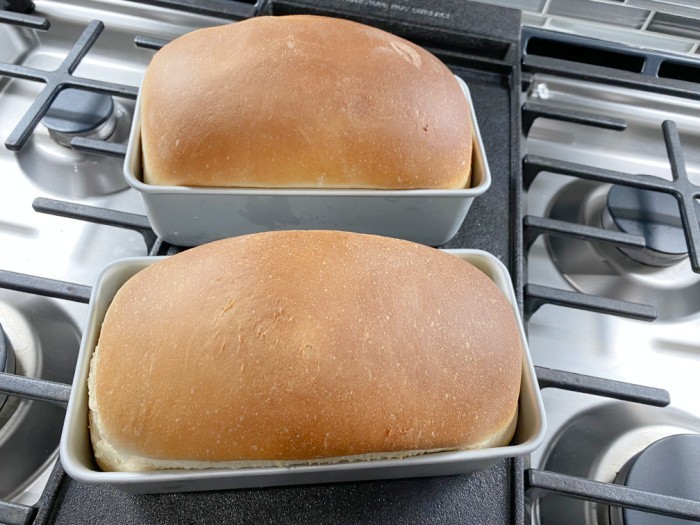
I wanted you to see how perfect the loaves looked coming out of the oven. Often, I’ll take a stick of butter and rub it over the top of the loaves to make the bread crust a little softer. These looked so great, I decided not to do that.
Bread Machine Bread Recipe
- 1-1/2 cups water
- 4 cups bread flour
- 1/4 cup sugar
- 2 tablespoons dry instant milk
- 2 teaspoons salt
- 2 tablespoons butter
- 1 tablespoon Saf Instant yeast
-
Add the ingredients listed to the Baking Pan in the order listed. Press the COURSE button and select Course No. 11 (for DOUGH ONLY), and press the START button. After it stops, remove the dough from the Dough Bread Pan. Use a dough scraper to cut the dough into two equal-sized pieces for the two loaves. I use bread pans this size: 7.75 x 3.75 x 2.5 Inches. Grease your bread pans, place the dough in them, and cover with plastic wrap. Let rise until double the size. Remove the plastic wrap. Preheat your oven to 350°F (176°C). Bake for 28-30 minutes or until baked through.
PLEASE CHECK YOUR BREAD MAKER BRAND'S INSTRUCTIONS.
-
1. Set the Baking Pan into the Main Body and close the lid.
2. Insert the Power Plug into an electrical outlet.
3. Press the "COURSE" UP button until it reaches Course #11 (for DOUGH ONLY), this is what I did today.
4. Push the Start button.
5. You'll also see the word "Rest" next to #11 telling you that it is in the "rest" phase as the unit warms up the ingredients.
6. This "rest" phase should last about 20-25 minutes.
7. You'll hear the unit move into the "knead" phase as the kneading blades start spinning to knead the dough.
8. The screen will change from "rest" to "knead" during this period.
9. After a few minutes, the unit will make a buzzing sound, and you'll notice the word "add" flashing on the screen. This is the appropriate time to add any ingredients you want to your dough, like nuts, raisins, etc. You can open the lid, add the desired additional ingredients, and close it without changing any settings.
10. Once the knead phase is complete, you'll see the word "rise" on the screen next to #11. This is the phase where the yeast kicks in and does its thing.
11. When there are approximately 30 minutes remaining in the dough-making process, you'll see the time setting change from the estimated completion time to 30 minutes, which means there is that much time remaining. This clock setting will change in 1-minute increments until the dough-making phase is finished. When I could see the dough was ready through the glass opening in the lid, I skipped this step. I turned off the machine and unplugged it.
12. After it stops, you remove the dough from the Dough Bread Pan.
13. Use a dough scraper to cut the dough into two equal sizes and then mold them into two loaves of bread. (I use bread pans this size: 7.75 x 3.75 x 2.5 Inches.)
14. Place the loaves into your greased bread pans, cover with plastic wrap. and let double in size.
15. Remove the plastic wrap.
16. Preheat your conventional oven to 350°F 176°C and bake for 28-30 minutes or until baked through.
PLEASE CHECK YOUR BREAD MAKER BRAND'S INSTRUCTIONS.
Final Word
Here’s my take on this excellent bread maker. I love it; I really love it. I’m so glad that a reader mentioned she bought one. I have big plans to teach the world how to make pizza, dinner rolls, French bread, and breadsticks using this incredible machine. I’m sure there’ll be other things I’ll want to make, so stay tuned.
I can use this machine to make bread from start to finish in about 2 hours. I won’t worry about it needing electricity. Mark and I live for today and stock up for tomorrow. This bread can be made with pennies compared to store-bought bread and will pay for itself within a year, depending on how much bread, dinner rolls, or pizza you make at home. Bread is getting so expensive; this is another way to be self-sufficient and save money, too.
I’ve been telling my readers for years that mastering the art of bread making is a must-have skill if you genuinely want to be prepared for the unexpected. You and your family can thrive if you have the ingredients on hand and know how to make bread. If you’ve been reluctant to learn bread making, now is the time to jump in with both feet. Learn how now, and live through most anything!
I can always make bread in a bowl. But until then, I’ll enjoy making bread without hurting my fingers and hands. May God bless this world, Linda






Hi Linda! This sounds so easy to do. But, the machine is a little too expensive for my budget. I do make bread by hand. And Larry buys the frozen loaves and thaws them out. They’re pretty good, but Hand made is so much better.
Hi Deborah, yeah, I choked on the price, I get it. THEN I taught myself how to use it. I LOVE it. But then I make a lot of bread so it will pay for itself very quickly. Thank you for the 5 stars, my sweet friend. Check out thrift stores for one. Linda
I do have a bread machine, but prefer to make my bread by hand. I also have a Kitchen Aid mixer that I could use. Kneading the bread is therapeutic to me. LOL
Hi Deborah, I love hearing kneading the bread is therapeutic to you, I totally agree!! Linda
I was at D.I. and saw a bread machine for about $5, I didn’t need one but that seemed like a great price. I will try this as I usually make Honey French Bread in mine. MY only problems is trying to convince my husband that bread takes longer than 2 minutes to cool before he cuts it! You are right it is so much cheaper and so much better to bake your own bread.
I got a bread slicing tool from Prepared Pantry, it makes nice even slices. For some reason when I hand cut bread the slices are never the same thickness.
Hi Linda, oh my gosh, I just looked up that bread slicing tool from the Prepared Pantry!! I LOVE it! I know about the 2 minutes to wait to slice it, LOL!! There is nothing better than warm bread from the oven! Linda
P.S. $5.00 for a bread machine, squeal! Great buy! Linda
Linda, I had commented about the Zojorushi bread makers in one of your other bread making articles a few years ago. This brand was recommended by a friend who was a retired bakery owner & was the only brand he would use for his home.
Don’t be discouraged by the price… I found both of my Zojorushi bread makers in thrift stores for under $10 apiece. One of mine was still in the box & never been used. Do check any used ones out for missing paddles or damaged pans. Then plug ’em in to make sure the controls, timer & selectors work. The user manuals are available online for downloading & printing.
There is also a book available that compares all brands of breadmakers & lists recipes & user directions specific to each brand. I think that the title is “Electric Bread”.
The Zojorusjhi breadmaker can also be found at antique stores, estate sales & yardsales. Or check online sites like Ebay, FB Marketplace, etc. These online sites can also be a source for replacement parts.
Enjoy the new acquisition! God Bless you & your readers for all the wonderful information shared in the articles & comments!
Hi BDN, Thank you for the recommendation!! It’s so funny, I knew I wanted one after you mentioned it, thanks for reminding me it was you!! I LOVE it! I make so much bread, cinnamon rolls, breadsticks, dinner rolls, it will pay for itself in no time. I love hearing you have seen them at thrift stores. YAY!!! You found two of them for $10.00, oh my gosh! Now we will all run to thrift stores! Great comment, Linda
I had a Zojorushi bread maker when I lived in Japan. It lasted for ten years! I think the only reason it died after ten years was because I made bagel dough in it once a week.
Hi Linda, wow, that’s awesome!! Linda
Linda,
Jane and I have a really old WelBuilt bread machine that makes cylindrical shaped loaves. It belonged to Jane’s late aunt and we’ve never used it. Jane always makes her bread by hand, but arthritis is now making that difficult so I’m going to clean up that old machine and give it a try.
The Zojoriushi looks ideal and my thanks to BDN for the tip on looking for one in a thrift store.
Hi Ray, oh my gosh, you have one!!! I love it!! The BIG difference is baking the dough in the regular oven. I don’t like how it tastes when it bakes in the machine. I vaguely remember it crumbled like crazy! Linda
Linda,
Questions: Do you ever let the machine bake the loaf? I noticed you used the dough function, which apparently made enough for two loaves. Is that the way you normally do it?
Oh, our new cabinets are in and now we’re waiting on the countertops. They are Maple and all shelves and drawers roll out and self-close.
After the countertops and new sink are installed the plank flooring will be put in. My God! There is a light at the end of this tunnel.
Hi Ray, SQUEAL! I love hearing you have cabinets!!! Yay!! I bet they are beautiful!! I can’t wait to hear when you get the countertops and sink! Please send me a picture when you get them!! Here’s the deal, this machine makes a two-pound loaf, I normally make one-pound loaves. Mark and I can’t eat that much bread before it goes bad. Plus, when I baked it in the OLD bread machines we had, it crumbled a lot. It tastes so much better when we bake it in the oven. Linda
Linda,
I may try letting the machine bake a loaf just to see how it comes out but if it can take the mixing/kneading work out of bread making I’ll be very happy. Jane and I can do like you do and pull out the dough and bake it in the oven.
Meanwhile, I’ll keep my eye out for a thrift store Zojirushi BB-CDP20.
I’ll send you some pics when the kitchen is done.
Hi Ray, I can’t wait to see the pictures!! Fingers crossed you find a Zojirushi BB-CDP20!!!! Linda
Great post! I have had my Zojirushi since 2003, so an older model than you have, but it works just the same. It’s a great bread machine and was wonderful when I was working to put dinner in the crockpot and bread in the Zojirushi. When we all got home, dinner was ready and the house smelled amazing!
Hi Robin, thank you for the 5 stars! I love hearing you have used yours for years! It’s a great brand, I believe! I’m so excited about this purchase and how I will use it!! Thank you for sharing!! Linda
I have never been able to make bread the regular way but I love the bread I make in my bread machine I just love. I will look at the store for a bigger machine than I have that will make more than the one loaf that my machine makes.
Hi Jackie, thank you for the 5 stars, my friend! I am so excited to use this machine again and again. It’s so easy and makes the best bread!Linda
I have one of these machines and I love it. I like how it makes regular loaf shapes instead of cubes. Yes it was expensive but I had a cheaper one and didn’t like it. The Zojirushi one was easier to use and more reliable. I didn’t like the holes in the bottom from the paddles. All that being said, since you taught me how to make bread the old fashioned way, I haven’t looked back… I’ve not used my machine again. No complaints from the hubs either.
Hi Robbie, thank you for the 5 stars, my sweet friend! It doesn’t matter how we make homemade bread. It’s knowing how to make it and knowing we will survive because we have that skill. I love hearing you have the same brand!! I love it! Linda
Thanks to a dear friend, I was finally able to make this bread and it has been the best discovery ever! I’m so thankful that I can make bread for my family now. So happy!
Hi Jess, thank you for the 5 stars, my sweet friend! It’s a skill we all need! Making bread fills the belly and the soul! Love this! Linda
I love my Zojirushi, we haven’t bought a loaf of bread since buying it 2 years ago! But I have to say, I don’t understand the just using it for the dough cycle. That’s so much extra work. We have 4 different recipes we use, all designed for bread machines, maybe a smidge drier bread, but not a deal breaker. It’s so much easier to put it all in and it bakes a loaf. The key is to use recipes designed for bread machines.
HI Rebecca, oh yes, people bake their bread in them. I just don’t care for dry outside crust. I say do whatever works for you. I make the ingredient bags ahead of time and place them in the freezer. When I want to make bread I dump the dry ingredients from my silicone freezer bags in the Zojirushi add 1-1/2 cups water and turn it on and walk away. When I want to make my two loaves after it’s risen in the machine, I let it rise again in my pans and bake it. We can’t eat a two pound loaf fast enough. I’m so glad you love using yours! Linda
Hi,
I’m the least domestic female I know. That being said, I’m really practical and frugal. Mother, who’d been a US Marine in WWII, gave me a cookbook and a sewing machine for college graduation. “What am I to do with these?” She replied that she had just spent a lot of money on my education and hoped I could think and read because that’s all it takes to do “those things.” She was right. Scratch cooking from a pantry is IT. It’s just “chemistry.”
I was gifted a bread machine 30 years ago from dear friends who didn’t want theirs anymore. I’m on my 3rd one now. They don’t build them like they used to. I don’t have a lot of room, so the most recent ones are Compact Cuisinart. Really good. I bought a spare a couple of years ago. I just looked them up and they have gone up so much in price that I would get one more like yours for just a bit more. – 2 loaves is too much for us, though. there are some “compact” ones on Amazon that are probably good and not expensive.
Bread machines are cost effective. Even with the bit of cost for buying and running one, the wonderful bread they produce is a financial bargain. No waste. No running to the store for chemical filled “bread.”
I just looked up your French Bread in an hour and I’ll do that one soon. No bread machine. I’ve never used the dough hook on my Kitchen Aid Stand mixer…time to try it out.
Your website is fun and makes me think. You make a difference, but I’ve told you that before.
We have some tough times coming. Learn these skills.
Hi CAddison, thank you for the 5 stars, my sweet friend. I remember you said your mother gave you a sewing machine and a cookbook for college graduation! I gave a sewing machine to one of my granddaughters and she is sewing like crazy. She posted her bags on Instagram and a store in Florida is now buying them from her to sell in their store! My granddaughter lives in Idaho and is going to college right now. Your mom was smart to give you those two precious items! I love it! There is nothing better than homemade bread. It saves us so much money and fills the belly. Life is good! Thanks again for your kind words, yes, hard times are coming and you and I will be ready. Stay safe, Linda
I have a bread machine that makes the single, block-shaped loaf with the paddle indentation in the bottom as mentioned in some of the other comments. I use it from time to time, but I live alone and can’t finish the loaf before it dries out. One thing I’ve been concerned about, and no one has mentioned here, is the use of PFAS in the bread machine buckets to keep the baked loaf from sticking. These chemicals (same as in nonstick pans) have been proven to cause all kinds of cancer & other health issues, and it is very difficult to find a bread machine that doesn’t have them! I recommend everyone do your research and be aware of this when thrifting for bread machines. This method of mixing but not baking in the machine probably reduces the risk of PFAS, as these are more activated by heat, but it’s still not zero hazard.
Hi Nomi, thank you for the reminder. You can cut the recipe in half, my daughter does that. One small loaf. I understand the possible risk, but then it makes you wonder what foods we purchase and what they are baked or cooked in. I try to buy as many stainless steel inserts that I can. But it’s impossible in some cases. I am on oxygen 24/7 never smoked or vaped (2 years on oxygen now). I worry about the air I am breathing wherever I go. I love your reminder, we have to be careful where we can. We can only do what we can. Linda
Linda, I just love all the fabulous information you provide on your blog. I am just starting to learn about bread baking even though I am in my sixties. I learn so much from you. Many thanks!
Hi Linda, thank you for 5 stars and your kind words, my sweet friend. If you have trouble at all, remember fresh ingredients, keep the yeast in the frig or freezer. It does not freeze, but it preserves it. Wheat gluten and Dough Enhancer same thing. I keep my flour for one year. After that it does not rise the way I like it. It will also smell stale and may not be safe to use. 18 months is pushing it. Have fun, there is nothing better than homemade bread! Linda
We do have a bread machine, but it will only hold 4 cups total of all ingredients. I use the recipe in my book that came with the machine.
Hi Deborah, that’s a perfect size! Great! I love knowing there are smaller machines. Great for someone single or a couple. Linda
As you know I’m a big fan of bread machines. I’m on my 3rd one in 30+ years. Start to finish about 3 1/2 hours and it takes about 5 minutes to toss the ingredients in…there’s a certain order. Yeast goes in last and on top.
I use the timer regularly. Have fresh bread in the morning….or whenever. I’ve set it for up to 12 hours and the bread is great.
The best part is cutting off the top when it’s hot! Slather on butter.
I make my own dough enhancer since YOU mentioned it. I found out how great it is. I’m now using 1/2 cup less flour per loaf. Big saving.
My machines pay for themselves quickly. It’s less than $2/loaf including the bit of electricity.
I just bought a mill for my Kitchen aid mixer and ordered wheat berries from LDS. The best price I could find with $3 shipping for 12 #10 cans. That’s the best way for me. Storage temperature here is a problem unless it’s in the house. Cans are the answer.
The price is slightly more than I pay for flour NOW. With certain inflation around the corner, this will be a great investment.
For people like me/us, the bread lives in the refrigerator. We toast it for great sandwiches or whatever. No waste that way.
I use a compact Cuisinart machine. There are also compact machines for less that probably are fine. The link you have in your article is the one I have. I highly recommend it. Again, for people watching their pennies (who isn’t?) this little machine will really help out. It will also make other doughs.
HI CAddison, thank you for the 5 stars, my sweet friend. The Cuisinart is a good brand and the price is reasonable. I’m so glad you found the wheat. Wheat is heavy and expensive to ship, $3.00 is a bargain. Yay! There is nothing better than hot bread slathered with butter or even plain! LOL! Linda
approximately 66 pounds of wheat berries shipped across the country for $3 is beyond a bargain. AND, their prices are the best I could find. Thank you. I feel like I’m getting a gift!
I will teach myself how to mill the stuff with 1 can and then put the rest into long term storage. My kitchen aid attachment arrived yesterday. Sadly, I think “it” is just around the corner. Shortages and/or high prices.
Since it is in cans, it shouldn’t be as fussy to store? Your thoughts on that, please?
Hi CAddison, I’m so glad you got it, yay! I have my wheat in six gallon buckets (I change out the lids to RED Gamma Lids). I live where it is dry, so I do not put anything in my buckets. Never have, never will. I also have 48 #10 cans of hard white wheat. My six gallon buckets hold between 42-45 pounds. I only have seven (45 pound) buckets right now. I always have ten. I will check with Costco to see if they have wheat. There will be a shortage of wheat for sure. No doubt about it. I’m so glad you are stocking wheat. Good job. Keep the wheat in the #10 cans they are ready for your pantry shelves. If you grind the wheat freeze it in heavy freezer bags until you use it. I grind three months worth at a time. Just FYI. Linda
CAddison, LOL! Someone reading that comment may think I am a hoarder. Oh well! LOL! Linda