
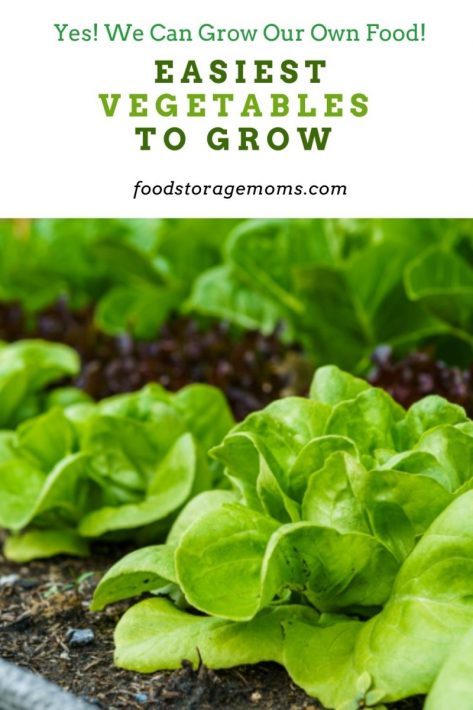
Easiest Vegetables To Grow
This post may contain affiliate links. We may earn a commission if you purchase via our links. See the disclosure page for more info.

If you’ve always wanted to have a garden, here are the easiest vegetables to grow for beginners. Yes, you can do it, I promise. There is something about growing your own food. You cultivate the soil, plant the seeds or seedlings, and then wait for those seeds to sprout or seedlings to mature. I wanted to update this post as a reminder to start putting your garden plans together since the warm weather is just around the corner.
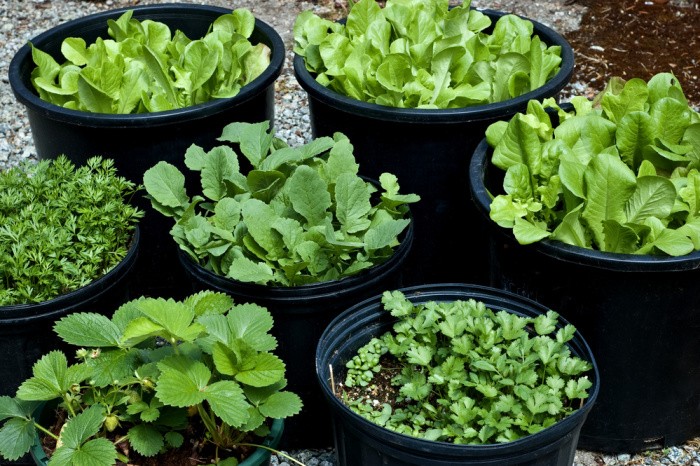
You can grow plants in pots, in raised garden beds, and in the ground. If you have a balcony, a small yard, a medium-sized yard, or several acres of land, you can grow some, or a large majority, of your own food.
Obviously, the bigger the yard, you’ll probably need a tiller. Mark and I used to have a tiller, those days are gone. We don’t have nearly as much land now. We’ve raised garden beds and they suit us fine. I really can’t wait to get up in the morning to go outside and check on my “food supply” during the growing season.
We’ve talked about this before, with all the food that is being recalled for E-coli, Salmonella, listeria, or whatever, we need to grow at least a few vegetables for ourselves. Hopefully, the weather has calmed for some of you who have been slammed with horrific storms and very cold temps. I’m hoping your soil has dried out enough so you can start your garden now, or very soon. If you missed my post on What To Plant In April, please check it out.
As you know, we’ve all been beginner gardeners at some point. Well, we have to start somewhere, right? I remember when Mark and I were first married and someone gave us a flat of 24 small tomato plants. We were so excited to be gifted those tomatoes. Mark was in school and we had one little girl. What a blessing those were to us.
In our backyard, we had a small section that was probably about 4 feet by 6 feet. You would never guess this, we planted ALL those tomato plants in that tiny area. The soil conditions were perfect. We had tomatoes galore. I still laugh about our first garden in Salt Lake City, Utah. Life is so good.
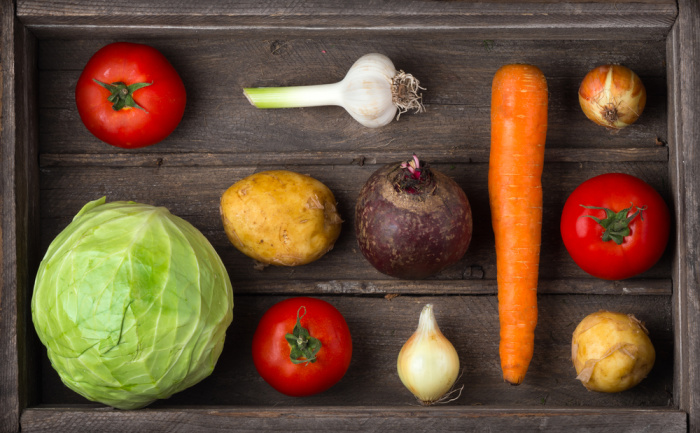
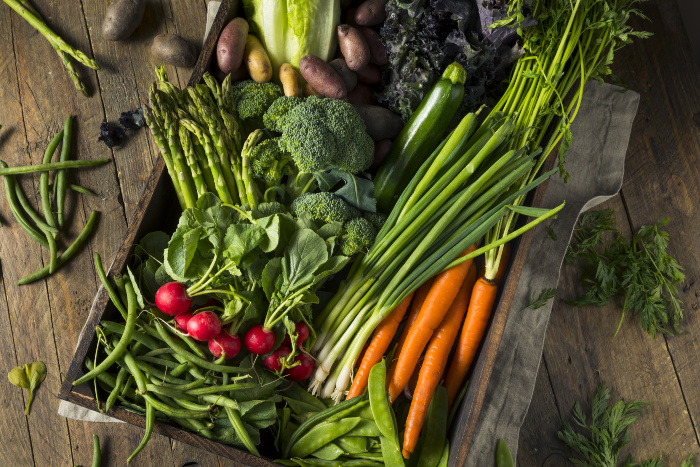
Today, I’ve put together a list of the easiest vegetables to grow. You can pick and choose the ones you like to eat. Don’t be afraid to try some new ones; you may end up loving them, too.
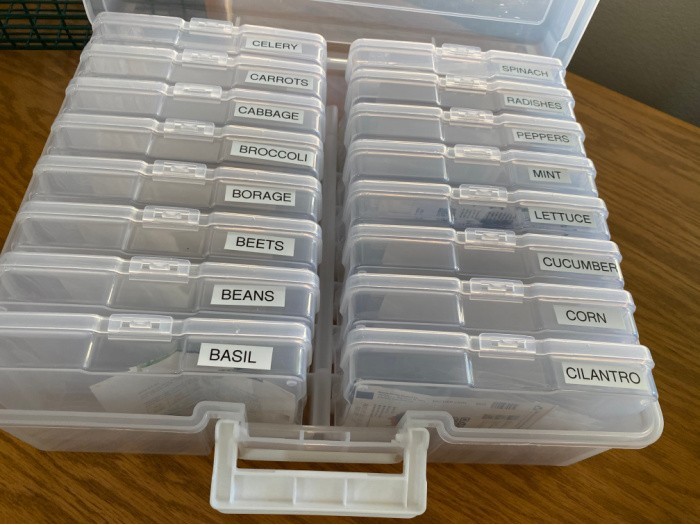
How I Store My Garden Seeds
Plastic Photo Container and Label Maker
Easiest Vegetables To Grow
Amend The Soil If Needed
Before we get started with the vegetables you can plant, let’s be sure your soil is ready. Here are my tips for soil, I do this every Spring and Fall.
The first thing we need to do is pull any weeds that have come up since the last time you turned over the soil. Dig out any leftover crops that you may have missed the last time you harvested. Turn the soil several times and add the following amendments, if you need them.
Earthworm Castings Organic Fertilizer
Soil pH Levels
What Does The Term pH Level Mean?
Are you wondering what the term pH level means when gardening? Each plant prefers a different level of acidity to grow the very best harvest. The level of acidity desired varies between each plant variety. Therefore, you can adjust the pH of your soil by adding lime or sulfur to bring it up or down, depending on what your soil needs. You can have your soil tested, possibly by your state extension service, or try and do it yourself with a soil tester. pH Tester
How To Hand Pollinate
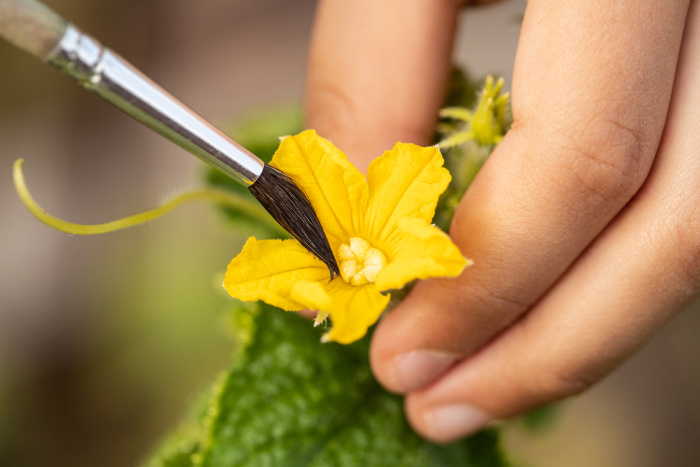
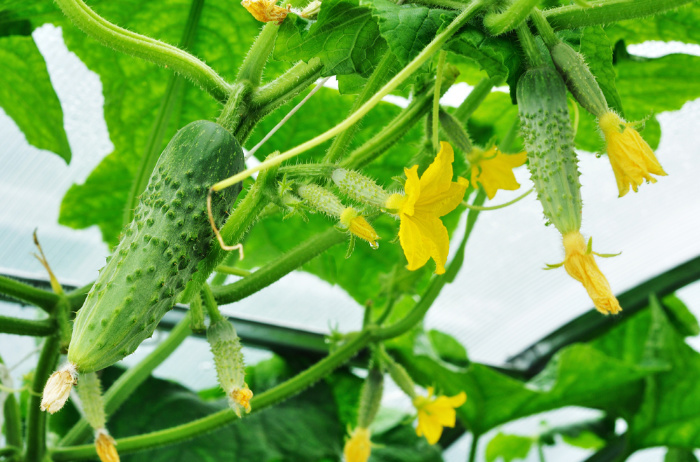
All you need is a paintbrush if you need to hand pollinate because you’re not seeing any fruit develop. Here is something you may want to try. You do this by removing the male blossom (male blossoms don’t have fruit behind them). They produce pollen, leaving the center covered in the pollen to collect with the brush. Use a “brush” to apply the pollen you collected to the center of the female flower. This works every time for squash, melons, and cucumbers.
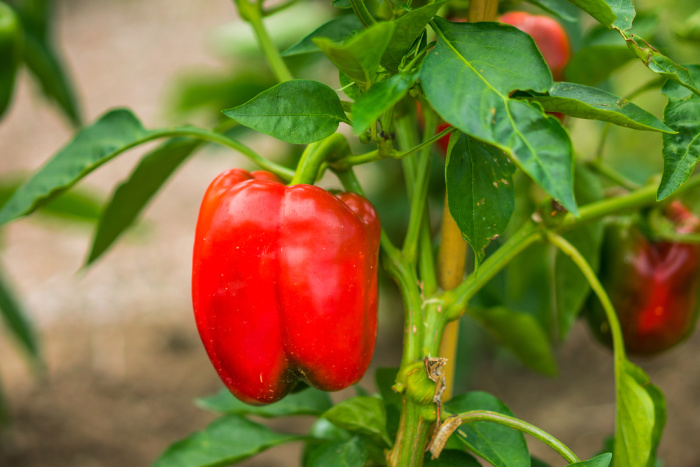
1. Bell Peppers
Start your sweet peppers inside where they’re protected about 8-10 weeks before the last spring frost date in your neighborhood. I typically put three to four seeds in each seedling container and thin them down to two plants once they’re about 4 inches tall. As mentioned, we use Miracle Grow Organic Potting soil, it works great when planting my seeds. I plant them 1/4 inch deep, cover them with soil, and water them. Depending on soil and air temperatures, you can also sow them directly outside.
Once the soil temperature stays above 65 degrees you are good to transplant. Be sure and “harden off” the seedlings about ten days before the transplant date. For those of you who may not be familiar with the term “harden off,” it’s the process of helping transition your plants that have been protected and coddled indoors early on so they’re ready to go to the more hostile outside world.
The good folks at Burpee have some great insight about this process as follows: “To harden off your seedlings, gradually introduce them to the outdoors. It helps to store your seedlings in trays, at this point, to make transporting the plants easier.
Take your seedlings to a protected location outside for one hour on the first day. Do this each day for a week, adding one hour each day. By the end of the week, you’ll be at 7 hours, and the plants will be ready to be transplanted.” Great advice!
Fertilize the soil before planting the seedlings. Plant the seedlings about 18 inches apart. Sweet peppers require water and don’t like the soil to dry out too much from the heat. They should be watered consistently, as needed.
Canary Bell matures in approx. 100 days
Coral Bell matures in approx. 88 days
Big Red matures in approx. 75 days
California Wonder matures in approx. 75 days
pH level for Peppers: 5.5 – 7.0
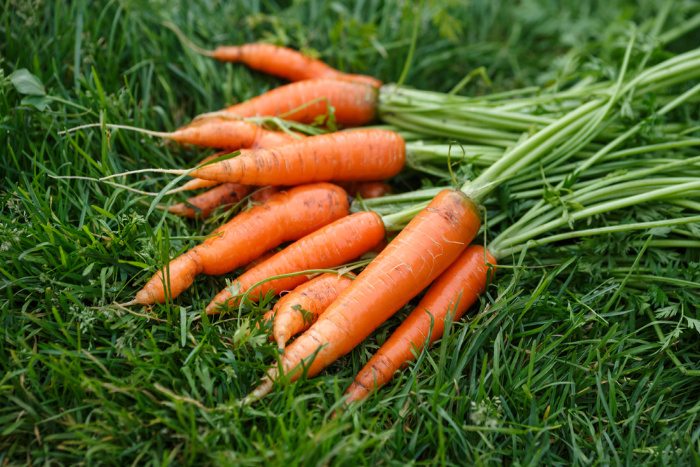
2. Carrots
Carrots like really smooth, loamy soil with nutrients added as shown above. I like to moisten the soil slightly, sprinkle the seeds over the soil, and cover them with compost. Keep the rows about 3 inches apart, and stagger planting the seeds over two to three weeks to have an abundant harvest for the season.
If you live where the heat is intense, be careful as carrots don’t like to dry out. If you water them by hand for two to three weeks after planting the seeds you will soon see the little sprouts. This is when you’ll fertilize with some Miracle-Gro Fertilizer and thin the carrots as needed. Use mulch to cover them, if you live where the summers are extremely hot.
pH level for Carrots: 5.5 – 7.0
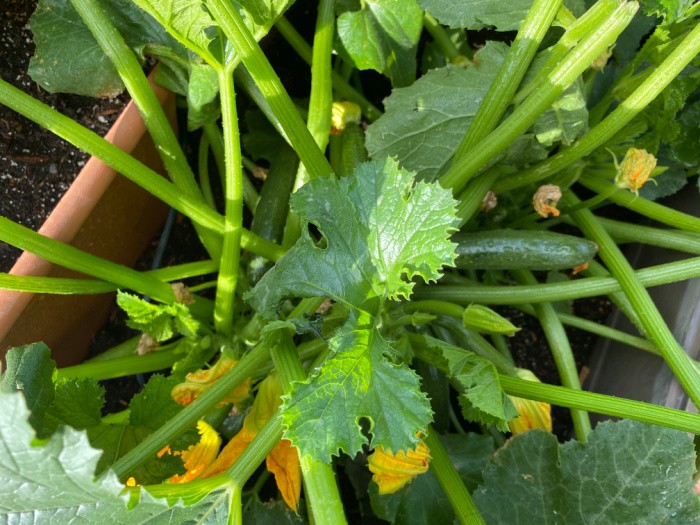
3. Cucumbers
Cucumbers thrive when the weather is hot and they receive a lot of water. Plant them in full sun. If you planted seeds inside, make sure you don’t set your seedlings outside until the weather is in the 70-degree range. Check the last frost date for your area and wait two weeks before planting the seedlings or seeds outside.
Decide if you want to grow bush cucumbers or cucumbers on the vine. I have always had better luck with bush cucumbers. Bush cucumbers work great in pots or small garden spaces, which is why they do better in my raised gardens. I suggest you stagger when planting the seeds because you’ll have cucumbers bearing at different times instead of all at the same time, resulting in a huge picking.
Cucumbers like compost and composted well-rotted manure. They need well-fertilized soil. Cucumbers grow fast and don’t depend on a lot of care or work to get them to thrive. When watering, try and keep the leaves dry, to keep leaf diseases forming. Male blooms show up first and drop off. No worries, within a week or two, a female flower will appear. If not, you may have to do hand pollination, as shown above. Again, you do this by removing the male blossom, leaving the center covered in the pollen. Use a “brush” to apply the pollen you collected to the center of the female flower.
Use metal cages for vine varieties. The cucumbers will hang better on those because they’ll attach more quickly to the cage wires when growing. Plant two to three seeds about one inch into the soil, and cover the seeds with soil. If the soil is moist and warm you’ll see sprouts within a few days. Plant the seeds or plants 36-60 inches apart. Bush cucumbers can be planted closer. Cucumbers grow from start to finish in 50-70 days.
pH level for Cucumbers: 6.5 to 7.0
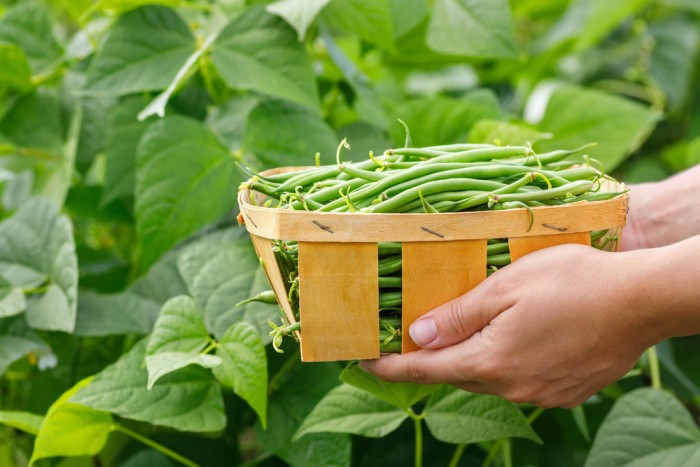
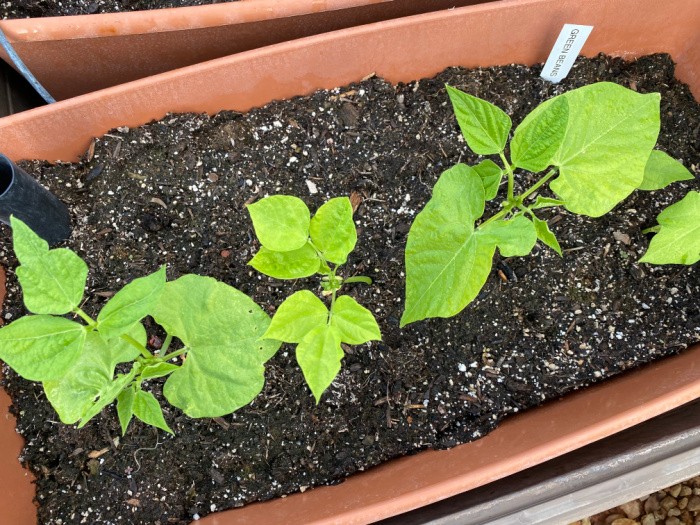
4. Green Beans
This is one of my favorite vegetables to grow. When our girls were growing up, we grew a lot of green beans. We canned bushels of them in our pressure cooker. They taste so good when they’re freshly picked. I only grew bush beans, but you can plant pole beans if you have a way to support them up off the ground. Bush beans grow about 2 feet tall and the pole varieties grow up to 10 feet tall. Bush beans are ready to pick about 50-55 days after planting. Pole beans take a bit longer, so plan on 55-65 days to harvest them.
Please remember, if you can stagger the plantings every 2 weeks you can harvest green beans for weeks rather than all at once in one week.
Green beans need a good composted rich soil with rotted manure. You plant the seeds 1-2 inches deep and cover them with soil. Space the seeds in rows about 6-8 inches apart. Water immediately and keep regularly watering them until they begin to sprout. After they begin sprouting they need 1 to 1.5 inches of water each week. They need full sun, so plan accordingly. They grow best when the air temperatures are between 65 to 85 degrees.
When the green beans are the size of a pencil, they’re ready. The skins can toughen up very quickly, so check on them often. You pick them by snapping them off at the vine.
pH level for Green Beans: 6.0 to 6.2
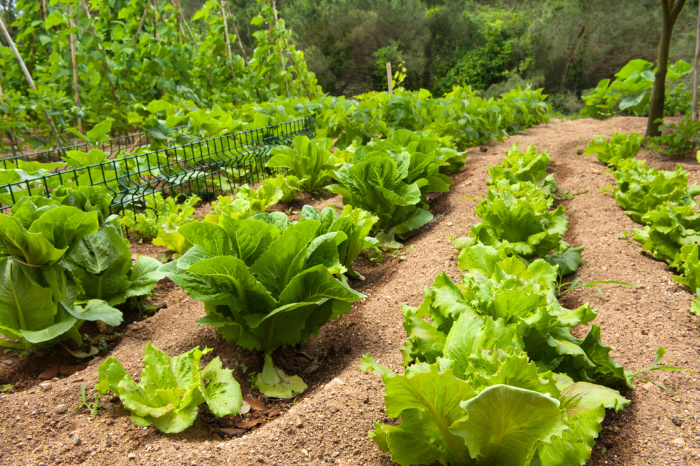
5. Lettuce
Add the amendments above to the soil where you plan to plant your lettuce seeds. The nice thing about lettuce is it’s so easy to grow and sprouts up pretty fast. Just make sure the soil is loosened, loamy, and well-drained. Lettuce loves nitrogen and potassium, so keep your eye on the leaves as they start to grow. Work in a lot of organic matter or compost. Lettuce matures in 55 to 60 days. Romaine takes longer to mature, and so do head lettuce varieties.
Plant the seeds about 1/4 inch deep, tamp them in the soil, and water them in. Easy and simple. Read the package to space them according to the lettuce variety you choose. Seeds won’t germinate in soils above 80 degrees F. You can start some seeds indoors and transplant the seedlings into a shady spot when the weather is too hot outside. You may want to choose heat-resistant varieties if you live where the temperatures get very hot in the summer. It’s better to pick early than late because the leaves become bitter over time.
pH level for Lettuce: 6.0 – 7.0
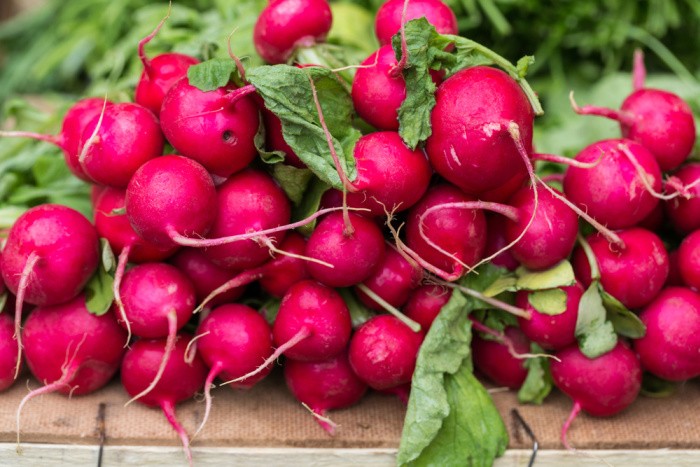
6. Radishes
I like the radish variety called Red Champion because they are larger and have bright red skin. They grow in small areas, and the days to maturity are 25-30 days. Another one I like is called Pink Beauty because the white flesh is crisp and mild. They grow really well in pots or containers. Their days to maturity are 25-30 as well. I just sprinkle the seeds over the soil, do a slight soil coverup, and sprinkle with water. If you stagger the planting days you’ll have several days of freshly picked radishes at harvest time.
pH level for Radishes: 6.0 – 7.0
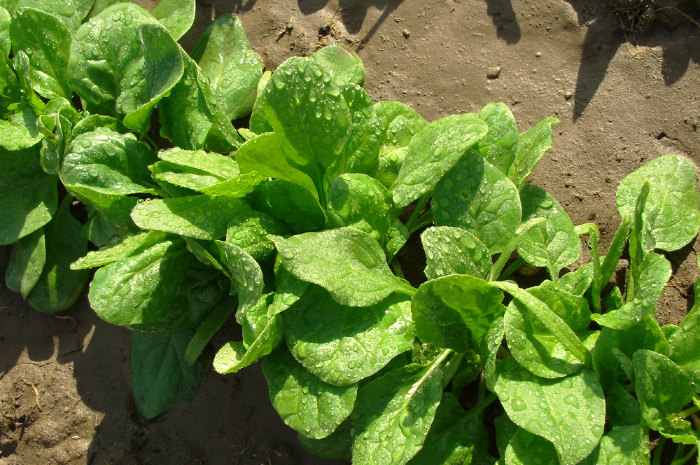
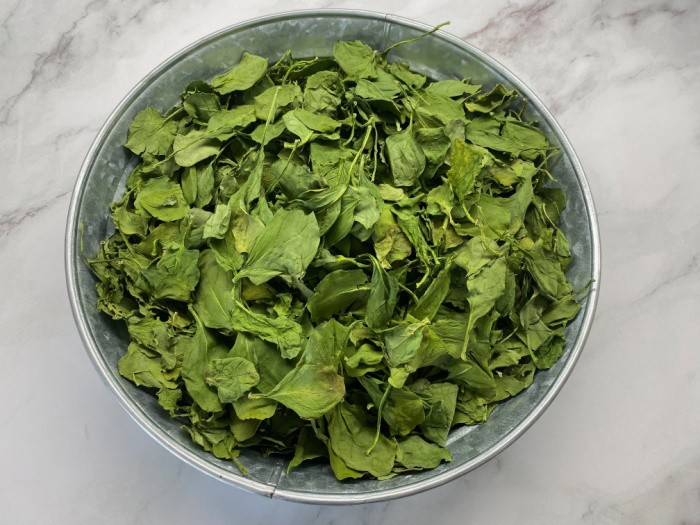
7. Spinach
I used to plant New Zealand spinach seeds because they can withstand the heat of Southern Utah. It’s a large-growing plant, but I make salads and smoothies and freeze a lot of spinach for the year. This is one spinach variety that grows from spring to fall without any issues. The more I cut it back, the more it grows, literally. Days to maturity are 75 days.
Here again, make sure your soil has the amendments above and you turn over the soil again and again. Plant the seeds at least one foot apart and the rows two feet apart.
pH level for Spinach: 6.0 – 7.5
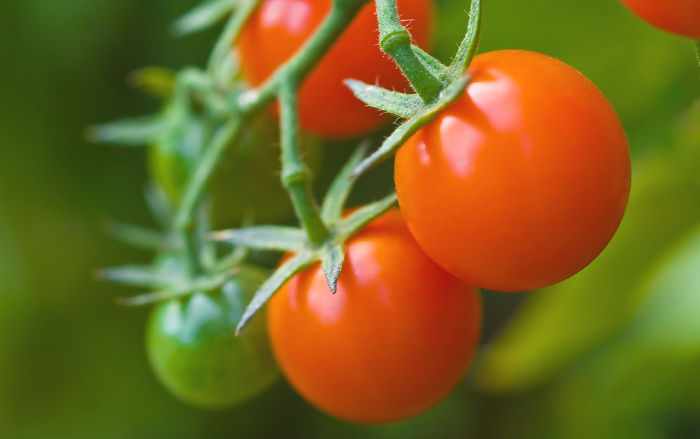
8. Tomatoes
Let’s talk about tomato choices. You have to decide if you’re just going to eat BLTs; that’s awesome! If you want to make salsa, tomato juice, or spaghetti sauce, you need to think about which tomatoes are best to use. Of course, these have to be good for your area. I only know Utah, so I’ll share what I’ve done for years. These are 100% Heirloom/Non-Hybrid/Non-GMO tomatoes.
- Abraham Lincoln: 1 lb. heirloom, great for ketchup and tomato juice. Easy to grow and matures in 85 days.
- Beefsteaks are large tomatoes, can be over 2 lbs., are easy to grow, great for slicers, and mature in 85 days.
- Bonnie’s Best: 6-8 ounce fruit, great for slicers or canning. Matures in 85 days.
- Marion: chefs prefer these crack-resistant tomatoes. Great for salads or sandwiches. Matures in 75 days.
- Pear: pear-shaped fruits that grow in clusters. Great for salads. Matures in 75 days.
- Homestead: a popular heirloom variety. They are suitable for canning and are excellent in hot climates. They mature in 80 days.
- Mortgage Lifter: they produce large tomatoes, up to 2 lbs. Easy to grow and matures in 70 days.
- Money Maker: It’s one of the most reliable tomatoes you can grow. It grows up to 8-ounce tomatoes, is easy to grow, and matures in 85 days.
The best time to plant your seeds indoors is about 6-8 weeks before the last expected spring frost in your neighborhood. You can grow your seedlings or plants about two weeks after the last spring frost. You can enter your zip code on this website to find the best start dates. Farmer’s Almanac First and Last Frost Dates By Location
It’s really easy to grow tomatoes from seeds. You can start with seed pellets or plant them in smaller containers and transplant them to larger containers, as needed. The seeds don’t need light, so you can put them on top of your refrigerator to keep them warm and help them to germinate. As soon as the seedlings pop up they need sunshine. You can put them on a window shelf or a table close to the window. You should see them poke through the soil in 7-10 days.
The seedlings need the temperatures to be 70 degrees F during the day and 40 degrees F at night. Once the seedlings reach 4 inches tall, transplant them into larger containers. Please plant them deeper than other vegetables.
pH level for Tomatoes: 6.0 – 6.8
Please Check Out What To Plant Each Month:
- What To Plant In January
- What To Plant In February
- What To Plant In March
- What To Plant In April
- What To Plant In May
- What To Plant In June
- What To Plant In July
- What To Plant In August
- What To Plant In September
- What To Plant In October
Final Word
If you’ve always wanted a garden, the ones discussed in this post are the easiest vegetables to grow. You can do it, my friends, one step at a time. It’s all about being self-sufficient and growing our food. Thanks again for being prepared for the unexpected. May God bless this world. Linda
Copyright Pictures: Lettuce AdobeStock_424113118 by Thinapob, Carrots on Grass Depositphotos_80366386_S By maxsol7, Red Ripe Tomatoes Depositphotos_2400994_S By Frankljunior, Spinach with Water Drips Depositphotos_11143472_S By DLeonis, Radishes Depositphotos_110047938_S By wjarek, Pollinating Plants Depositphotos_219055640_S By Elena@Mas, Lettuce Growing Depositphotos_4125122_S by ivonnewierink, Red Bell Peppers Depositphotos_81608898_S By Ehaurylik, Green Beans In Basket Depositphotos_595746046_S By AlterPhoto,Cucumbers Growing Depositphotos_11914800_S By Syaber


Linda ~ You should see my 8X10 foot deck!!! I planted my grow boxes (although only one is fully utilizing the grow box top mat!) So, I am growing 1 each: bush cherry tomato, bush cucumber, oregano, thyme, basil, mint (label said peppermint but it smells more like spearmint), carrots, lettuce, radishes. Then I also have a mini strawberry barrel and a pot with lavender. Oh and I planted the mint in its own pot as mint tends to spread a bit.
I am using sort of a “square foot” technique with the lettuce, radishes and carrots and will reseed as needed. I am so excited to be able to harvest right outside my back door!
Hi Leanne, SQUEAL OF EXCITEMENT!! Yay!! This is so exciting!! I may need to buy some of those so I can show people how they work!! I LOVE hearing this! Linda
Linda ~
Now that I have my garden growing, I find that I spend a lot more time out on my deck. It is like a little oasis! I can hardly wait to start harvesting!!
Hi Leanne, oh my gosh, I love hearing this! P.S. I planted my asparagus crowns 12 days ago and it’s starting to sprout! Linda
Hello Linda, In my yard we have all these Japanese lowquat trees which I assume are either indigenous to Florida or they just grow well in this environment. They can be cut down and they grow back fast. They’re also easily propagated by just cutting a piece and planting it. They’re foolproof and they grow like mad.
That all sounds great, but the problem is we don’t use all the fruit. And if the poop hits the fan, it would be a great resource. The fruit is like a canepa in that there is a large pit surrounded by soft gooey fruit, so there is not much there unlike a peach or an apple which can be cut up. You just pop them in your mouth eat the fruit and then spit the seed. I imagine there must be a method to process them.
I’m also trying to find out how to clean tangerines (We have one small tree) of all that white stuff around them so they’ll be like the canned variety and we can enjoy the fruit alone or in coleslaw or Chinese dishes.
We also have plantains, but I have no idea how to work with the tree and increase the yield, but it gives us a few bunches thru the year and I wait impatiently for those green buggers to ripen up.
Hi Frank, oh my gosh, I love hearing you have all this “food” growing in your yard! I just planted some asparagus because it keeps coming back every year! Plus, I planted a Pomegranate bush and it’s loaded. I’m like you, I want food growing in my yard. You have a gold mine! Linda
I bought my mom containers and soil for her birthday. She planted indoor spinach last weekend. She’ll be doing bell peppers and a few other things.
The recalls and even getting sick once from the spinach made her decision to get back into it on a scale she can manage.
I worked the fields my younger days and I can tell you what is happening today is just nasty, lazy and intentional. We excused ourselves off the field and washed our hands before returning. This lack of hygiene is inexcusable and race, culture and productivity are not reasons that are valid despite hearing them all repeatedly. And if your forcing workers that hard then you are just greedy, evil and not a good person and need a beating.
I can’t stress enough for everyone to grow what you can with whatever means you have especially now.
Hi Matt, oh boy, you nailed it, my friend! It is inexcusable. It is all about greed, we all know it. We MUST grow our own food, PERIOD. Some of the things I’ve seen in documentaries are not humane where families are working the fields so we have food to purchase. We must provide for ourselves. Thank you for the best comment EVER! Linda
Linda,
I’d like to recommend a few additions to your “easy to grow” list.
Bok Choi (or any of the Chois)
Bright Lights Swiss Chard
Green Arrow Shell Peas
Mammoth Melting or Dwarf White Sugar Snow Peas
Covington Sweet Potatoes
Gardeners Delight Cherry Tomato
All have exceptional flavor, take very little effort to grow and most will re-seed themselves so you’ll have volunteers coming up later on.
Hi Ray, oh, I LOVE this list. I will add these for sure, thank you!! We need to learn to grow successful gardens because it keeps us going. We learn new things each year. We can all easily grow our own food, even if it’s only a little. Thanks again, Linda
Last year I wanted to grow sweet potatoes but slips were so expensive in catalogs. Then I remembered how Mama grew slips. Take a sweet potato. Put in jar of water at least half out of water and put in window. Sprouts will start to grow on potato. When sprouts are about 2-3 inches long, break off next to potato and put sprouts in another little jar or glass of water and let set until they have roots. When roots established, plant. Best if water not chlorinated. This saved me a lot of money last year and grew many sweet potatoes in an old bathtub.
Hi Linda, oh my gosh, thank you for this tip! I would think the sweet potatoes would have to be organic? Maybe not? I’m thinking the GMO ones would not sprout. I LOVE LOVE LOVE this! I can almost visualize the old bathtub with the sweet potato leaves growing over the sides! Awesome! Linda
I think the variety is “Beauregard”. An old Southern favorite. Thanks for writing this article. With fertilizer prices tripling and quadrupling this year, food is going to be very high. Please remind folks to get their canning lids while they can get them. Ordered some ball lids from Amazon last week.
Hi Linda, I totally agree food prices are going to be going even higher. Thanks for the name of the sprouts or lettuce! I will check those out!! Great reminder on the canning lids!! Yes indeed, get them NOW! Linda
Wish we had sun for a garden, but we have 10 trees over 100 feet each on a tenth of an acre. Too shady. I guess I will just stick to growing sprouts! Love all your good info, thanks!
Hi Jan, sprouts are great! Have you looked at the AeroGarden for lettuce? I wrote a post about it. I now have 3 AeroGarden Bounty 9 pod units. I only buy them when they go on sale, one at a time!! LOL! You can also use your own seeds. A reader told me she loved hers or she had several now that I say that! I LOVE them! Thank you for your kind words, Linda https://www.foodstoragemoms.com/growing-fresh-lettuce-indoors/
I will look into that.
Jan, I love mine. Linda
Linda:
The vegetables that you mentioned are easy to grow unless you live in the Atomic Blasted Dessert in New Mexico. The only thing growing here is the bugs and critters the atomic bomb did not kill. We do have some birds but not many. I don’t know what to do to grow food because the land was destroyed by the 2 atomic bombs they tested here in the 40’s. I not sure what I will do this year because I really want to go at least some of our food but the fact my husband and I are Disabled Vets living on his SS and small VA pension I can’t see us getting any of the planters I have seen on TV where you set them up even then the bugs and critters take to eating them before we can harvest them. Have any Ideas.
Hi Jackie oh my gosh, the Atomic Blasted Desert in New Mexico, I got the giggles! Not funny, but funny. Heat, bugs, and critters are the worst! The soil sounds bad, darn!! Linda
I know this is 3 years late but…
While the planters are nice to have, you do not need to go that expensive! A cardboard box lined with weed guard (that weed fabric) then filled with garden soil will do the trick for many veggies. Also, I have seen techniques using plastic bins where you drill holes in one bin for drainage and fit it into another bin (helps cut down on watering), fill with soil and plant away. I have used 5-gallon buckets to grow carrots, garlic, onions – just need to drill a few holes in the bottom. If you search on Amazon for “garden grow bags” you will find a number of bags that are not all that expensive. I have a few that I paid $5 each for. Filled with soil and seeds – great! But, the cardboard box lined with weed guard is very inexpensive and very effective.
Hi Leanne, I need to look into those grow bags, Linda
Hi Linda, my wife and I get your emails and enjoy all of the encouragement you give to your subscribers. Its great to get all of the little reminders in each email. We live in Idaho and the weather has not been cooperating. Out of the first planting of carrots three came to the surface and are growing nicely, but realistically they were old seeds. Next bunch are now peeking through the surface. Fortunately, we have been trying to collect seeds from our garden each year and I think we are getting better at it. To those of you who don’t like to garden outside, then garden inside. Start with small experimental indoor garden for salads. Easy to grow and easy to harvest.
Hi Larry, thank you for your kind words, my friend!!! You know every year when we garden we learn something new. Nothing is better than that first tomato and seeing those seeds sprout through the soil. Squeal! I totally agree with you about growing some things indoors, we must do whatever we can to grow as much of our food as possible. Love this, Linda
Wyoming experiment #2 coming up this year!! I am going to take all the “topsoil” my landlord gave me last year and fill holes in the yard!! Then, I will fill my raised bed with decent soil! I think the stuff the landlord gave me has way too much clay in it! Further plans are to use pvc pipe to make it into a sort of hoop house to extend the growing season but also so that I have shade cloth to protect from the intense summer sun. Between plastic and shade cloth, I can also protect my garden from hail. I have seen baseball sized hail stones here in Wyoming!! I still have my 5 grow bags as well so I need to plan something for those. Watering is my biggest issue, but I plan to get a good long soaker hose.
I am not sure what I will be growing as my daughter will be starting plants for me – I’ll take what she gives me!!
Hi Leanne, yay for #2 Wyoming experiment! It sounds like you have a good plan for you new garden. It’s a blessing you have some veggies and fruit you can get from your daughters garden as well. Life is good, my friend! Linda
Hey, everybody! Don’t forget to let the”volunteers” grow in your garden!! My husband decided not to till in the two cherry tomato plants that came up almost on top of each other this Spring. I am SO GLAD he left them to produce tomatoes! We now have the BEST MINI-ROMA TOMATOES we’ve ever eaten! They are cherry tomato size but in Roma form and density!! SO GOOD!! We had a crazy spring and summer here: Bucketloads of rain in the spring, garden got planted kind of late-ish, still got many small Israeli melons (Ha Ogen) and winter squash, but I think the prolific spaghetti squash did not mind the blazing-hot summer like some of the other plants did. Red peppers went bonkers, and I am still eating and processing those! This year, I am making sweet Italian pepper slices in a special brine. Geez, Louise, the stupid pepper plants I ordered from Burpees were not all the long red roasting peppers that I ordered. We got a couple of hot red peppers, too, which we DID NOT WANT!!! Well, our friends were happy enough to get those. Good thing we had enough access to water to be able to keep the garden happy, though! Summer was a real scorcher this year… Now, on to pickling beets out the kazoo this weekend, right after I finish with the Ugandan Visas that we still have not finalized. YES, we are headed to UG again! People over there were pretty much BEGGING us to return due to the graduation of the 2 sisters I support at Children of Faith School, AND the official Opening Ceremony for the Water Well that got dug with the funds from the big fundraiser I ran for them. We will be at both events, since they are happening in 1 day. 🙂 Then traveling on to 3 other locations where they are anxious for us to return, too. YAYAYAYAYAY!!! I am just praying for good health for both of us, as we are getting older…and enough money to cover all the transportation expenses while in the country.
Hi Jess, oh your garden is such a blessing. I will pray for you and your husband to be healthy enough to go back to Uganda, everything is so expensive. Linda