Tips for Understanding How to Rotate Foods
This post may contain affiliate links. We may earn a commission if you purchase via our links. See the disclosure page for more info.

Today I have some tips for understanding how to rotate foods. Do you have a method to the madness when it comes to keeping a fresh and rotated stock in your kitchen pantry?
Or maybe you have an emergency supply for use in case of a disaster and you’re not entirely sure how to maintain it without everything becoming expired? You may not realize it but rotation is extremely important when it comes to your food supply.
It helps keep your supply fresh and up to date, and also keeps you from wasting a lot of money due to foods that you’ve had to throw out. If you’re needing a bit of help with this, not to worry. Here are a few tips for understanding how to rotate foods.
Rotating Helps You with Inventory
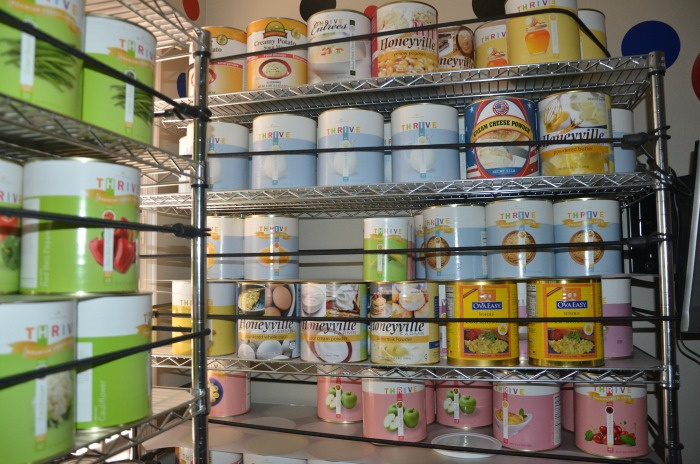
I bought these shelves online from Costco. They are 72 inches tall by 48 inches wide and 18 inches deep. They have heavy-duty wheels and are made by Trinity. The shelves you may have seen that are similar to these I bought at Costco are not as heavy-duty.
I use bungee cords to hold them in place in case of an earthquake. It may be wishful thinking because an earthquake would topple these I’m sure. But I feel better knowing they are somewhat tied to the shelving.
Not only does rotating help you maintain freshness in your pantry, but it also allows you to keep up with your inventory as well. You’ll have a better idea of what needs replenishment and foods that you have an abundance of. You may want to keep an inventory sheet to help you track your supply easier, know how old they are, and when they need to be used or replaced.
These Printable Forms may be helpful to you:
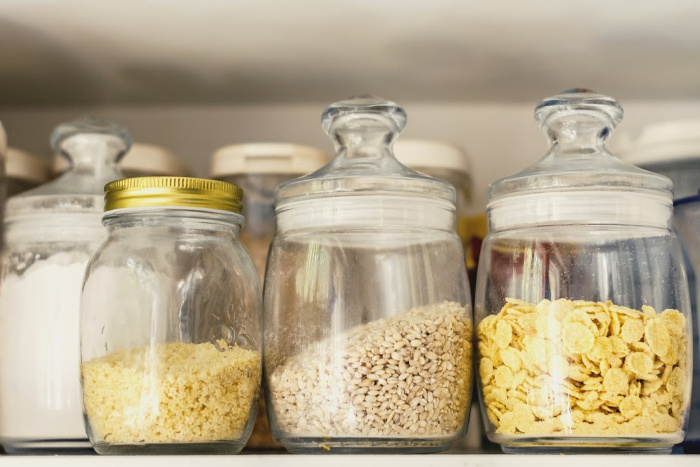
Follow the Grocery Store Practice
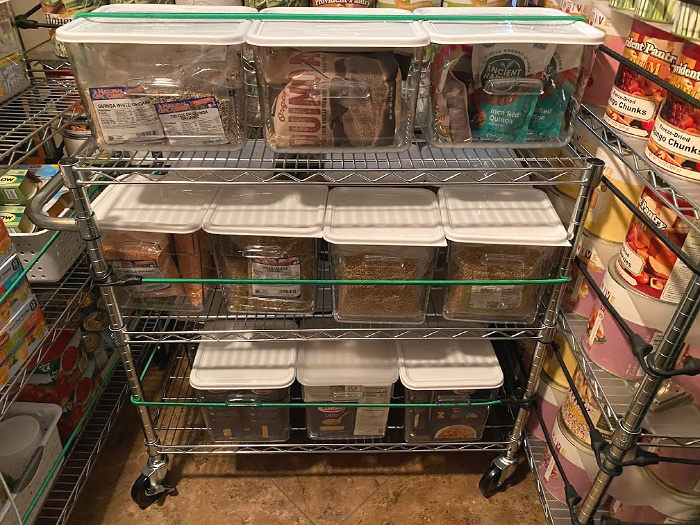
The top plastic containers are 12-quart Rubbermaid commercial containers. The second row has 8-quart Rubbermaid commercial containers. The best place to find these are at Rubbermaid Commercial Containers (you have to order the lids and containers separately). I’ve seen them on Amazon as well.
I have a very small home, but these shelves from Costco (online-only) work for me. These shelves go in our guest bedroom that has two triple bunk beds for guests who come to visit.
They are rolled out when we have guests arrive. 40.5-Inch Trinity Shelving I wish I had my old basement food storage shelves, but we downsized and now this is our life.
I live in Southern Utah (the desert) and the temperatures sometimes get over 114-120 degrees here. So all my food storage must be stored in my house, not the garage, it’s too hot.
Aren’t you thankful that grocery stores and restaurants practice rotating when it pertains to food items? This simple practice ensures that you’re purchasing fresh product instead of an out of date can of Spaghettios.
While it takes more time to stock the shelves this way, it means a higher quality product and one less aggravated shopper. Take the time to do the same in your pantry by placing the older product in front and the newly dated ones towards the back.
Maybe you prefer to organize it in a way that’s left to right? Find out what works best for you so that your pantry is on a first-in, first-out basis.
Keep an Eye Out for Spoilage
It’s an important practice to also pay close attention to any signs of spoilage. You may notice evidence of a dented can or seeping liquid from one of them. In that situation, it’s a good idea to go ahead and throw the product out so that you don’t run the risk of getting food poisoning.
Make Use By Dates Bold
It can be really difficult to read sell-by dates, especially if your food supply is in a cellar or a basement that’s dimly lit. Go ahead and grab a black sharpie and make those sell-by dates much easier for you to read by writing big and bold.
Stock Heavier Foods on the Bottom
Another useful tip when it comes to your pantry is to place heavier foods that come in cans or jars along your bottom shelf. The further a heavy object has to fall, the worse your smashed toe or explosion of food will become.
Also, having the heavy items on the lower shelves helps to keep the shelving balanced and less likely to tip over, particularly when moving them from room to room.
Incorporate Slanted Shelving
I must confess, I got rid of the shelves below because I felt they didn’t hold enough #10 cans to my liking. I bought them at the time because they had wheels and I needed to move them from time to time. My Trinity 72-inch shelves I have now hold at least 3 times as many cans and take up less space since they are taller.
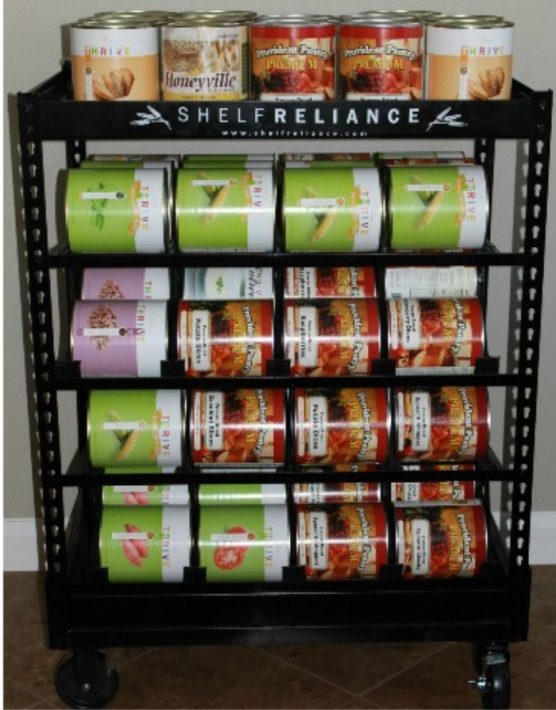
I also realize a lot of people love the Shelf Reliance shelving, and that’s fine. Whatever works best for you is how your storage should go.
One really easy trick that you can use to help with rotating is to use slanted shelving. This neat bit of shelving will take care of the rotation for you and keep you from having to pull your stock forward every time.
Have Like Items Together
Does your food pantry lack organization and it’s always a hunt to find what you’re looking for? Stop wasting all that time and spend a few extra moments upfront by paring all your like food items together. This will also help you when you go to take inventory of your food pantry.
Consider Labeling Your Shelves
Do you have more than one person besides you that helps you replenish or take from your food supply? If so, it wouldn’t hurt to label each section of your shelving so everyone knows exactly where they can look to grab or stash a container of pinto beans or a can of lima beans.
I use this label maker for everything in my house: Brother Label Maker and the Label Maker Refills
Rotate Older Foods Into Your Everyday Pantry
If you’re like me and have an emergency supply of food stored away alongside your everyday pantry, kudos to you. But just like those other foods in your pantry, your emergency stash will eventually go out of date as well.
If you are noticing cans of food with dates for use that are coming up, go ahead and bring those canned goods into your pantry in your kitchen to be used up quickly. Just be sure to replenish your emergency supply when you do so.
Be sure and watch out for Pantry Moths: How To Get Rid Of Pantry Moths In Your Kitchen
Final Word
These are a few tips for you to understand how to properly rotate food. Hopefully, a few of them helped you find easier methods of maintaining quality in your pantry.
Do you know of any other ways to make your rotation in your food pantry easier? If so, I’d love to hear from you. Please keep stocking up, we must. May God bless this world, Linda
Copyright Images: Pantry Jars AdobeStock_222200726 by SheDiva


I got a Harvest 72 from Shelf Reliance years back, but I configured it with all small shelves for supermarket sized cans – Progesso soups, Campbell’s soups, small mushroom cans, and tuna cans to give a hint as to sizes. I then bought a LOT of extra row dividers so I could cram in as much food as I could. Each food type is kept to its own rows and all rows have been labelled with magnetic strip and P-touch labels indicating type and row number. So I can easily tell which row to use up first then move items from the next oldest over to the first row, etc. I can also shift the labels around if I find myself craving more beef soup and less chicken soup and change up my buying habits. At the moment I have 8 rows of tuna, 4 rows of chicken soup, 3 rows of ravioli, among others.
And since with the taller rack it can’t be on wheels, I was careful placing it to have space behind it as well as in front. That allows me the access needed to move the row dividers. Not as critical now that I’ve got it setup, but for the first few months as I was adjusting things it was well worth it to not have to empty things out enough to reach in and move stuff.
To keep rotating items properly, I take items from the rack to fill in the kitchen pantry or when I’m grabbing lunches for the office. Newly purchased items go into the rack. Sure, it took me a couple of years to fill the rack most of the way, but it stopped the waste from losing track of items on the shelves and having to toss it out when the cans started rusting or leaking….
My #10 cans are just stored on shelves, although anything not on the bottom shelves is in the shipping boxes to reduce damage if things fall. I figured with the shelf life of the #10 cans, I don’t have to be quite as careful rotating things. Especially since I just buy FD food and stay away from dehydrated.
And for my storage buckets, I’ve been careful to just store items that should last longer than I will. 😉 White rice, lentils, sugar, wheat berries, etc. Bagged in mylar and with O2 absorbers where necessary before placing into 5 gallon buckets. Those are labelled and stacked around my other shelves. Haven’t needed to dip into any of the yet so haven’t started rotating, but I know the where the oldest stuff is so I can start there if events get worse and I stop going to the store to restock.
Sure, thats a lot of work, but I’ve done it slowly over the years (more than a decade, let’s leave it at that) and when taken in small chunks it’s not as scary.
Hi DMWalsh, OH MY GOSH!! You are amazing! Why didn’t I think of that! I think my daughter’s husband did something similar to what you are talking about for the smaller cans. You are my hero, my friend! I LOVE LOVE LOVE hearing how prepared you are! Keep up the good work, Linda
I live alone in a small apartment so most of my emergency stores are on similar wire shelving in the pantry but I keep them in numbered lidless totes that I can pull out like a drawer. I’ve written the expiry dates on top of cans in felt marker, batch by year/date and keep a spreadsheet of items, expiry dates and location on a clipboard kept with my cookbooks. Things approaching expiry move into current stock in the cupboards and get replaced. I try to at least have one replacement and one spare on hand at all times for things that I use regularly but have a shorter shelf life. I recently built an 8″ wide pull out shelf using up the skinny space between my fridge and the wall which is handy for storing a lot of smaller items and oddball things in jars. I try to keep things in the freezer layered so that each layer has a good variety and no need to dig around. In case of power failures I can wrap it with lots of extra blankets and things and minimise opening the door to keep things frozen longer. There’s a smaller stash of grab and go items along with my go bag in a shelving unit at the end of my daybed close to the patio doors in case a really quick exit is required, along with a lovely large decorative rock that can be used to smash the glass in case the door gets stuck in an earthquake.
Hi Alice, you have thought of everything, I LOVE it!! I have a small house and like you, we have to use up every nook and cranny to store stuff. It feels so good to be prepared and organized, good job Alice!! Stay well and stay safe, Linda
I don’t have anything near as fancy as you, Linda or DM Walsh!! I live in a small apartment with very little in the way of storage so my FD foods are stored in a closet and my store bought foods in a small cupboard. I have inventory sheets with Item, Number of Items, Use by Date and check boxes. When I use something, I mark it off and add it to my grocery list. That way I keep a fairly good supply on hand. I mark the check off boxes with a dry erase marker that can easily be cleaned off when I resupply.
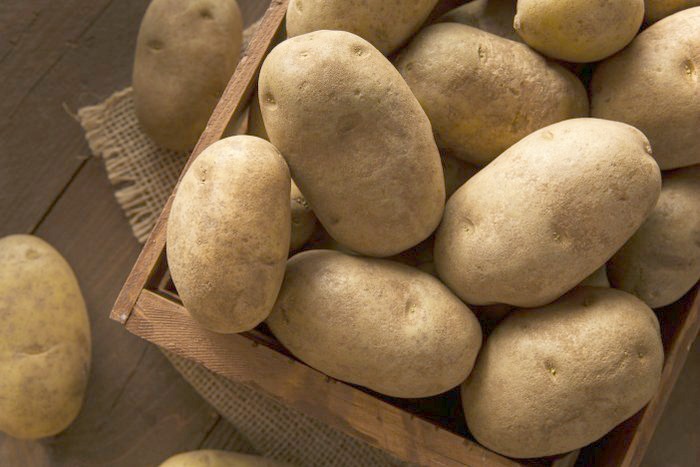
Today I am going to finish up my dehydrated mashed potatoes and start more dehydrated hash browns and sliced potatoes. I was fortunate to be able to pick up 140 pounds of russet potatoes the other day (free!) which I shared with my neighbors. I kept 20 pounds to use and dehydrate. Wish I had the money and the space for a home freeze dryer!!
Hi Leanne, wow, I love hearing you picked up free potatoes to share with neighbors! I LOVE it! I have never dehydrated potatoes (hashbrowns or sliced). This is awesome! My food storage set up is not fancy, I have to tell you something because you will get a kick out of it! I have my granddaughter living with us here in Southern Utah for a year while she attends Hair School. The other day I had her helping me organize the plastic containers checking dates on the food, etc. I said to her, Taylor, I think I”m starting to look like a hoarder but not the kind like we see on TV with junk. LOL! You know I don’t care for the word hoarder, it was being funny. The food storage room is maybe 10 feet by 10 feet. It has two sets of triple bunk beds and food EVERYWHERE on wheels! This is so we can move them out if guests come to visit! Life is so good even with a tiny place to store my food storage! Happy Thursday, my friend, Linda
Dehydrating potatoes is a bit of work initially but so satisfying! (to me!!). I almost prefer working with potatoes but again a bit time consuming in the prep end.
My daughter thinks I am a hoarder but then she starts talking about how much STUFF her in-laws have and says she is thankful I don’t have so much!!
Hi Leanne, you and I can sleep at night knowing we have food and water. You inspire me to try doing potatoes, I really want to try doing them for the experience. It’s so satisfying knowing we have food we have preserved one way or another. Great idea! Linda
Linda –
I have dehydrated grated potatoes for hash browns, cubed potatoes for soup/stew and may try making O’Brien hash browns with some FD bell peppers (rehydrate potatoes and peppers, then fry), I have done mashed potatoes and now have 5 trays of sliced potatoes. See below for the steps I took.
Hash browns, cubes and mashed potatoes
Step 1: peel potatoes and rinse well
Step 2: cook the potatoes until just tender (or a bit more for mashed)
Step 3: drain the potatoes and place in icy cold water to stop the cooking
Step 4: for hash browns, grate them into a bowl then spread on dehydrator trays – I used the mesh type tray liners but think next time I’ll use the fruit roll up tray liners
Step 4: for cubed potatoes, cut into even sized cubes about 1/2 inch cubes and spread on dehydrator trays – I used mesh liners and they worked well
Step 4: for mashed potatoes, I mashed then used a mixer to really finely mash them – I don’t have a ricer or I would use that – you don’t want any chunks. Then I spread the mashed potatoes on fruit roll up tray liners to about 1/2 inch thick (perhaps too thick!!). NOTE: DO NOT ADD ANYTHING (no butter, no milk)
Step 5: dehydrate until well dried. My dehydrator has one temperature and I have never tested it to see what it is. It also does not have a timer. I just check now and then!! For the hash browns it took about 12 hours; for the cubes about 18 hours and for the mashed it took a good 24 hours (spreading it thinner would cut down the drying time.)
Step 6: placed the hash browns and cubes in quart jars after conditioning. Will add oxygen absorbers when I have enough jars to warrant opening a package of absorbers. For the mashed potatoes, I broke up and placed the chunks in a very large bowl and broke the pieces up as small as I could. Then I ran the pieces through my high speed blender to break down to very small bits and potato dust! Then I put everything through a pretty fine sieve and if there were still larger pieces, back in the blender to break down more. I ended up doing 7 potatoes for mashed and ended up with just short of a pint of dried mashed potatoes!
For the sliced potatoes I did it a bit differently:
Step 1: peel the potatoes and rinse well
Step 2: using a mandolin slicer, I sliced the potatoes into a bowl of cold water
Step 3: I rinsed the raw slices several times to eliminate as much starch as I could
Step 4: keeping the raw slices in water, I transferred some of the slices to boiling water and brought the water back to a boil. I boiled the slices for 3 minutes. Note, I used a sieve like steamer basket to make transferring to the cold water easier.
Step 5: I then transferred the boiled slices to ice cold water to stop the cooking
Step 6: I then drained and transferred the cold slices to toweling and patted them dry of excess water
Step 7: I placed the slices on trays
Repeat steps 4 – 7 until all the trays are full
NOTE: I had a few slices left and no room on the trays. I placed them on a parchment paper lined cookie sheet and in the oven (my oven only goes down to 170F). After a couple of hours of the dehydrator running, I was able to move slices around to make room for those that were in the oven and continue dehydrating in the dehydrator.
As I said, potatoes are a bit of work but they are so satisfying! I figure when I am done, I will have 20 pounds of potatoes in 8 or 9 quart jars!
For those wondering how I will use all these potatoes: the hash browns will be rehydrated in boiling water for 5-10 minutes, drained and fried up with a bit of salt and pepper. The cubes will be rehydrated with boiling water to fry if I am making O’Brien potatoes along with rehydrated freeze dried bell peppers and probably onion; or I will just throw a handful or so into soups or stews. The mashed will be rehydrated by adding boiling water, milk and butter but I have never done mashed before so I will be experimenting on how much potato to how much water/milk and butter – sorry! For the slices, I will do them like the boxed scalloped/au gratin potatoes in the store: cover with a mixture of boiling water, milk, butter and for au gratin, powdered cheese then bake for 45 min in 350F oven. But I can also rehydrate the slices and fry like simple fried potatoes.
Hi Leanne, OH MY GOSH!! I LOVE LOVE LOVE this! I’m going to try doing this, you are amazing! 20 pounds down to 8 or 9 quarts!! Woohoo! Thanks for sharing!! Linda
Hi Leanne,
When rehydrating, how do you determine the amount of water?
Paul.
I never measure tho the container always shows amounts…..I just use water to cover and more…..when dehydrated, I just pour the excess water off and use a strainer….push on it if still too wet….so much easier than measuring and I have always have success..
HI Sandra, I do the same thing, if it’s dehydrated I just throw it into the soup, I like your idea, it will only absorb so much water, anyway. Great tip. Linda
You are so right….you and I like to do things the easy way
This article has some good ideas about how to STORE items. What I need is one about how to USE them. My cooking is pretty irregular. And only for 1 person. Do you have some suggestions on how to use up the contents once a can is opened?
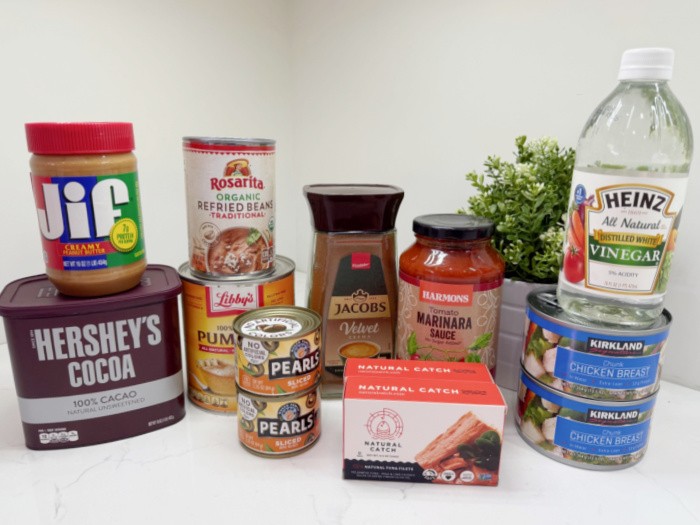
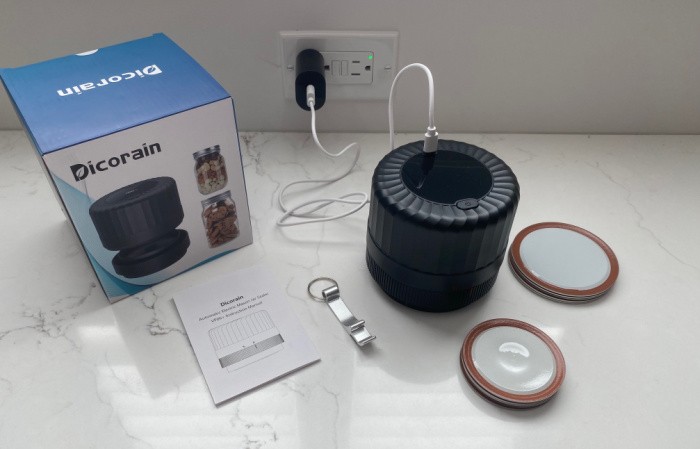
Hi Marsha, I’m glad you asked this question. It depends on which brand of dehydrated or freeze dried food you have purchased. They each have date as to the unopened cans and the opened cans time frame. Please remove the oxygen absorber from the can and discard. I like to use my Dicorain or FoodSaver to seal the contents in quart or pint mason jars. Be sure and date them. I have a lot of #10 cans and even 2 people will have a hard time eating with a month or so. In fact right now I have an OXO container in my freezer with some freeze dried ground beef because we could only each a partial can. I was still unpacking and have since found my mason jars. I would put that date that the can says on your brand on the mason jar lids. They will NOT revert back to 25 years. Please remember they were pressured canned commercially. I hope this help you, Linda
Hi LInda, I do understand these concepts. What I’d really like is what to cook now that I’ve opened xxx. I don’t have a FoodSaver or even a lot of Mason jars. Do have Ziplocks and a freezer. Could be an interesting series.
Marsha
Hi Marsha, baggies would work in the freezer, yes. I think now I understand what you are asking. I have been thinking about showing people how to use their food storage in a post, is that what you mean? For instance, I’m going to make freeze dried food and show how to make a meal with it. So many of my recipes I substitute my freeze dried green beans say for instance if I’m out of cans of green beans. I just hydrate them according to the brand instructions and use them in any recipe. I will work on that, good idea. Linda
Yes, that’s it. It’s easy to use it the first time you open the can. You had a reason to open it. It’s ideas on how to use the rest in a timely fashion that would be ever so helpful. Might be fun to give several ideas and then the community will chime in with their ideas for that particular item.
Hi Marsha, I will work on that. I’m glad you brought this up because I want to show people they can live eating only freeze dried or dehydrated food. The problem is NOW the prices are so high because food is so expensive. I will work on it. Thanks again, Linda