7 Ways to Build a Survival Shelter
This post may contain affiliate links. We may earn a commission if you purchase via our links. See the disclosure page for more info.

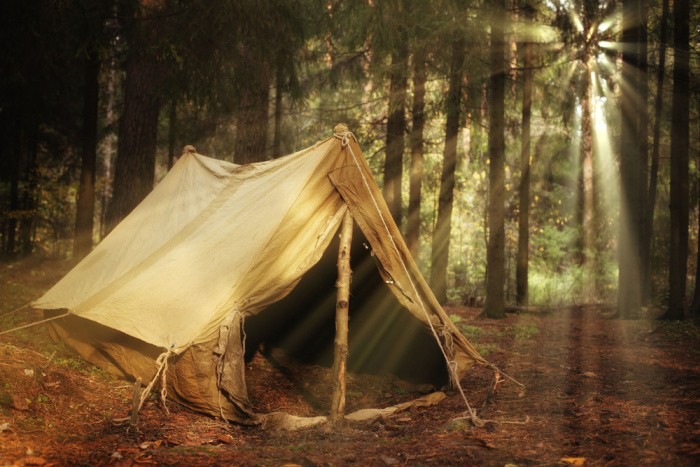
Surviving an emergency can be tough enough as it is, but things can get really bad if you don’t have a shelter in place so that you can escape the wind and the rain. To make matters worse, if you are living in an area that is currently experiencing extreme cold or hot temperatures, you and your family may only last for 2 to 3 hours without some type of shelter. Check out these ways to build a survival shelter. In case you missed this post, How To Make 72-Hour Kits That Will Last Forever. Please be aware I tried to find an image of the tents below to give you an idea about the ones I have written about. I’m having a tough time finding them, but I will keep looking for images.
Ways to Build a Survival Shelter
Fortunately, building a survival shelter isn’t that difficult to do, and very few supplies are actually needed. You just have to work with what you have all around you. These are 8 different ways to build a survival shelter if your life ever depended upon it. Waterproof Portable Tarp
1. Lean-To
The lean-to is a primitive shelter design that many survivalists choose to construct because it is so easy to build. You can use all different types of material that may be available around you, and it’s also convenient that it can be built in less than an hour when time is working against you.
To construct it you will need a long pole that you can secure between two trees. On one side you will add large sticks, branches, and brush. You can then place vegetation on top of that for more coverage, such as grass, leaves, or palm fronds.
There are two drawbacks to this type of shelter that you need to know about. Since it’s only one-sided, it doesn’t hold heat well, and you won’t have any protection if the wind or the rain changes directions.
2. Leaf Hut
A leaf hut is a two-sided shelter that will provide you with much more insulation and also an escape from the elements than what the lean-to shelter provides. You will need to place a 9 to 12-foot pole against the fork of a tree and then cover each side of it with tree branches. Be sure that you have plenty of sticks and branches close to one another, that way your hut covering won’t come through.
When you’re finished with this step, the framework should resemble something like a rib cage. Now it’s time to heap about 3 feet of vegetation on top of the frame to help keep air and rain out. You can use whatever is available to you, including grass, leaves, ferns, moss, and pine needles. If it’s windy, add some sticks and branches so that your vegetation doesn’t fly off.
2. Wicki-Up
The wicki-up looks almost exactly like a tipi, except covered in leaves. It’s a good shelter design to use if your area experiences a fair amount of rain. You will need dozens of poles for this one, with a few of them having forks at the ends. By locking a few of them together you can build a free-standing tripod that you can add the other poles around. Then add a vegetation layer over the poles, such as leaves, moss, and thick brush. If your wicki-up is large enough, you can even consider building a small fire inside, but you will need to be extra careful. Be sure there is an air-release hole at the top for proper ventilation.
3. Quinzhee
When you are caught out in a snowstorm, a quinzhee may be your very best bet for staying warm until conditions improve. The quinzhee closely resembles an igloo, yet it’s much easier to make.
- This one is probably the most dangerous shelter to make on this list because of the chances that it could collapse down on top of you. Yet there’s the freezing cold that could kill you as well.
- When you’re starting out, pile all of your gear, backpacks, and other supplies under a tarp. Then pile snow over them and pack it down. The packed down snow needs to be at least 2 feet thick around the dome.
- Then take about thirty to forty 12 inch branches and place them all around the dome for extra support.
Burrow your way inside the dome to retrieve your gear and supplies and then continue removing snow until you reach the base of each stick. Lastly, build a ventilation hole in the roof of your shelter about the size of your fist.
4. Wedge Tarp
The wedge tarp is another shelter that’s extremely easy to construct and will provide you with adequate protection when the winds and rain are constantly blowing in from one direction. When built correctly, two corners of your tarp will work as rain catches as well.
Getting started, you will need to stake down the two corners that are directly in the wind, not the corners that are furthest away from. Then take the center of the opposite end of your tarp and tie it to a nearby tree. Lastly, take the other two corners and tie them into the ground. This survival shelter will also supply you with water that you can harvest.
5. Tarp Tipi
A tarp tipi will work just as well as how the Native Americans once built their shelters. For this one, keep in mind that you are sizing the framework appropriately. After all, you want your tarp to be able to cover it completely when you are finished. Start off with a few long poles that you can lock together by tying a rope around.
Then add more long poles in a circle shape around the main support, and then wrap it around with your tarp. Lastly, make sure that your tarp is tied down well so that it doesn’t blow off during high winds.
I quote Wikipedia, “A tipi (/ˈtiːpiː/ TEE-pee), also tepee or teepee and often called a lodge in older English writings, is a tent, traditionally made of animal skins upon wooden poles. Modern tipis usually have a canvas covering. A tipi is distinguished from other conical tents by the smoke flaps at the top of the structure.”
6. A-Frame Tarp Shelter
This shelter will take you very little time, and it provides an adequate escape from the rain, and also the wind if you decide to keep it close to the ground. Simply hang a line of cordage between two trees and place your tarp over it.
Tie down each corner of your tarp to keep it securely in place. Just remember to build your bough bed beforehand for extra comfort at night.
7. Tarp Wing
If your main concern is for rain covering over a large area, the tarp wing may be the way for you to go. If it’s tied up high enough, it can be used to provide rain-protection over your campfire.
Tie two corners of your tarp up high, and the other two in lower positions, and you’re done. One drawback is that it can sound a lot like the sail on a boat if the winds are strong enough, something you won’t want to hear while you are sleeping.
Final Word
Knowing how to build a shelter for any environment is a skill that you and I need to have. This is especially true if you ever got lost, or had to evacuate quickly to a remote location. Do you know of any other survival shelters that are easy to make that would provide you with protection from the elements? What are some other ways to build a survival shelter that you have used in the past? May God Bless this world, Linda
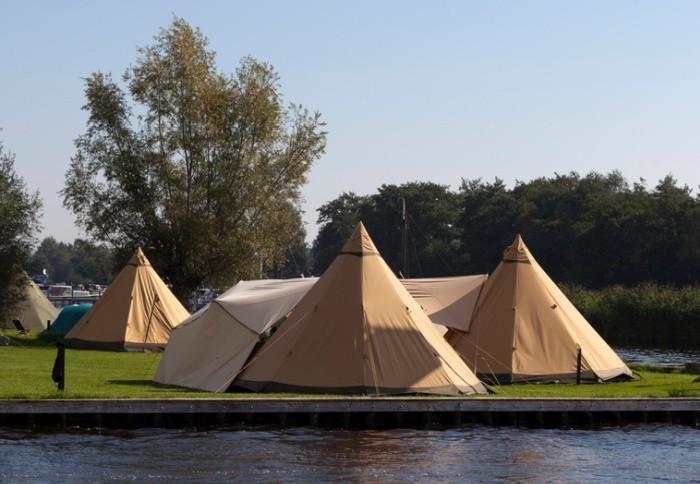
Copyright Images: Old Tent In The Forest Deposit photos_22162917_s-2019, Tipi Tents Deposit photos_16800339_s-2019


Great post today, Linda. We need to think about getting some kind of tent or something to make one.
Hi Deborah, I’m hoping I never need to use one, but better safe than sorry. Let’s hope we can just shelter in place. But we never know if we have to evacuate. Linda
Good Morning, Linda. I’m familiar with the different types of shelters you have mentioned above, however, this is merely a suggestion, it might be helpful to those who are not familiar with each one to have a photo of what they look like. Great article, by the way. Happy Easter to you and your family.P
Hi Pam, my husband said the same thing. I tried to find some photo stock and I couldn’t. Maybe I bet look again, thanks for your thoughts, I really appreciate it. Linda
I’ve made several of these. They all help with convection loss of heat. The second thing you’ve got to work on is the conduction loss of heat from the ground.
That actually needs to be done beforehand on the leaf hut as there’s just not much room to work in once it’s done. You make it small to keep in body heat.
I also use my pack to seal in the doorway.
Practice now so that knowledge is there
Hi Matt, I agree, we must practice so we know how to put it together, build it, or make it. Body heat is a biggy! Great comment, Linda
I’ve found a couple of YouTube channels that have some interesting shelter set ups: Survival Lilly and Wild Woman Bushcraft. I do disregard some of the things they do but other things are good to have at least a basic knowledge of. I do like the shelters they have both made although in a SHTF, I would likely start out with just my tent/tarps. After a period of time, I would try to strengthen my living conditions using some of what I have learned from these two channels.
Hi Leanne, I will check out those YouTubes, thank you. I agree we need basic knowledge and skills and start small and expand them. I love learning new things, big or small! Linda
Linda ~
Even though I do not have a place to actually put the techniques into action, once I have watched the videos, I have at least the basics so I can call on my memories to recreate (probably with a lot of failures before success!!).
Hi Leanne, I agree, our adrenal would kick in and our memories will pop out! Failures are learning curves, Linda
Hi Linda. I know this is a late post, but reading it today & re how to make an evergreen bough bed reminds me of a great fiction novel I read recently. It is called The Forest of Vanishing Stars by Kristin Harmel which is based on true stories of survival. Talk about constructing shelters…..and making bough beds!!!! Check it out. https://amzn.to/3Jx6FNp
Hi Janet, thank you for sharing the link!! I want to read this book!! Linda
I hope so. If you’re into WWII stories of how many people helped the Jews escape the hatred directed towards them from the German Nazis, you’ll love it. It was the manner of how they were hid & survived that surprised me in this story. Best book I’ve read in a long time & very eye-opening.
Hi Janet, I would love to read this, helping the Jews escape was a blessing. I’m going to see if they have it in audible. Thanks again, Linda
Janet, I bought the audible, yay!!!! Linda
Hi Linda! Tom Brown Jr. Wrote a lot of survival books. His field guides are the ones I like best. There is one for city and suburban survival, one for wilderness survival, and one for nature and survival for children. They all have debris hut building in them for a simple shelter that is warm if there are sticks and leaves around. His books seem to have gone up in price, but can be found used… Stay safe and God bless!
HI Jan, oh thank you, I will check out his books for sure. Love hearing about good books! Linda
Linda: it is easy to find photos online: Just paste this into your browser and all kinds of free photos come up “photos of a wicki-up shelter”. Just replace the wicki-up with the names of the shelter. You must use the shelter at the end or you get buildings. Bushcraft seems to have a lot of the photos. I have used this to paste photos into my doc of this post. (I ALWAYS include the link, never share and use only for my own personal use).
Hi Carol, I will check that out. I have to pay for my images (copyrighted) but I will check those brands out, thank you, Linda