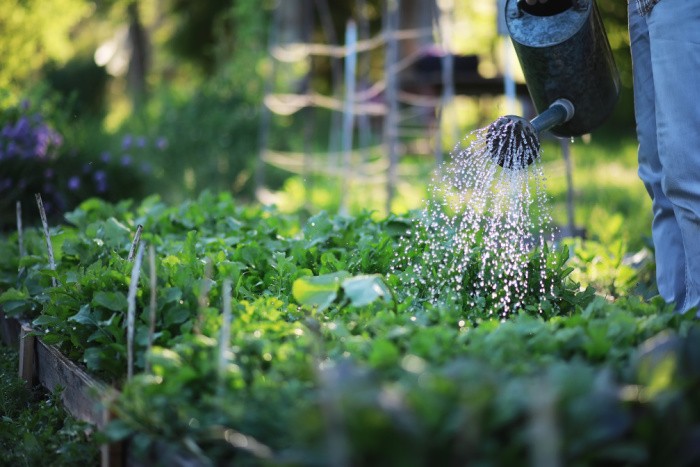
10 Watering Hacks for Your Garden
This post may contain affiliate links. We may earn a commission if you purchase via our links. See the disclosure page for more info.

Here are 10 watering hacks for your garden today. Are you an individual who loves to garden but lives in a particular region that experiences frequent droughts? Or perhaps you’re just looking for practical ways to cut back on watering so frequently? Whatever your reason for conserving water, you’ll be excited to know that there are several different methods of water conservation that you can try that actually work. They can save you money, too! Keep reading to discover 10 watering hacks for your garden that will help you get through the summer months using less H2o.
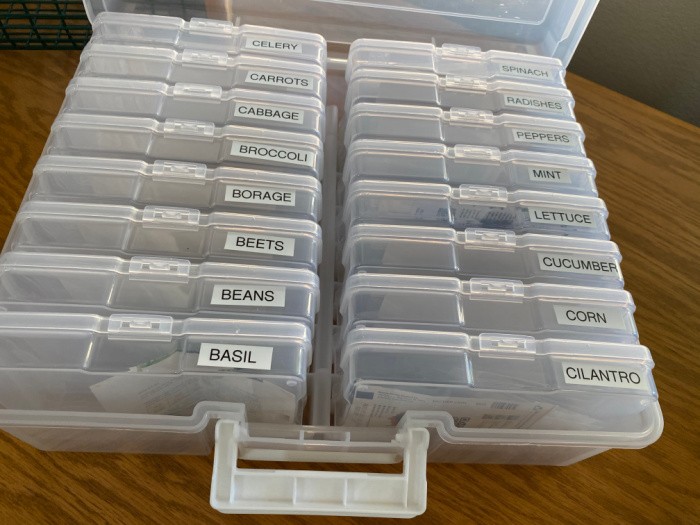
This is where I buy my garden seeds: SeedsNow. Please learn to garden this year if you haven’t before. We must produce some of our own food, however small it may be. How I store my garden seeds: Plastic Photo Container and Label Maker
10 Watering Hacks for Your Garden
1. Use Nothing but Good Soil
Does your garden soil mostly consist of clay, sand, or rocks? That can be really unfortunate, but I’ve got good news! Adding several inches of nutrient-rich garden soil to your pre-existing soil can make a huge difference in how often you need to water your garden. That’s because it contains organic matter that effectively retains more water while improving drainage. Your plant’s roots will also be able to grow much deeper where that moisture may be. 10 Tips to Improve Your Garden Soil
2. Keep the Weeds Out
Weeds can be such a nuisance! And if you don’t stay on top of them, they can be one of the main reasons why you’re having to water so often. That’s right! They’ll end up stealing water away from the plants and vegetables that you’ve worked so hard to grow. Discourage their growth by laying landscaping fabric, mulch, newspapers, or cardboard, along with using a hoe and pulling weeds by hand. Can I Eat Chickweed: Edible Weeds
3. Lay Down Mulch – Great Watering Hack!
On an extremely hot day, your plants can miss out on up to 70% of the water you give them because it ends up evaporating quickly on top of and beneath the soil. But that’s not the case when you’ve taken the time to lay a few inches of mulch down around each of your plants.
Mulch actually helps your garden conserve water in a number of different ways, including keeping weeds at bay, cooling the soil temperature, while also improving your garden’s soil as over time it blends with the natural soil in your yard. It’s up to you whether you go with straw, bark chips, grass clippings, leaves, or even newspaper. This helpful watering hack needs to be done every year. Container Gardens: Everything You Need To Know
4. Construct Swales in Your Garden
For those of you that have a garden situated on a hillside or slope, building a swale (a shallow channel with gently slowing sides) around it would be a great option for you. Whenever it rains, the water runoff will gather behind your garden and sink down into the soil where your plants will then be able to benefit from it a few days later. It’s a permaculture technique that’s been around for a long time and is proven to work. Be sure to check out the blue link above to learn more.
5. Consider Self-Watering Containers
Whether you don’t have the time for a huge garden, or you simply lack the space, container gardens are another water-efficient solution you may prefer. As the soil in your containers start to dry up, the extra moisture that’s recessed away towards the bottom of the container will then soak up into the soil and reach your plants. The Best 5-Gallon Water Jugs
6. Use a Soaker Hose
You’ll lose very little water to evaporation when using a soaker hose, and even more so if you hook it up to a timer. You have the option of buying a commercial version or making your own by drilling tiny holes into an ordinary garden hose. Just be aware that going with the do-it-yourself approach will take up a fair amount of time. 50 Items You Need In Order To Barter
7. Drip Irrigation
Proven to be over 90% effective, drip irrigation does an excellent job of helping gardeners preserve water. All you need are long tubes that have release points close to your plants. When certain plants no longer need water, simply plug the holes to stop the water flow. The only downside is, your garden’s layout may look different the following year, and it can sometimes be difficult to reconfigure emitters and piping.
We had this system in our raised gardens in St. George, Utah. They worked great since we could put the emitters or small sprayers close to the base of each plant. Since they were part of the raised garden boxes that were all 4′ by 4′, moving the piping was easy.
8. Use an Olla
Another irrigation hack that Native Americans used is the olla. If you don’t know what one is, it’s a wide clay pot that has a narrow neck to it. You can bury several of them down in the soil next to each of your plants with the tops just reaching out of the ground. You fill them with water once or twice a week and your plant’s roots will suck up the water that goes into the soil.
9. Don’t Waste Cooking Water
Instead of always dumping your boiled vegetable water down the sink, why not use it to help water your garden or plant containers? This is not only resourceful, but you’re providing your garden plants with minerals and other nutrients. Just wait until it’s cooled off before you use it. That’s one way to not waste water! This could be effective for a small garden or a few containers.
10. Make Sure Your Irrigation Equipment is Top-notch
A leaking hose or spigot may seem like a very small problem to have, but in just a month’s time, you may have wasted thousands of gallons of water, depending on the size of the leak. And that’s no exaggeration! Be sure that you keep an eye out for leaks and that you perform regular maintenance on your irrigation equipment when necessary. This includes checking timers, replacing broken sprinkler heads, fixing emitters, and making sure that your water pressure isn’t too high or too low.
These garden watering hacks can make a huge difference in how often you need to water your plants and vegetables in your garden. You’ll even be able to slip away on a vacation without as many worries when using some of these tips. Do you know of any other watering hacks that your fellow gardeners would benefit from knowing?
Final Word
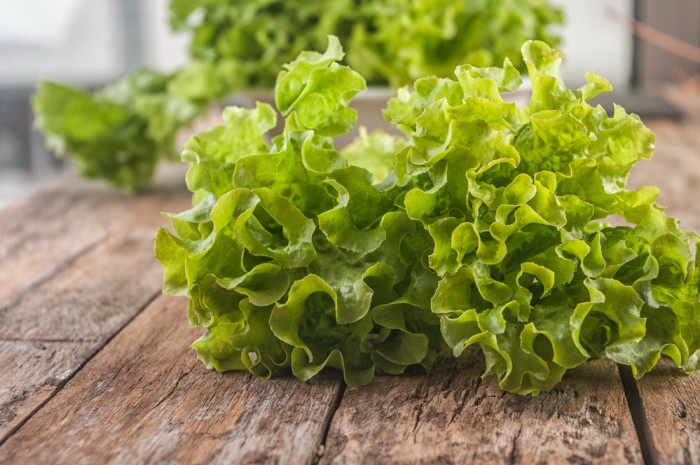
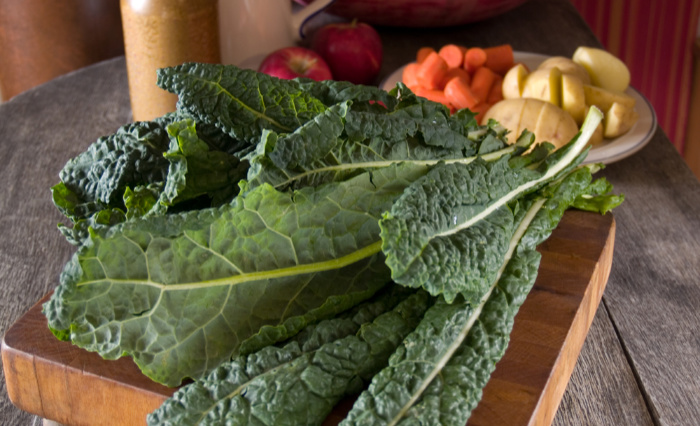
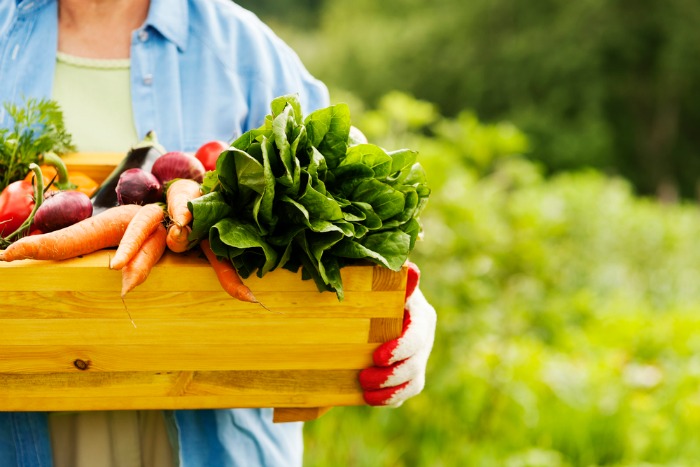
I hope you enjoyed my 10 watering hacks for your garden today. Now, more than ever we MUST grow some of our food. If you have a Farmer’s Market nearby, you are truly blessed. I realize some of us don’t have the ground or the sunshine to grow everything we’d like. That’s okay, grow some lettuce in a ceramic pot, beans on a vine, tomatoes in a patio hanging pot, or potatoes in a small bed or container. You can still grow something for your family.
Last year I purchased a couple of AeroGarden units so I could grow some lettuce in my house during the winter months. I was pleased with the results, and so was Mark as we enjoyed fresh lettuce all winter long.
It’s the best thing I have ever purchased for growing some of my food. AeroGarden Please sign up for their newsletter so you know when they have sales. Let’s all get the whole family involved with growing a beautiful garden this year. The fresh food is so delicious, and working together outside is so fun. May God Bless this world, Linda
Copyright Images: Man Farmer AdobeStock_314255016 alexkich


Hi Linda, great info as always. Our area had severe drought conditions last year and there were watering restrictions. I had many new pants that I wanted to get established so I needed to water. I collected the water from the dehumidifier in buckets as I emptied it and used that for the garden. I actually think it helped them grow better, but could be wrong about that. Using that method I could water whenever needed as I wasn’t using the city water. I also planted plants that are more drought tolerant such as sedum, and hope they will come back this year to lessen the need for watering. It’s a jungle out ther, to be sure, must do all we can to provide for our families, and the bees. Take good care.
Hi Rita, what a great idea about the dehumidifier water! I love it! We have a drought in Utah as well. We need more snow. Great comment, Linda
Great article Linda! As a master gardener I would add please get quality Rainbird drip irrigation supplies from a plumbing supply company – not the junk at Home Depot, Lowes, etc. It won’t hold up or work well at all and you will hate drip irrigation. You can easily learn how to install it and customize the system – YouTube has tons of videos. I have a timer for my system and also a valve I easily turn for each grow box to turn off the water in that box when it’s not in use – easy! I just lift up the lines to plant or rototill then set them back down on top of the box securing them with some prongs you buy. The big box stores drip lines plug easily but not Rainbird and it is easy to flush the lines at the beginning of the season.
I would also strongly recommend NOT using landscape fabric unless it’s somewhere you never want anything to grow. Consider a pre-emergent if it’s temporary. Nature will put down leaves, dirt, etc. and in just a few years you will have several inches of new soil on the top. WEEDS start growing in this new top layer and even attach themselves to the fabric . . . but you can’t grow plants you want without a big headache. It is very difficult to dig through the fabric to plant anything. Once you have punctured that fabric to plant something then it now has an avenue for weeds there too.
Best thing for weeds is to stay on top of them – don’t let them get big so they are easy to hoe. A scuttle style hoe will easily get rid of small weeds quickly. It’s also easier to weed good soil. I can grab a small weed and pull it with roots 6″ long out in my garden boxes with good loose loamy soil full of compost. Hope this is helpful – happy gardening!
Hi Kay, thank you for your advice on where to get the “good” equipment for our gardens. We need to produce as much food as we can for ourselves. I love your comment. Linda
Is it alright to use Pine nettles around my garden plants as a mulch to save water.
Hi George, pine needles will take longer to decompose, but they are a great mulch full of nutrients. I would use them. Linda
Pine needles are fine–as Linda said, they do take a long while to break down, but are easy to gently scoop aside if you need to get at the bare soil. Some sources will tell you they will acidify the soil, but apparently this isn’t true. (And they are *so* easy to rake up and bag for when you need them!)
Linda,
The type of homemade soaker hose you describe will actually be more like drip irrigation but without the emitters controlling flow that most drip irrigation hoses come with. What you would end up with is very irregular irrigation and your plants won’t like that.
I recommend only using actual commercial soaker hose. My raised beds are 4’ wide and 16’ long. I build a manifold consisting of five or six 16’ runs linked at each end with elbows and tees. This gives me very uniform watering. I save even more water by laying a bed of mulch over the soaker hose. I’m in the Mohave desert and this method is the best I’ve found.
Good stuff
Thanks Matt,
I’m originally from SE KS and there it rained enough we didn’t have to worry about watering the gardens. I really miss that rain–just not the tornadoes.
Yeah I’m on the western side of Oklahoma and we are pretty dry.
Hi Matt, the weather here has left us in a dought. Linda
Hi Ray, I bet you do not miss the tornadoes!!! Linda
Hi Matt, thank you my friend, Linda
Hi Ray, thank you I will go look for one to replace that one. I’m in the middle of a build-a-home stage, I had a drip system on timers in Southern Utah. Thank you, Linda
Sorry to hear that Matt. We get less than 10″ per year here–and we haven’t hit that in several years. That lack of rainfall is sort of a blessing in disguise since our ground here is rock so when we get a hard rain we get flash flooding because it all runs off.
When I was growing up, our old dug well would be touchy in a dry summer–we often watered the garden with bathing water, cooking water (which contains good nutrients, BTW!), water left in the animals’ buckets, and of course rain-water collected off the roof! We *never* poured water away those years.
My rain-water barrel is at the corner of the house right near my garden–so I can scoop up a bucket or a watering can and only walk a few steps.
Similar idea to the olla–save plastic bottles (milk, soda, etc.) and their caps. Use a needle or small awl to punch a few small holes in the bottom of the bottle, bury it several inches into the soil, fill it with water, and cap it. The cap helps slow the water draining into the soil–depending on the size of bottle, and size of holes, it can last several days. Just use a small nozzle or watering pot to refill the bottle–doesn’t have to be removed from the soil.
And if you do water, be sure to soak the soil deeply–otherwise, shallow watering will encourage your plants to only develop shallow roots, making them even more susceptible to drying out.
Linda–many thanks for the tip on the photo cases for seeds, which you’ve posted several times before! I finally got some cases this winter–and I actually know exactly what I’ve got this year!
Hi Rhonda, great idea on the plastic bottles with holes!! I love it! Great ideas for all of us. I went through so many containers for seeds and this one is the best, YES, we can see what we have and where we need to replenish them. I’m glad you got one!! Linda
Many good ideas, most of which I’ve used at some time or another. One trick I seldom see mentioned anywhere is Sunken Beds. Yes, these are work but can be made somewhat permanent. I happen to live with ‘sugar sand’ so called because when it gets real dry on top inch, it becomes very fine, like powdered sugar. The first few inches drain very well which actually causes roots to grow deep. That’s a good thing! Yes, dig down a few inches and the sand is moist. Compost placed on top easily disburses nutrients. So, why Sunken Beds? Sand also can get very hot so can burn the stems. Lol, and remember sand drains easily! What I did was to dig long rows about 8 inches down, put either old boards or sturdy cardboard on the sides. Pretty similar to raised beds. Used the soil removed to build up the walkways between rows. Then put cardboard or landscape fabric on walkways. In the beds I put newspapers down, then a few inches of compost and black dirt, just enough to plant seeds or seedlings. As these grow, I keep adding a bit of sand (I got a lot of this,lol) and compost. I keep these beds at least 2 inches down from the top of the sides. The rationale for the built up sides is that rain will run into the sunken beds (tender plants will also have protection from strong winds). When a person must water from a hose, the water will stay between the walls giving the plants time to absorb the moisture. It’s much like raised beds but in a dry climate or drought, every drop counts. The first time I did this I had read in the Farmers Almanac that my area was to get a long drought. Yep, we did: no rain for 11 weeks! Basically June thru August, our primary growing time. My sunken beds saved my harvest. The plants I’d just put in the ground faltered, yielded little. The one raised bed practically burned up. I worried about my well so used my dish water, bath and shower water, and Any food/drink leftover liquids to water my sunken beds. A lot of work! But, I had the only garden in my area that produced heavily. Oh, we had 95-100 degree temps for almost 5 weeks during this time. I continued to do half my garden in sunken beds, half in the ground. Giggle, I always thought raised beds would be easier for weeding but even weeds dried up that year. Just something for folks to think about. ✌️.
Hi Wendy, thanks for the information on sunken gardens, I haven’t heard about those. 11 weeks no rain, ouch! The awesome thing is your garden was the only one that produced! Gotta love that! Linda