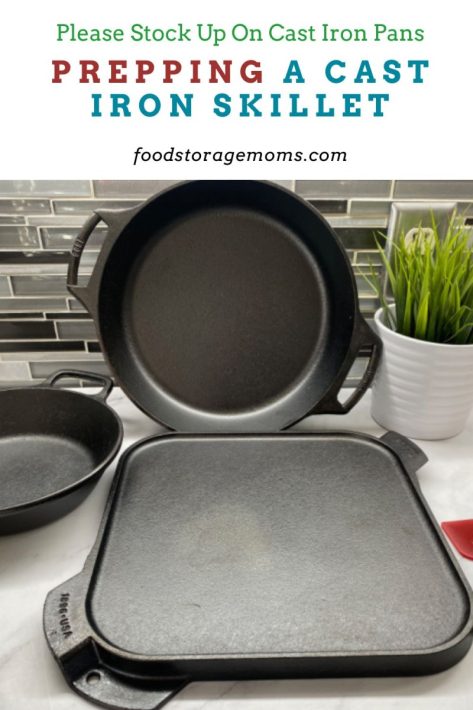
Prepping a Cast Iron Skillet

I don’t know about you, but I absolutely love cooking with cast iron. In fact, I use my favorite skillet on a regular basis. Besides being extremely durable and versatile, cast iron is known to handle extreme heat and help blend wonderful and delicious food flavors into cooked meals that no other frying pan can seem to do.
But before you ever use one for the first time, it’s very important that you prep your cast iron beforehand. I love making recipes in my cast iron skillet like How to Make the Best Skillet Brownies in Cast Iron and How To Make Scones Using A Cast Iron Skillet! I’m always anxious to get my new cast iron products ready to go as soon as I get them home.
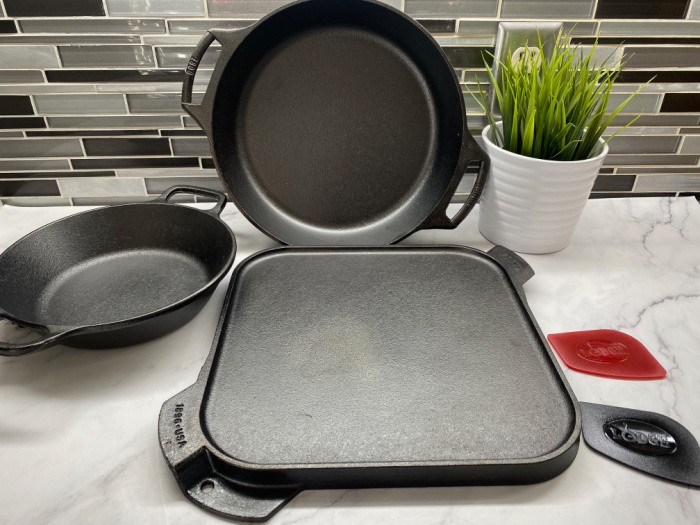
Seasoning a cast iron skillet doesn’t require a whole lot of time or effort on your part, so don’t make the careless mistake of cooking with your pan before doing so. There are a number of reasons why you should season your cast iron products that I’ll share with you in a moment. Here’s how to properly prep and season your new cast iron pan before you ever go to use it for cooking. This is one of my favorite pieces, Lodge 12-Inch Square Griddle
What Does Seasoning Mean for a Cast Iron Pan?
Seasoning a cast iron skillet involves adding a hard non-stick coating to it. Not only does this add extra delicious flavor to some of your favorite dishes, but seasoning your cast iron skillet will also help prevent it from rusting.
While most cast iron skillets come pre-seasoned these days, at some point, you’ll need to reapply a surface coating to continue getting the best results.
How to Properly Season a Previously Used Cast Iron Skillet
Over a period of time, the seasoning in your cast iron skillet will start to erode. You’ll know when it’s time to apply a new layer of seasoning when you notice the skillet’s surface has dry and patchy spots. It could be you’ve purchased your skillet from a thrift or second-hand store or received it as a hand-me-down. These steps will make sure the skillet is ready for use.
Before starting the seasoning steps, make sure the skillet is clean and free from any residue. Using soapy water and a stiff brush, clean the surface of the pan. Rinse it off and dry it making sure you’ve removed any moisture that might conflict with the next steps.
When it gets to that point, simply brush a thin layer of quality neutral cooking oil and then heat it until the oil has bonded to the surface of the pan. Keep reading to discover the correct and easy way to season your cast iron skillet so that the bond process works as it should.
Step One: Rub a Thin Layer of Neutral Oil in Your Pan
The first step to seasoning your cast iron skillet is rubbing a thin layer of neutral oil on the surface. Yes, a thin coat of oil is all you need!
Avoid using oils with strong flavors, as they can affect the taste of the food you cook in your pan. You can use almost any type of oil for this purpose, such as sunflower, canola, or vegetable oil. My go-to choice has always been vegetable oil for the best results.
Also, make sure that you don’t use too much oil because this will cause your pan to become sticky. All you need is a thin coat rubbed in without any excess oil. When you’re finished, the pan should feel practically dry when you touch it.
Step Two: Heat Your Pan Over Medium High Heat
Next, heat your oven to 350 degrees Fahrenheit and place your cast iron skillet on the top rack for one hour. I’d also encourage you to add foil to the rack below to catch any oil drips that may happen, and that’s why we don’t heat the pan on the bottom rack.
Some people like to prep and season their cast iron skillets over the stove, which you can certainly do. But this method has the potential for creating hot and cool spots that don’t allow the seasoning in your pan to set and bond evenly.
Step Three: Turn Off the Oven
Once the hour is up, go ahead and turn off your oven. Allow your skillet to cool off by leaving it in the oven before touching it. Avoid the urge to remove your cast iron from the oven until it has fully cooled off.
Step Four: Repeat These Steps for an Unseasoned Pan
If you’re dealing with a brand-new cast iron that’s never been seasoned before, you’ll want to repeat these steps that I’ve mentioned above several times. After all, a good seasoning is made by adding several thin layers to your skillet, not just one.
You’ll know when you’ve accomplished what you’ve set out to do when your pan develops a coating that has a smooth finish. Remember that a thin layer of oil works just fine, you don’t have to overdo it and possibly create a smokey environment in your kitchen.
Season While You Cook
Another great way to add more of a flavorful coating of seasoning to your cast iron is by cooking foods that contain a lot of fat or oil in them (bacon grease). The perfect example of this would be cooking bacon or frying chicken in your skillet using cooking oil or butter.
This is a natural way to preserve the seasoning that you’ve already worked on creating. Seasoned cast iron skillets are the best, so don’t be afraid to season while you cook! Don’t forget that you can also use your cast iron cookware to bake, which will help season the inside of the cookware even more.
Foods to Avoid Cooking in Your Cast Iron Skillet
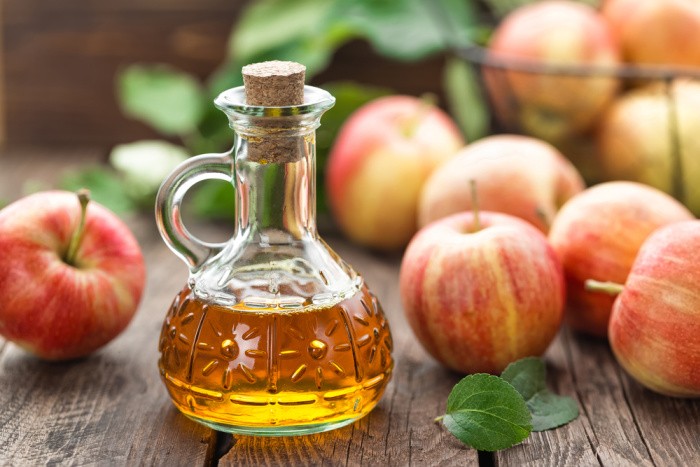
While a cast iron skillet can fry and sear almost anything, there are certain foods that you don’t want to cook in it. For example, I’d recommend avoiding acidic foods that contain vinegar, citrus, tomatoes, and tomato-based sauces.
That’s because the acid can cause the seasoning to wear off much more quickly, which isn’t good for your pan. You may also notice that your food has more of a metallic flavor to it if you decide to go ahead and cook foods that are higher in acidity.
If you’re concerned about maintaining your cast iron skillet’s seasoning and preventing damage to it, simply remember to avoid cooking with very high heat on an already hot pan. Also, be sure to clean your skillet after each use, while still allowing it enough time to cool down before storing it away.
How do you prepare a cast iron skillet before cooking?
The first step in preparing a well-seasoned skillet for cooking is to make sure that it is properly cleaned and seasoned as mentioned in the steps above. This will ensure that the food you cook in it retains its flavor and that the skillet itself lasts longer. You can also buy cast iron seasoning to help move the seasoning part along.
Do you have to prep a cast iron skillet?
There is no one right answer to this question, as it depends on the type of cooking you are planning to do with your cast iron skillet. Some people recommend scrubbing the pan thoroughly with hot water and soap before using it for the first time, while others say that it is best to simply wipe it down and season it before using it. Ultimately, you may have to experiment with your own cast iron skillet to find out what works best for you.
Do you have to prep a cast iron skillet?
There are a few different methods you can use to prep your cast iron skillet before cooking. These include scrubbing the pan thoroughly using hot water and mild dish soap, seasoning it with oil or fat (coconut oil or canola oil), or simply wiping it down with a damp clean rag or a paper towel.
Can you use metal utensils on cast iron?
Cast iron (especially Lodge cast iron) is a very sturdy metal. This means you can put it through a lot. Feel free to use metal utensils on the cooking surface of the pan because they will survive!
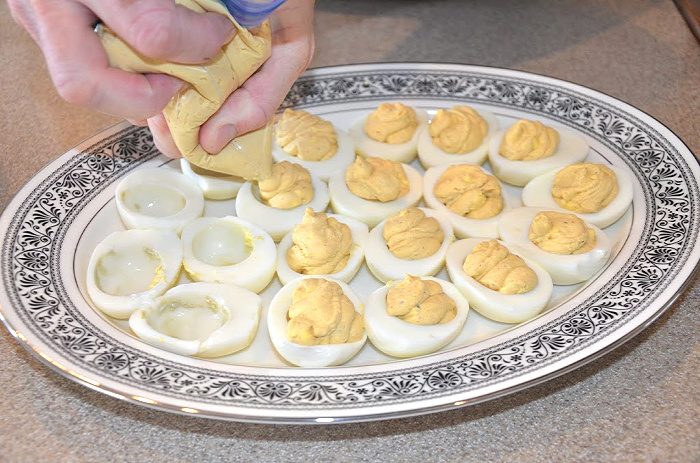
You can purchase a pan scraper for the cast iron skillet so that you aren’t overdoing it when it comes to metal against metal. You can see the black and red pan scrapers in the picture.
More Cast Iron Tips
Final Word
Prepping and seasoning a cast iron skillet is so simple and requires very little effort. So if you want to get the most out of your cast iron skillet and ensure it lasts for many years to come, be sure to follow these simple steps when seasoning it!
You can also be sure that your food will taste better than ever before! What do you love most about your cast iron skillet and what other tips would you be willing to share with a first-time cast iron skillet user? May God Bless this World, Linda


Excellent info Linda! We have lots of cast iron cookware – fry pans, griddles, Dutch ovens, etc. They are so well seasoned nothing sticks to them. Years ago my husband found a skillet while out hunting! He brought it home (I call him a crow, he’s always bringing things home!). The cast iron was very rusty but he cleaned it up, seasoned it and now it’s his favorite fry pan!
Who drops a cast iron fry pan in the woods??? LOL.
Hi Beth, LOL! I was thinking the same thing, who drops a cast iron fry pan in the woods??? That was a great find! I love this! Linda
Linda,
I completely agree with your cast iron advice. I love cast iron. Jane doesn’t use it because it’s too heavy and awkward for her to cook with, but I use is all the time. Pancakes, fried chicken, fried potatoes, sautéed onions and squash, the list is practically endless–except for not cooking any acidic foods of course.
Hi Ray, I have friends who gave away their “heavy” cast iron because it’s too heavy for them!! YIKES!! Oh my gosh, whoever got them at the thrift stores scored big time! I keep my 12-inch skillet (without handles) on my stove all the time. It’s heavy but it makes everything tase better as you said!! LInda
Well, I don’t think my cast iron kettle will fit in the oven. LOL!! It is a family heirloom hanging kettle of around twenty gallons. I need to refurbish it as it has been idle for many years. First order of business is to weld up a stand to hold it over a large propane burner or campfire. Next order will be to clean out the rust with wire brush and elbow grease and treat with phosphoric acid if needed. The phosphoric acid is a last ditch effort which converts the iron oxide (rust), which is active, to phosphoric oxide which is inactive. Then will come the delicate job of seasoning the kettle. I want to get it ready for a SHTF event in case we need to cook beans for the entire neighborhood. LOL!!
Hi Harry, oh my gosh, a 20-gallon cast iron pot, would be huge! What a blessing for the crowd when you serve those fabulous Texas beans! I love it! Linda
Linda:
My husband taught me a way that makes the pans look like new. I am always picking up cast iron pans from yard sales and resale shops and some are really nasty. All he does is takes and digs a hole in the driveway and starts a fire. He then puts the pans on top of the fire and puts a old car hood on top and lets the fire go all night. I know when you do that it makes them look scuzzy but you take a wire brush and brush all the that scuzzy stuff off bring them into the kitchen and wash them and then heat up the oven and brush bacon fat on them and heat them in the oven for about a hour and they come out looking like new. When they cool wipe any excess oil off them and put them up. I have pans that are over 75 years old and they looked totally worthless. But doing them this way brings them back to life.
Hi Jackie, oh my gosh, this is awesome to learn about how to refurbish cast iron. I love it! Linda
I recall the really huge cast iron skillet my mother had – unfortunately it was destroyed in a house fire. And for those who say it could be redeemed, it dropped into our basement when the house collapsed and it was cracked. Dad tried to salvage it but with the crack it couldn’t be. Anyway, I remember at Christmas time, mom always used this skillet to make her peanut brittle. The skillet was so well seasoned that the candy just slid out! So how my mom kept is seasoned was by cooking bacon in it and leaving the grease in the pan until it was fully cooled. Then she scraped out the grease, wiped the pan down and put it on the burner to heat up; she then continued to wipe it for a few minutes while it was hot. After it cooled completely, one final wipe down and it was ready for whatever she was going to cook again.
I gave all my big cast iron to my daughter. It was getting too heavy for me; I no longer cooked in the quantities that the pans could contain. I now have several smaller pieces: 8 inch skillet, 12 inch griddle, 2 5 inch casseroles; a mini wok. Those are the ones I use all the time. I also have 3 camp dutch ovens: 8 inch, 10 inch deep and a 12 inch deep.
Hi Leanne, what a shame it was to have a fire and to lose I guess everything. So sad. The cracked cast iron skillet is not good! I love hearing about the peanut bottle sliding out of the cast iron pan, I guess the bacon is the secret!! Love this! Now I’m going to look for a mini wok! WOW! That would be awesome! Linda
Yes, Linda, it was pretty sad to lose everything. But, my dad’s home was in the path of a raging forest fire! He was able to save the things that were important to him.
The mini wok I have was a gift from my nephew. He does a lot of outdoor cooking and was looking for a table to set near his grill to set hot pots on. I just happened to have one that I was not using – my ex gave the table to me but because I am so short, it was really too tall for me. So, my nephew has a large cast iron wok and I said it would be nice to have a mini wok and I would have to look for one. A few days later, one came in the mail for me from him!! It is a Lodge pre-seasoned (but between you and me, not seasoned well enough!!)
Hi Leanne, I’m glad your dad was able to save the most important items! A forest fire is scary! Your nephew sent one to you, is that the sweetest thing ever?? I love that!! I agree even though they say “seasoned” it’s barely seasoned! LOL! Linda
Yep, if you ever watched the old series “Rawhide” it is like the kettle that their cook, Wishbone, would use to make a huge kettle of beans or stew or whatever. You would have seen him dipping the results out and serving it to the cattle drovers with a big ladle. Of course, they would gripe about his cooking even though they did not refuse the food. LOL!
Hi Harry, oh I remember that show and him standing by a wagon or a small wood structure or something. That pot is what we will all need to feed those who didn’t prepare when they come knocking. LOL! Linda
I love cooking and baking in cast iron. I have several pans and skillets and my favorite is my great-grandmother’s Wagner skillet. It is as smooth as silk, and my mother gave it to me when I left home because she didn’t like to cook and didn’t want it!
Hi Paula, oh a Wagner skillet from your great-grandmother is a treasure!! You are so lucky to have that one!! Linda