Lemon Tree: Everything You Need To Know
This post may contain affiliate links. We may earn a commission if you purchase via our links. See the disclosure page for more info.

Have you always wanted a lemon tree? Growing up in Las Vegas, NV we had neighbors who had their own citrus trees growing in their yards. Some evenings we’d sit around one of the trees and munch on the fruit. I thought to myself that someday I’d have one of those trees in my yard. Since Mark and I have spent most of our marriage together living in northern Utah that dream wasn’t possible, it’s much too cold in the winter.
Now we live in southern Utah where the climate is much more suitable for citrus trees. Since I’ve had to do my own research regarding the proper planting and care of citrus trees I felt it would be appropriate to do this post today, Lemon Tree: Everything You Need to Know.
I had heard good things about the folks at Stark Bro’s, a group who sells their nursery products online. They have a wide variety of items available for sale, including citrus trees. Based on my goal to have a smaller tree I could bring inside during the winter months, I decided to buy a Meyer Lemon Plant from Stark Bro’s and they shipped it right to my door.
This particular plant is more of a dwarf version that I could put on my front entry area close to a hose bib for proper watering. It’s also close to the front door, so moving it inside late this fall will be an easy step.
Lemon Tree: Everything You Need To Know
Stark Bro’s – Introduction
I had Mark spend some time getting acquainted with the Stark Bro’s website so we could learn how to plant and care for our Meyer Lemon Plant. They had a whole section dealing with citrus trees that we found to be very informative and helpful. Stark Bro’s Website
There were a number of subsections outlining how to start the planting process all the way through the harvest phase. Within each subsection the important steps were detailed so you have the best chance to grow a successful and fruitful tree.
Listed below are the various sections so you can get an overview of what is ahead when starting your citrus tree growing journey:
- Acclimate
- Location
- Planting
- Soil Preparation
- Fertilizing
- Pest and Disease Control
- Pruning
- Spraying
- Watering
- Harvesting
Lemon Tree Tips
We don’t have room in this post to cover all the critical steps required to grow and nurture your citrus tree, but I did want to address the approach taken to grow the tree in a container, since that’s what I’m doing. The Stark Bro’s website outlines the following steps to be taken for container growth:
- Transfer your new plant to a 6-10 inch pot within a few days of arrival.
- Fill the container with potting soil loosely (do not tamp) to 3″ below the rim.
- Gently loosen the root system from the soil ball, so roots don’t encircle the soil ball.
- Place the plant so the root ball is even with the soil surface.
- Fill the container with the remaining soil.
- Water thoroughly.
The website goes on to say: By your tree’s second summer you can plant it in a larger container, usually 16-20 inches in diameter. They have a shallow root system, so a wide diameter container is far better than a deep one. This can be the tree’s permanent home.
These pots can be moved as you wish. Just remember not to make a major change in light exposure all at once, but in stages. Refreshing the soil every one to three years will provide soil nutrients and encourage healthier growth.
In case you missed this post, Lemons: Everything You Need to Know
How To Plant A Lemon Tree
Step One
Mark and I found at Home Depot what we thought was the perfect container. It is 16″ in diameter with a 15″ usable opening. It stands 15″ tall from the ground to the top.
One of the things we liked about it was the base that would catch any excess water that might drain from the pre-drilled holes in the bottom. It also was a size that wouldn’t overwhelm our small sitting area outside our front door where we have a small table and two chairs.

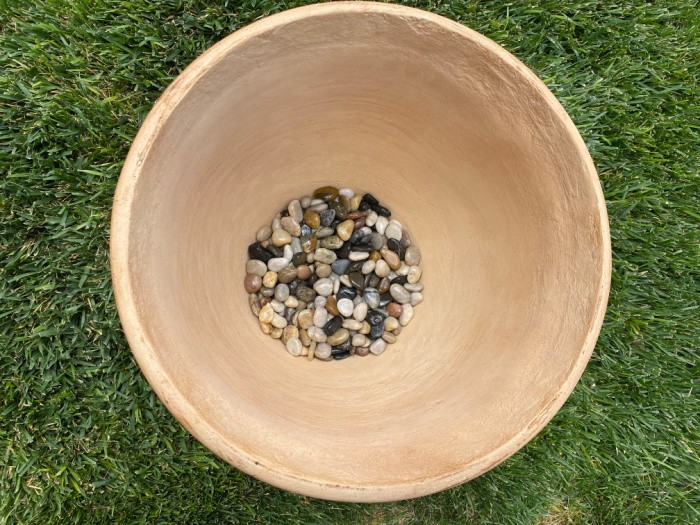
Step Two
We had some leftover small rocks from a previous project that we placed on the inside of the container around the bottom. We’ve learned that planters with drainage holes often get plugged as the soil settles and the water seeks an outlet.
The rocks keep the holes clear so any excess water drains out as designed. These are the rocks I purchased, but any type of small rocks or marble will work. GASPRO River Rock Most craft stores sell many types of pebbles or rocks.
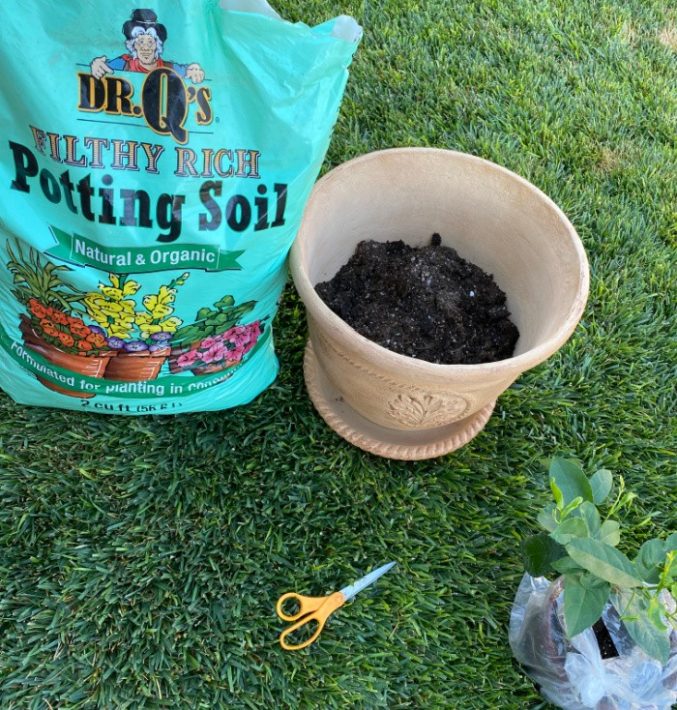
Step Three
We have grown to love the products with the Dr. Q’s name. You can see the picture below of their “Filthy Rich Potting Soil.” We have a number of pots in our backyard where we’ve planted tomatoes, potatoes, flowers, and other plants where we’ve successfully used this soil product. As you can see, we put a few inches of the potting soil as a base for the tree.
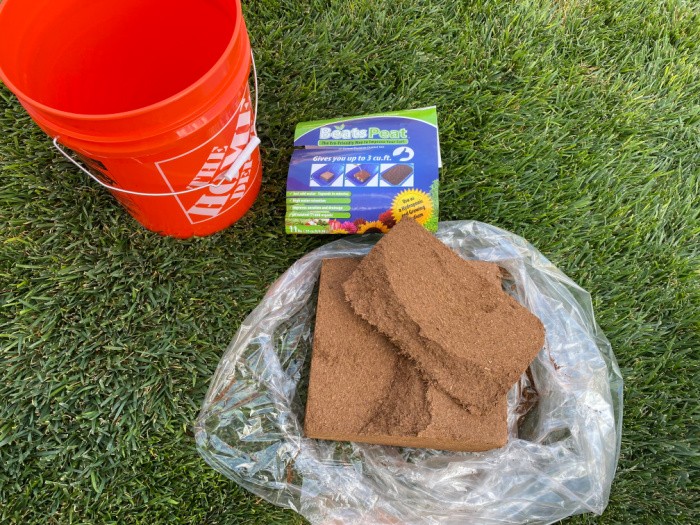
Step Four
I had heard about a great product that can be used in plant containers that helps keep the soil moist, and thus requires less watering efforts. The product is called Beats Peat and is offered by the company, PlantBest.
The Beats Peat product is actually made from what they call coconut coir, the all-natural ground-up husks from coconuts. If you visit PlantBest’s website you can read about all the environmental and eco-friendly attributes of the product vs using actual peat moss, it’s amazing. Beats Peat PlantBest
You can see the dried composition of the Beats Peat product when taken out of the package. It comes about the same size as two loaves of bread laid side by side. I broke off a piece so I could add it to the container soil.
Step Five
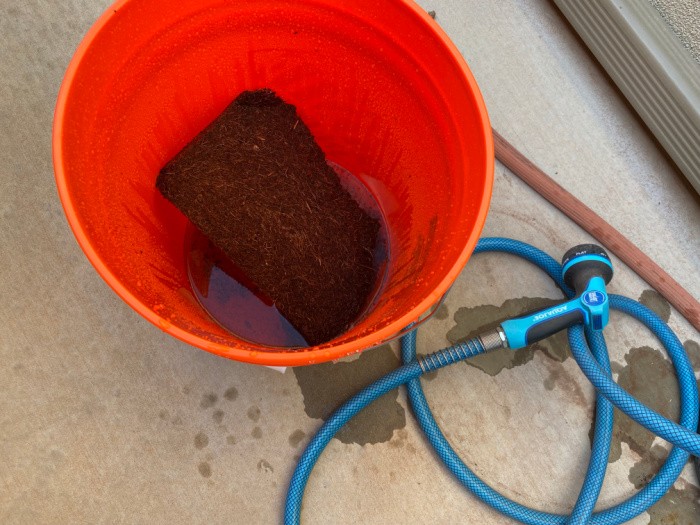
We put the Beats Peat in a separate bucket so we could moisten and soften it. I was surprised how it expanded as it captured the water. The original package says if you added water to the whole package it would expand to a full 3 cubic feet! I LOVE this stuff!
Step Six
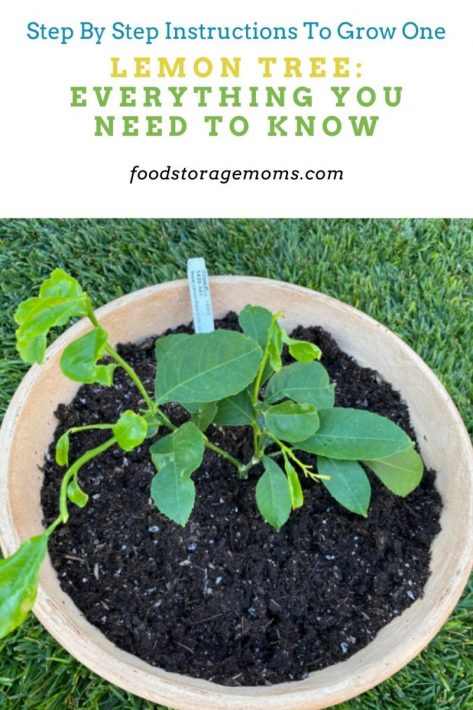
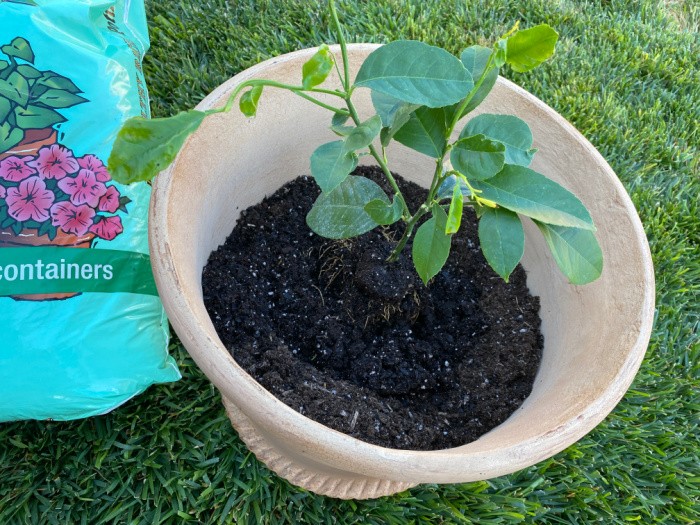
I took the Meyer Lemon Plant from its small container, broke up the soil ball, and placed the plant in the container on top of Dr. Q’s potting soil. I was careful not to break or otherwise damage the roots.
Step Seven
After placing the lemon tree on Dr. Q’s soil, we added the Peats Best to help keep the tree from drying out. We then took more of Dr. Q’s potting soil and filled the container to near the top, making sure we didn’t compact the soil too much so it could collect and then properly drain the water each time we watered the plant.
Step Eight
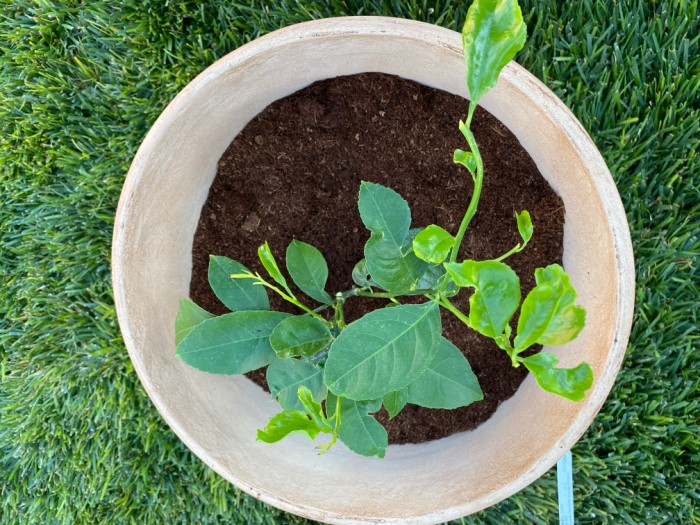
We noticed there were a few small branches on the Meyer Lemon Plant that appeared to be weak or damaged. I took a scissor and cut those off, allowing all the healthy branches to expand and grow. Note the small white tag in the container.
I usually leave these identifying tags so I won’t forget what was planted. Sometimes I’ll put the date I planted the plant so I can track the growth and development cycles.
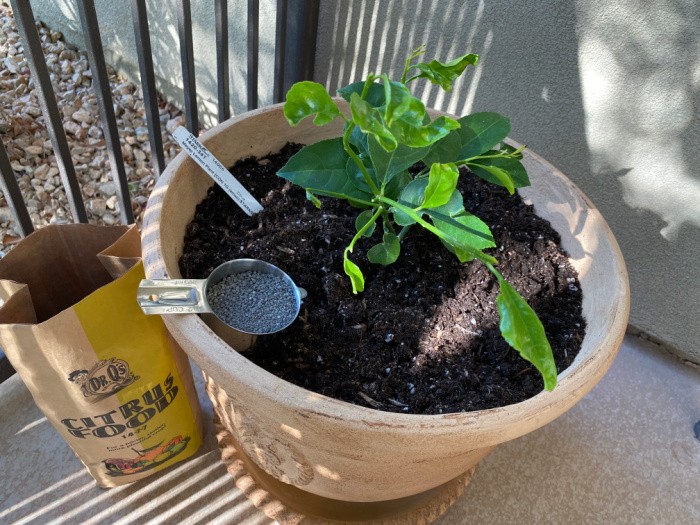
Step Nine
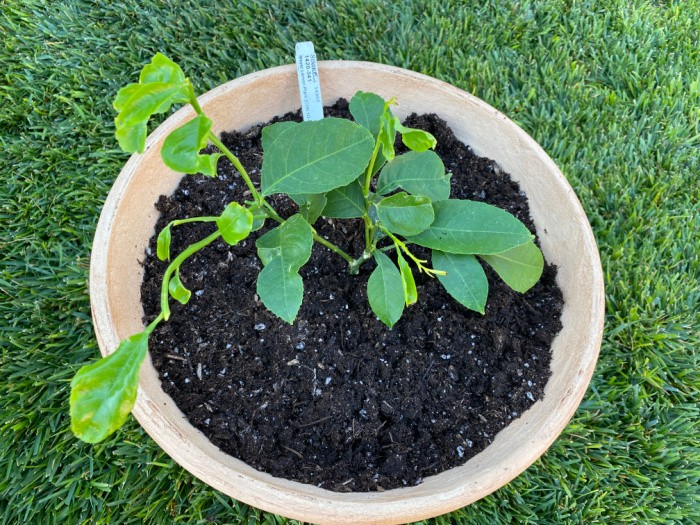
To give the lemon tree a great kick start I took 1/2 cup of Dr. Q’s Citrus Food as its first fertilizer dose. I made sure I spread it out evenly all over the soil in the container, keeping the fertilizer away from the leaves and branches so they wouldn’t get chemically burned. Organic Citrus Food
Step Nine
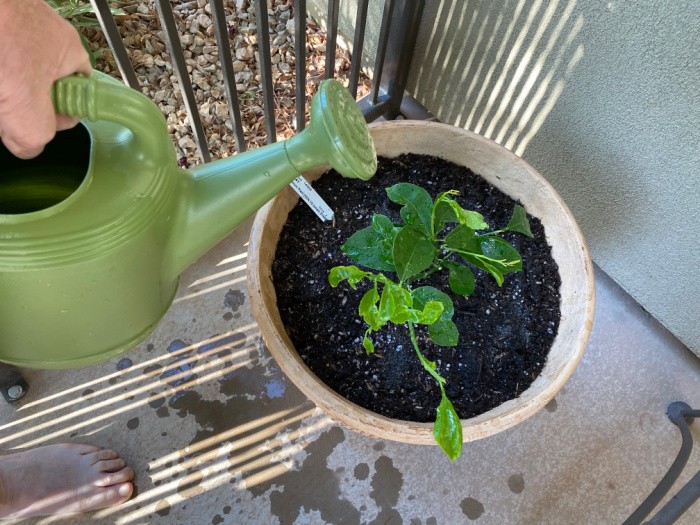
I keep a plastic green watering can on my front porch area. I have two succulent plants out front that need loving attention from time to time. I used this same watering can to water the lemon tree so it would get started on the right foot.
See how rich and dark-colored the potting soil looks once it gets some water. This is how I plan to track and properly water this special tree going forward. I truly want to see it succeed.
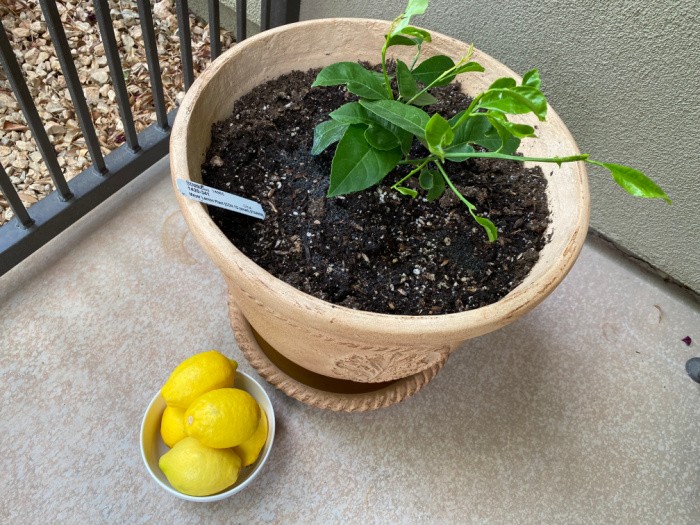
Step Ten
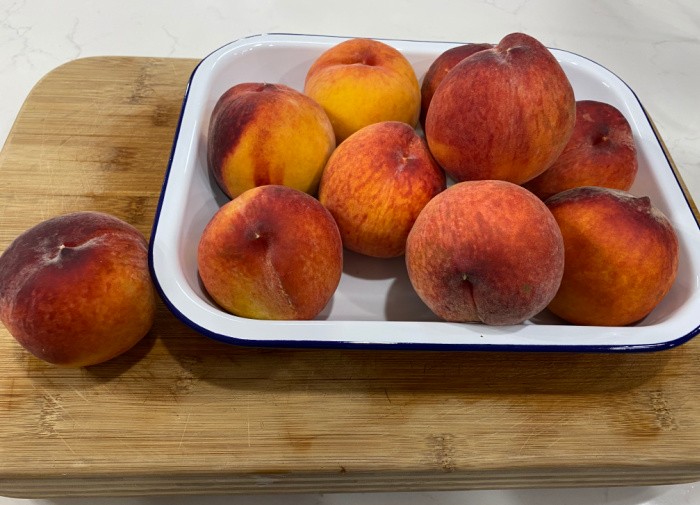
It may be wishful thinking, but I wanted to take a picture of some mature lemons like I hope to see produced by this Meyer Lemon Plant for years to come. How great is it to see the “fruits” of our labor to grow our own food, I love it.
Final Word
It brings me so much joy to try new garden adventures by planting things I haven’t tried before. This Meyer Lemon Plant is very unique compared with what I usually plant and grow each year. I’m hoping by purchasing quality plants from well-known and respected companies that I’ll continue to experience success in my garden efforts.
I also try to follow the instructions as closely as possible since I figure the nursery company supplying the plant certainly knows more about its care than I do. Hey, let’s keep preparing as best we can, and growing your own food is essential. May God bless this world. Linda


Oh yum! I’ve always wanted to grow a lemon tree. I love lemons, and lemon anything. You are just too good to us.
Hi Deborah, I have always wanted a lemon tree, so I took the plunge. My daughter in California has always had lemon trees! I will be babying this little tree. Linda
“Lemon tree, very pretty, and the lemon flower is sweet
But the fruit of the lemon is impossible to eat.”
Sorry, couldn’t help myself.
Hi Karl, now I have the giggles, you made my day!! You are awesome! Linda
I had ‘lemon envy’ and took the plunge early this Spring and got a Meyer Lemon tree.
The blooms smelled absolutely scentelicious… like Jasmine and Honeysuckle combined. I’m now watching 4 little lemons developing on it’s branches. I live in the Pacific NW, in the Willamette Valley so not warm enough in the winters for it to be outside.
Can’t wait to taste my own home-grown lemons!
Hi Karen, SQUEAL!! You have 4 little lemons!! Now, I have lemon envy! Oh my gosh, this is so awesome!!! This is so exciting! Linda
I have a little bit of “envy” going on now! Living in the PacNW, I don’t see how even bringing in a plant during the colder months would thrive! I don’t think the late spring through early fall are generally hot enough here to produce good citrus. Boo Hoo!
Hi Leanne, don’t be too envious yet, LOL! This is my once attempt!! It’s hot here that is the ONLY thing I have going right now. I will keep you posted. I check that baby every single day!!! I have wanted one forever! Finger crossed, Linda
Hi Leanne,
I’m over Kitsap way and convinced I can grow a lemon tree as well as an avocado (although I don’t think this one would produce). Wish me luck!
Good luck to you, Pam. I am in Oly. One of my biggest issues with trying to grow things is that I live in an apartment and don’t get the best sunlight on my deck! I also forget to water on a regular basis!!
I have three myer Lemon trees, one Lime and 1 Grapefruit, All are in pots as I live in a zone that I must bring them in by October each year. I plant mine in catcus soil, and use citrus food once a month for added nuturients. I was told not to bury the roots to far down so all mine you can see some of their roots. The Lemon trees have been hanging tough for 5 years now, the Lime tree, for 2 years and the grapefruit is reaching 1 year old. I water once a week and I water until the water runs out of the bottom. During winter I drop the watering to about 1 time every two to three weeks. Also best locatoin in winter is south facing windows. Come spring you will lose some leaves, but once outside they will replace themselves. We do enjoy our citrus and the lemons are big and full each year, the limes are the normal size, but the grapefruit, which has a wonderful taste are really little. I wish you well on the adventure and encourage all to take the plunge and enjoy growing your own citrus.
Hi Rebecca, oh I LOVE LOVE LOVE your comment! I will start watering it a bit more. Your comment makes me so happy!! Thank you!!!! Linda. P.S. Now I want a lime tree!!