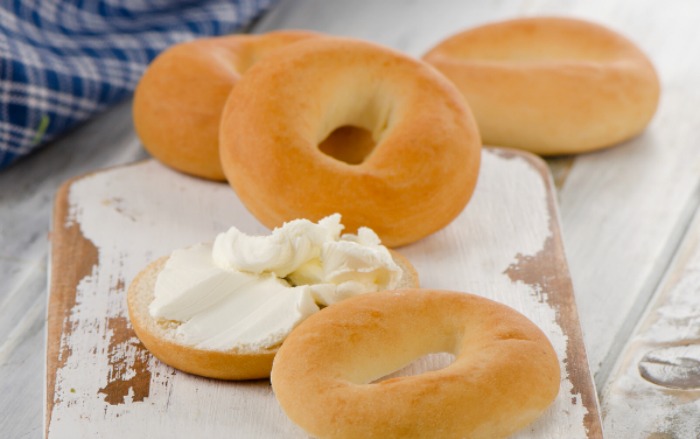
No-Knead Homemade Bread Recipe
This post may contain affiliate links. We may earn a commission if you purchase via our links. See the disclosure page for more info.

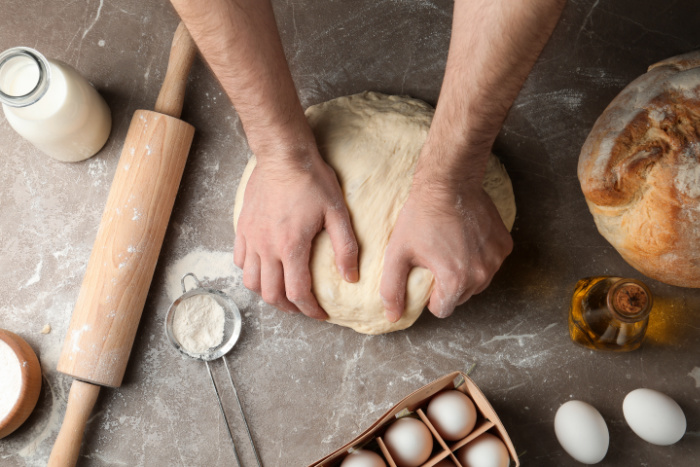
It can’t get any easier than this with my no-knead homemade bread recipe. There is something deeply satisfying about baking your own bread. No-knead homemade bread is one of the simplest and most rewarding skills anyone can learn, requiring only a few basic ingredients and minimal effort. In a time when food costs are rising, supply chains feel uncertain, and more people are returning to traditional kitchen skills, learning how to make bread from scratch is more important than ever.
This guide breaks down the essential ingredients used in no-knead bread, explains why each one matters, and explores why bread-making is a skill every household should have. Please note this is not sourdough bread. I think this recipe is even better.
Kitchen Items You Will Need
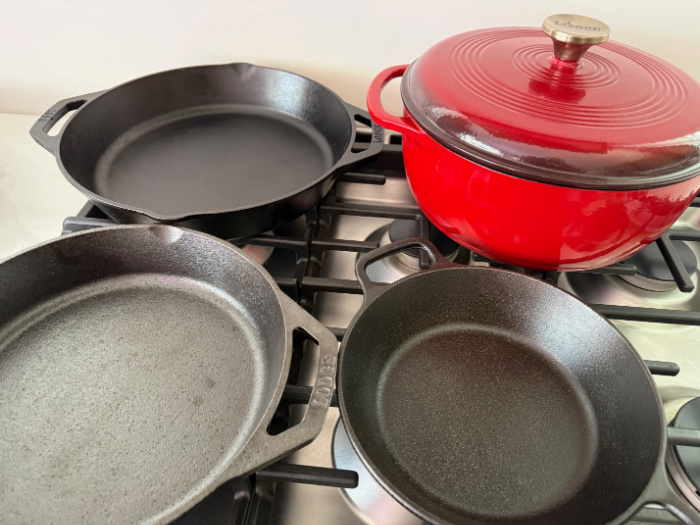
- Dutch Oven or outside cooking Dutch Oven
- Mixing Bowl
- Measuring Cups and Spoons
- Pastry Cloth
- Serrated Knife
- Danish Whisk or Silicone Spoon
- Parchment Paper
- Bread Lame To Score Bread
- Doughty Stainless Steel Dough Whisk (this is my new favorite whisk for dough)

What Is No-Knead Bread?
No-knead bread is a rustic style of bread that relies on time instead of physical kneading to develop gluten. By allowing the dough to rest and ferment slowly, the gluten structure forms naturally, creating a chewy interior and crisp crust without the work of kneading.
This method is ideal for beginners, busy families, and anyone wanting to make homemade bread with minimal tools and effort.
In-Depth Ingredient Breakdown
Flour: The Foundation of Bread
Flour provides the structure of bread. When mixed with water, the proteins in flour—glutenin and gliadin—combine to form gluten, which traps gas and allows the dough to rise.
Common flour choices for no-knead bread include:
- All-Purpose Flour: Versatile and widely available, producing a soft crumb and reliable rise.
- Bread Flour: Higher protein content creates stronger gluten, resulting in a chewier texture and better structure. Please note: I only buy bread flour.
- Whole Wheat Flour: Adds fiber, nutrients, and a nutty flavor, though it produces a denser loaf and may require more water.
- Fresh-Milled or Artisan Flour: Often more flavorful but may absorb moisture differently and require adjustments.
Flour quality directly impacts the final loaf. Fresh, properly stored flour produces better flavor and texture.
Salt: More Than Just Flavor
Salt plays a crucial role beyond taste. It strengthens gluten, controls yeast activity, and enhances the overall structure of the bread.
Without salt:
- Dough can rise too quickly
- Bread may taste flat or bland
- Texture can become weak and crumbly
Using the right amount of salt balances fermentation and brings out the flour’s natural flavor.
Yeast: The Living Ingredient
Yeast is a living organism that feeds on sugars in the flour and produces carbon dioxide gas. This gas creates air pockets, causing the dough to rise.
Why yeast matters in no-knead bread:
- Long fermentation improves flavor
- Slow rising increases digestibility
- Less yeast is needed compared to traditional bread
Instant yeast or active dry yeast are commonly used, but even wild yeast from the environment can be captured for sourdough-style breads.
Water: The Unsung Hero
Water activates the yeast, hydrates the flour, and allows gluten to form. It also influences fermentation speed and dough texture.
Key points about water:
- Warm water speeds yeast activity
- Cool water slows fermentation for better flavor
- Mineral content can affect dough performance
Proper hydration is what gives no-knead bread its signature open crumb and artisan appearance.
No-Knead Homemade Bread Recipe
- 2-1/8 cups Warm water (I microwaved it for 30 seconds)
- 1/2 teaspoon Instant SAF Yeast (whisk in warm water)
- 4 cups Flour (I use bread flour)
- 1-1/2 teaspoons Salt
-
When ready to bake, preheat your oven to (450°F) = (232°C). Place your Dutch oven, lid included, in your oven to preheat it. Please note: I have to heat my oven to 425°F (218°C).
-
Grab a bowl, add the warm water, and whisk the yeast until smooth. Add the flour and salt, stir the bowl from the outside in. Scraping as you stir. Let it sit overnight for 10-18 hours covered with a plastic lid or plastic wrap.
-
I use a pastry cloth on my countertop and flour it to make all my breads. Flour the pastry cloth and remove the dough from the bowl.
-
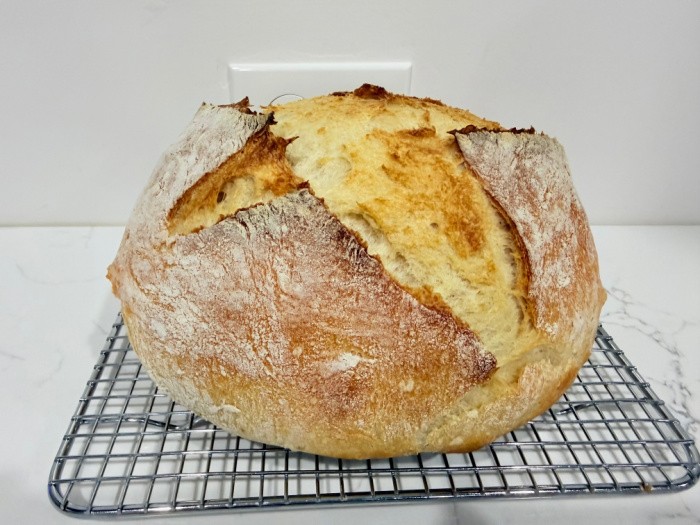
Mold the dough by sprinkling with a little flour. Fold the sides in all around until it's a circle. Flip it over. Place it carefully into the parchment-papered Dutch oven.
-
Score the top of the dough ball with a very sharp knife or Bread Lame knife.
-
Place the Dutch oven with the lid into the HOT oven.
-
Bake the dough in your hot Dutch oven, covered, for 30-35 minutes.
-
Remove the lid and bake for 5 more minutes. This bread is magical, I promise.
-
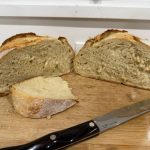
Cool the bread on a rack, then use a serrated knife to slice it when it's warm. It will continue cooking, so please wait about 30-40 minutes, or you may end up with doughy bread.
-
Please note this bread is not sourdough bread, it is fermented bread, but it sure tastes yummy!
-
Please note that I called King Arthur Flour customer service and asked how to fix the bottom of the overcooked loaves I baked. The woman said to lower the temperature to 425°F (218°C) and bake for 35-40 minutes. Remove the lid and bake another 5 minutes.
-
PLEASE REMEMBER THE BREAD WILL CONTINUE TO BAKE EVEN ON THE COOLING RACK. DO NOT CUT THE BREAD FOR AT LEAST 30-40 MINUTES AFTER BAKING IT, OR THE BREAD MAY BE DOUGHY INSIDE.
How to Store Homemade Bread After Baking
Properly storing homemade bread after baking is just as important as the baking process itself. Because homemade bread lacks preservatives like those in store-bought loaves, it must be stored properly to maintain freshness, texture, and flavor. The way you store bread depends on how soon you plan to eat it and your local climate.
Let Bread Cool Completely First
Before storing homemade bread, allow it to cool fully on a wire rack. Cutting or wrapping bread while it is still warm traps steam, which can lead to a gummy texture and encourage mold growth.
Why cooling matters:
- Excess moisture escapes
- Crumb structure finishes setting
- Crust stays intact longer
Cooling usually takes 1–2 hours, depending on loaf size.
Best Storage for Short-Term Use (1–2 Days)
If you plan to eat the bread within a day or two, store it at room temperature.
Best options include:
- Bread box
- Paper bread bag
- Clean kitchen towel
- Loaf placed cut-side down on a cutting board
These methods allow air circulation while protecting the crust from becoming soggy.
Avoid airtight plastic for fresh bread, as it traps moisture and softens the crust quickly.
Storing Bread for Medium-Term Use (3–5 Days)
For slightly longer storage, wrap bread loosely in:
- Parchment paper
- Wax paper
- A paper bag inside a loosely closed plastic bag
This combination helps retain moisture without sealing in condensation.
Keep bread in a cool, dry place, away from direct sunlight and heat sources.
Should You Refrigerate Homemade Bread?
Refrigeration is not recommended for homemade bread.
Cold temperatures cause bread to stale faster by crystallizing the starches. While refrigeration may slow mold growth, it significantly reduces quality and texture.
Exception: Very humid environments where mold forms quickly—refrigeration may be preferable to waste, but freezing is still the better option.
Freezing Homemade Bread (Best Long-Term Storage)
Freezing is the best way to store homemade bread for extended periods.
How to freeze bread properly:
- Allow bread to cool completely
- Slice before freezing for convenience
- Wrap tightly in plastic wrap or freezer paper
- Place in a freezer-safe bag or container
Frozen bread maintains quality for up to 3 months.
To thaw:
- Let it sit at room temperature
- Toast slices directly from frozen
- Reheat whole loaves in the oven for a freshly baked texture
How to Store Crusty Artisan Bread
Crusty no-knead bread benefits from breathable storage.
Best methods:
- Paper bag
- Bread box
- Wrapped in a clean towel
If the crust softens, refresh the loaf by placing it in a hot oven for a few minutes to restore crispness.
Signs Bread Has Gone Bad
Discard homemade bread if you notice:
- Visible mold (green, black, or white spots)
- Sour or musty smell
- Excessive moisture or slimy texture
Mold spreads quickly through bread, so don’t try to salvage partially affected loaves.
Why People Need to Know How to Make Bread
Bread Is a Survival Skill
For thousands of years, bread has been a staple food across cultures. Knowing how to make it ensures you can feed yourself and your family with minimal ingredients, even during shortages or emergencies.
With just flour, water, yeast, and salt, you can create nourishing food when store shelves are empty or budgets are tight.
Saves Money Over Time
Store-bought bread prices continue to rise, especially for artisan or specialty loaves. Homemade bread costs a fraction of the price and delivers better freshness and flavor.
Learning to bake bread turns inexpensive pantry staples into high-value food.
Health and Ingredient Control
When you make bread at home, you control what goes into it:
- No preservatives
- No unnecessary additives
- No hidden sugars or oils
This is especially important for families managing food sensitivities or aiming for cleaner eating.
Builds Confidence and Self-Reliance
Bread-making connects people to traditional skills that were once common knowledge. It builds confidence in the kitchen and encourages an independent mindset rather than reliance on convenience foods.
For children, watching bread rise and bake teaches patience, science, and appreciation for real food.
A Skill That Connects Generations
Bread has always been shared knowledge, passed down through families. Reviving this skill preserves tradition, strengthens family bonds, and reconnects us to a slower, more intentional way of living.
The Best Way to Score the Top of Bread (Complete Guide)
Scoring bread is more than decoration—it controls how the loaf expands in the oven, improves texture, and creates that beautiful artisan look. When done correctly, scoring helps bread rise evenly and prevents random cracks in the crust.
Here’s a clear, practical guide to scoring homemade bread like a pro.
Why Scoring Bread Matters
When bread goes into a hot oven, the trapped gases expand rapidly (a phenomenon called oven spring). If the crust has no weak point, it will burst unpredictably.
Scoring:
- Directs the rise of the loaf
- Prevents uneven cracking
- Enhances crust texture
- Creates professional-looking patterns
The Best Tool for Scoring Bread
Bread Lame (Best Option)
A bread lame is a razor blade mounted on a handle. It creates clean, precise cuts without dragging the dough.
Razor Blade (Great Alternative)
A simple razor blade works nearly as well and is widely used by home bakers.
Sharp Knife (Last Resort)
A very sharp, serrated, or chef’s knife can work, but it often drags the dough, resulting in rough cuts.
Key tip:
The sharper the blade, the better the score.
When to Score Bread
Score the dough right before baking.
The dough should be:
- Fully proofed but not overproofed
- Slightly firm on the surface
- Not sticky or wet
If the dough collapses when scored, it may be overproofed.
How Deep to Score Bread
The ideal depth is:
1/4 to 1/2 inch (6–12 mm) deep
Too shallow:
- Cuts disappear
- Bread bursts elsewhere
Too deep:
- Loaf spreads out instead of rising upward
The Correct Angle for Scoring
Hold the blade at a 30–45° angle, not straight down.
Why this matters:
- Creates an “ear” (the raised flap of crust)
- Encourages upward expansion
- Produces a dramatic artisan look
Straight vertical cuts create flatter, less dynamic loaves.
Final Word
No-knead homemade bread proves that good food doesn’t have to be complicated. With just four simple ingredients and a little time, anyone can produce a hearty, nourishing loaf at home. Homemade bread rewards proper storage.
With the right method, you can enjoy better texture, longer freshness, and less waste. Whether you keep it on the counter for daily use or freeze loaves for the future, understanding how to store bread properly helps you get the most from every bake.
In a world that often values speed and convenience, learning how to make bread is an act of resilience, frugality, and care. Whether you’re cooking from scratch, preparing for uncertain times, or simply wanting better food for your family, bread-making is a skill worth mastering. May God bless this world, Linda


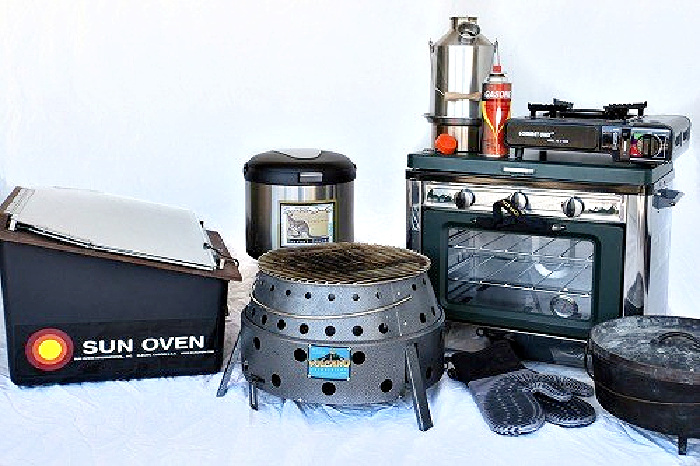


I’m going to try this in my Sun Oven, but not until we have at least 12 hours of daylight. in the meantime I’ll just use our regular oven.
Hi Ray, yeah, not sure I can put a heavy Dutch oven in the Sun Oven. I would cook this with my outside Lodge Dutch oven over and under coals. Linda
Hi Ray, I forgot to tell you thank you for the 5 stars, my friend! Linda
I have a cast iron Dutch oven and gonna make it in this. I can’t wait to try this. We have snow here, and as long as I have power, I can use my oven, even though it’s propane, the pilot needs a spark from electricity to start. It won’t start with a match or lighter but, the top burners will. I’ll be making a pot of some kind of soup, today. May have to use your cornbread recipe. YUM! Love me some soup with cornbread!
Hi Deborah, thank you for the 5 stars, my friend! Oh my gosh, my daughter came up with this recipe from sommewhere and we are sharing pictures each day. It is so fun to make and so easy! Linda
Linda, oh Linda: Sometimes you are JUST the life saver I’ve been looking for! We have quite a supply of Pamela’s (brand) G/F Bread Flour, and I’ve been wondering what to do to make it into some bread when I can’t spend a lot of time on it. This recipe might just be the ticket for our family!! I am so excited. Once I can get enough time to try it with the Pamela’s bread flour, I will let you all know how/if it turned out. 🙂 If it turns out well, I will be using your recipe for quite a while, cause the Schar Bread, which is G/F, is awesome tasting but extremely expensive. Plus the price increases quite regularly, as well! Going to go make the pot of organic chicken bone broth now and turn it into a chicken and veg. soup later today. Thank you, my dear friend. You are SUCH a blessing!! By the way, for those looking for a great Gluten Free baking mix, I highly recommend Pamela’s. We get it reasonably priced through Amazon’s Subscribe and Save, so we can afford it once in awhile. It makes the BEST fruit on the bottom berried cobbler anywhere. I actually do the bumbleberry cobbler version with apple slices and rhubarb added in, and many shakes of powdered ginger with 1-2 packets of stevia. THAT DESSERT IS SO WONDERFUL!! Enjoy!
Hi Jess, thank you for the 5 stars and your kind words, my sweet friend. This bread is a life changer. Please let me know how the GF bread flour does. This will help so many people. Thank you, Linda
Linda, I’m usually a sourdough-kind of girl, but I will try this recipe! I love having different bread recipes. Thank you!
Hi Paula, thank you for the 5 stars my friend. I love making sourdough bread but it never tastes like the restaurant sourdough. It tastes yummy but people bring me sourdough bread and it does not taste like sourdough. We call it sourdough but once you eat San Francisco sourdough bread you can’t go back to any other, in my humble opinion. I make a lot of bread. Is the ocean side water in California??? I do not know. Linda
I love this recipe since both Tom and I have too much arthritis in our hands for kneading. I mix regular table salt with pink Himalayan salt. Would that effect it?
HI Chris, thank you for the 5 stars, this bread is so awesome! It’s crunchy on the outside and fluffy inside. Life is good if you know how to make bread! Linda
Looking forward to making this easy bread! Thank you Linda!
I wonder how it would do if I divide it and use 2 cast iron bread pans…..hmmm will give that some thought and how I’d cover it. Meanwhile I do have a Dutch oven.
Hi Janet, thank you for the 5 stars, my sweet friend. I am trying to figure out if I can use my Emile Henry Bread Pan with a lid (13.4″ x 5.3″x 5.5″). Mine is a cream color, I am going to try and make two loaves in it. https://amzn.to/4k06Ov6 I have had it for years. This recipe is a game changer. It’s magical when you take the lid off after baking. It brings me so much joy. I bet the cast iron bread pans would work if you have a lid for them. We need to figure this out. Linda
Thank you so much for the recipe. I have made it twice!!! Easy and delicious!!
Hi Alli, thank you for the 5 stars, my sweet friend. I make this bread almost every other day now! It’s so easy and so fun! Linda
This bread is so easy to make! Thank you, Mark
Hi Mark, thank you for the 5 stars! I’m glad you love the bread! Linda