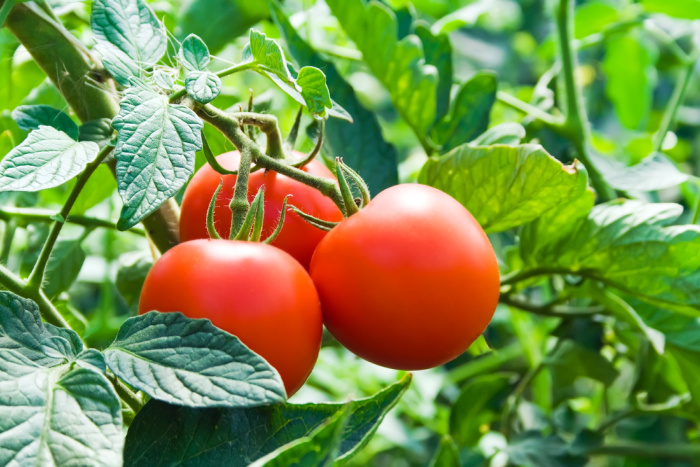
Top Gardening Tips for Growing Tomatoes

For many gardeners, tomatoes are one of the main reasons they fell in love with gardening in the first place. I, too, know from experience how rewarding and satisfying it is every time I get to enjoy a slice of tomato that I grew in my garden. Here are some of the top gardening tips for growing tomatoes.
If it’s your first ever growing tomatoes, or you’re hoping for better results this time, I’d happily share what I know. These are some of the top gardening tips for growing tomatoes that you ought to know. This is where I buy my garden seeds: SeedsNow
Top Gardening Tips for Growing Tomatoes
Wait for the Right Time to Plant
Just because you’ve had a few days of sunshine and temperatures have finally warmed up, doesn’t mean it’s the right time to plant your tomatoes. For tomato plants, you must be patient and wait until all threats of frost are out of the way. However, if you’re getting antsy like most gardeners, you can consider starting your seedlings indoors to give them a head start.
Make Sure Your Garden Soil is Up to Snuff
Your garden soil plays a huge role in how much success you will have as a gardener. Good soil must be well-draining, full of nutrients, and have a light and fluffy texture. Without one of these variables, your tomato plants will have difficulty growing to their full potential. If you are unsatisfied with what you currently have to work with, here are some tips on improving your garden soil.
Plant them Deep
You want your tomato plants to be robust, with a healthy root system that runs deep. Do this by planting your tomato plants deeper than you would expect. Only the top few leaves should be showing when properly planted. Go ahead and pinch off the lower branches and cover them with soil. This is an essential tip for growing tomatoes. In case you missed this post, How to Garden With 5-Gallon Buckets
Provide Plenty of Sunlight
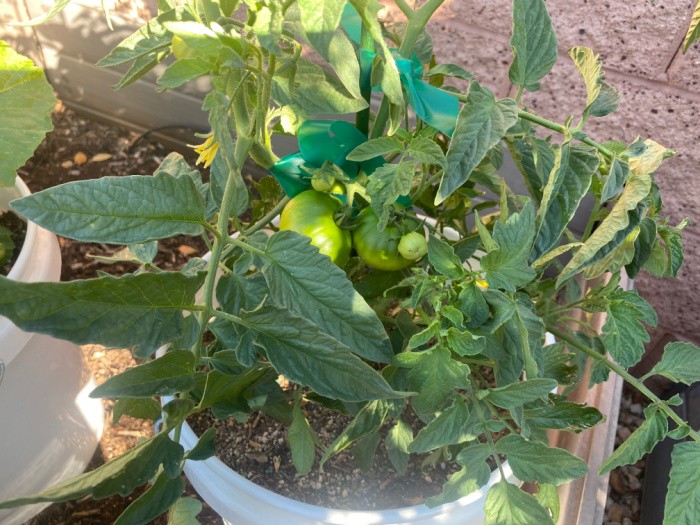
Tomato plants enjoy lots of sunshine. You must plant them in a location that receives full sunlight, about 6 to 8 hours daily. If there’s not enough sunlight in your backyard for growing tomatoes, you may want to consider planting them in pots or containers to move around. You can also grow them indoors under a consistent light source.
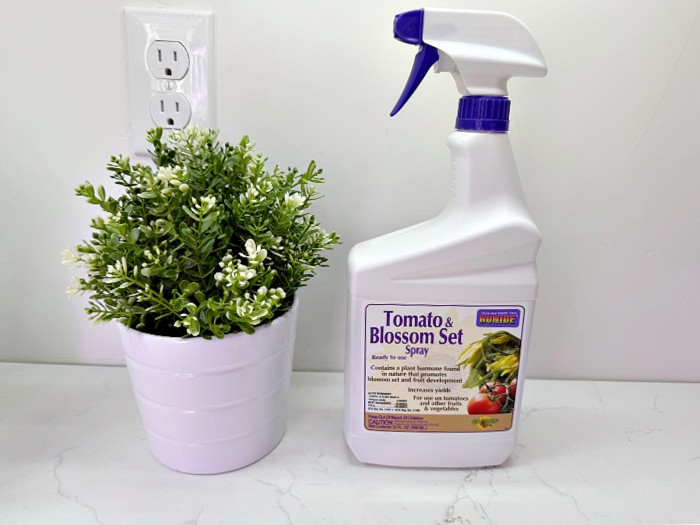
Yellow Flowers But Zero Fruit?
It could be because they are not pollinating due to a lack of a slight breeze or from bees. I have used this product and it works. Tomato Blossom Set
Hand Pollinate
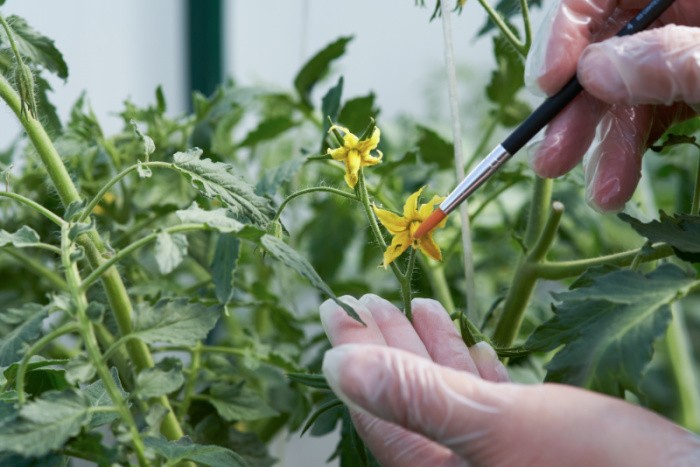
You only need a paintbrush to pollinate your squash or tomatoes. If you need to hand-pollinate because you aren’t seeing any fruit develop, here is something you may want to try. You do this by removing the male flower blossoms (male blossoms don’t have fruit behind them).
They produce pollen, leaving the center covered in pollen to collect with the brush. Use a “brush” to apply the pollen you collected to the center of the female flower. This works for tomatoes, squash, melons, and cucumbers every time.
I’ve also found that having good flowering companion plants nearby helps with pollination. If you can attract bees or other pollinators to the flowers, your pollination problems may be solved.
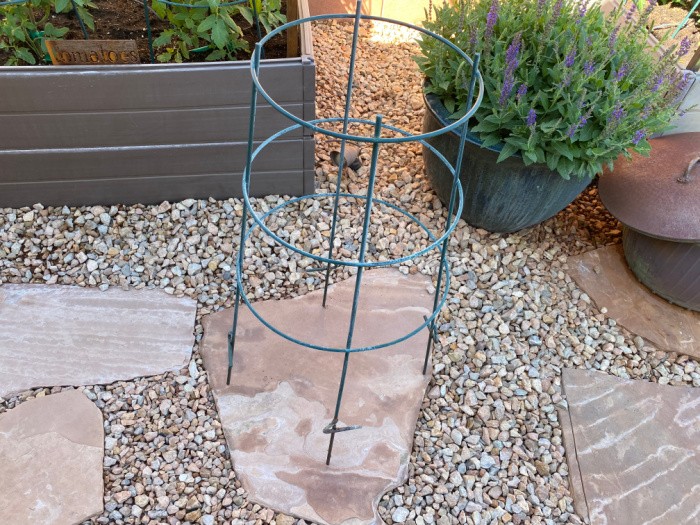
Stake Your Plants
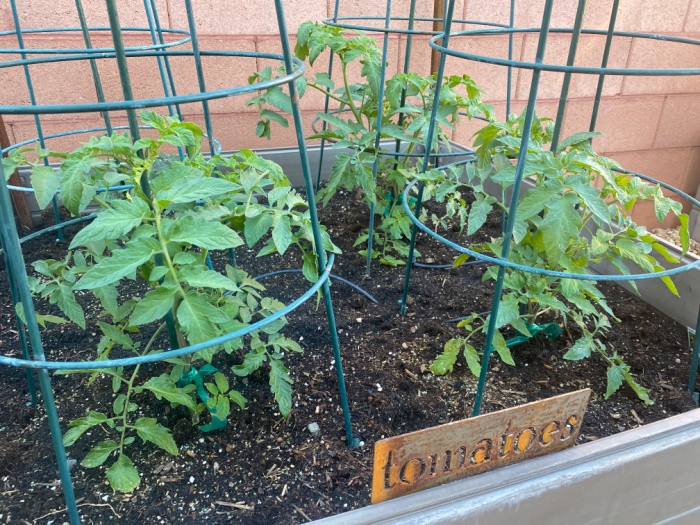
Once your tomatoes start to grow, it will only be a matter of time before the plant can no longer support its weight. This can cause the plant’s stem to break, or the fruit will grow on the ground, leading to disease and rotting.
Staking your tomato plants as they grow is the best way to prevent this. You may even need to do this as often as once or twice a week to keep up with them.
I use some narrow-gauge garden poles I buy at my local nursery. I tie the central plant stem to the poles with green stretchable plant tape. Try to tie them such that the plant has some room to grow without damaging the branches. Don’t tie too tightly since the plant should slide up the tape as it grows. Green Stretchable Garden Tape and the 36-inch Garden Poles (these last for years) and Sturdy Tomato Cages
Also, note that I use some heavy-duty tomato cages. These are a little hard to find, but I buy mine from Glover Nursery in West Jordan, Utah. They have lasted for years and help support those branches as the tomatoes grow to full size. My plants often grow to nearly my height in my 18″ deep grow boxes/raised planters. I don’t want my tomatoes to rest on the ground as they mature. You’ll love these cages!
Give them Calcium
Unfortunately, you won’t know if your tomato plant has a calcium deficiency until you pick its fruit. You’ll wind up with tomatoes that are rotten on the bottom. Yuck! You can avoid blossom end rot by adding calcium to your plants.
You can do this by sprinkling powdered milk around the base of the stem, and don’t hesitate to do this sooner rather than later. If you have questions about growing them in your particular location, don’t be afraid to inquire at your local nursery or stores like Lowe’s or Home Depot if they have a functioning garden center. They can prove very helpful.
Blossom Rot
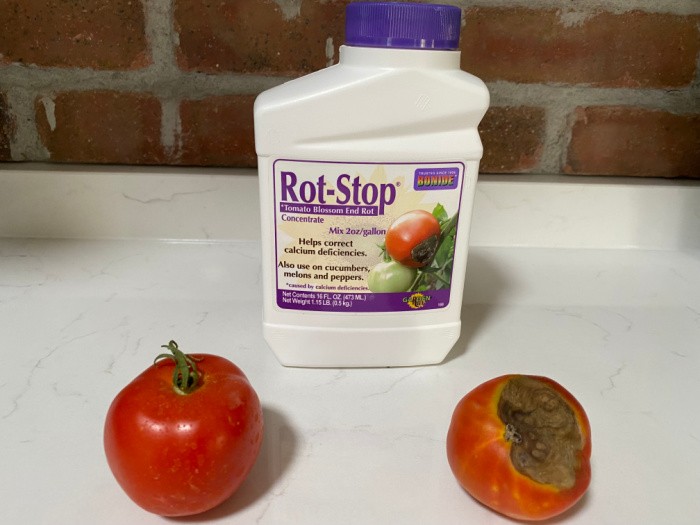
This is tomato blossom rot. I picked this one from a pot I’m growing tomatoes in. You can still save the plant. It’s caused by insufficient calcium in the tissue of the tomato. You need to maintain moisture in the soil throughout the season. You can add crushed egg shells or use the product shown above. Bonide Blossom Rot Concentrate
Add Mulch
Mulch does your garden several favors, which is why it is highly recommended. It helps the soil around your plants retain moisture while keeping weeds down and away from them. It also keeps the soil from getting on your plants when watering them, which can help prevent them from exposure to possible diseases.
Water Your Plants Regularly
When your seedlings are first starting, they must be watered daily, and sometimes twice if temperatures are already getting hot. Once they mature, they’ll need about 1 to 1 ½ inches of water each week. If you’re wondering if it’s time for more water, stick your finger into the ground next to the plant. If the soil is dry before it reaches your first knuckle, you’ll know it’s time to water.
While tomato plants need plenty of water, be aware that it is possible to overwater them too. It can be easy to do so because overwatering looks a lot like underwatering. Your plants may start shriveling up, and their fruit may crack. Watering them earlier in the day is also recommended.
Fertilize with Just the Right Amount
When you fertilize your tomato plants, they will thrive, but you must carefully use a balanced approach. Over-fertilizing will give your plants too much nitrogen, which can lead to bushier plants but fewer tomatoes. Fertilize Your Plants
If you notice yellow leaves on your plants, they’re not receiving enough nitrogen, and you will need to increase their feeding. As a general rule of thumb, tomato plants should be fertilized about once every month.
Trim and Prune Foliage
If left unkempt, tomato plants will become a bushy mess, and your tomato crops will suffer. That’s why pruning your tomato plants regularly is so important; this will also allow them to reach harvest sooner. This should be done to the older leaves once the plant is around 3 feet tall. Most gardeners prefer to prune back the foliage and leaves closest to the ground to avoid diseases and bugs.
Watch For Pests and Diseases
Checking your tomato plants regularly is critical to their health. Don’t let it go if you notice any signs of disease or evidence that something is munching on their leaves. Take care of it immediately. Here are the types of pests and diseases you may encounter and how to treat them organically.
Cheryl-Master Gardener Tip
When your tomato plants reach 2 1/2 feet tall, remove the bottom leaves far enough to allow air to circulate and keep the leaves from being watered. Choose the best 3-4 strongest stems and train them up, pruning out the rest carefully. Tie these up onto poles to spread out.
This will bring in lots of sunshine and provide excellent pollination. I was taught this method at one of my Master Gardener classes. It was a fantastic class; I have used this method ever since. My plants can reach over 5 feet and produce huge crops. Adding more air to circulate sets the blossoms for fruit. Toward the end of the season, I prune the top so everything below can ripen. Make sure to add calcium as they start to produce!
Final Word
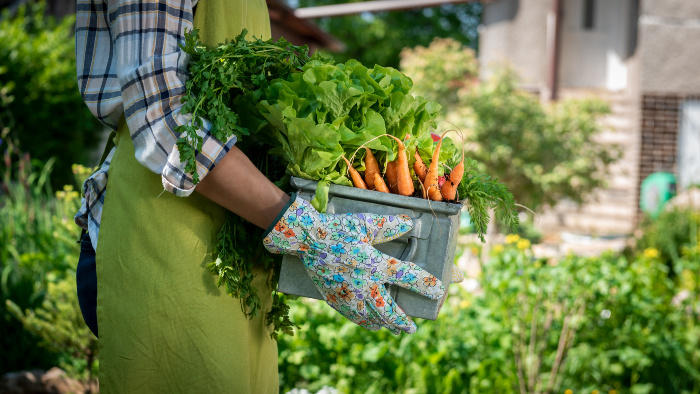
Growing tomato plants requires a bit of love and attention, but you and your family will be rewarded with delicious-tasting fruit all summer. Mark and I enjoy BLT sandwiches during the summer—they’re so delicious! If you’re a gardener and have had success in the past growing tomatoes, what are some other helpful tips that beginners would benefit from? May God bless this world, Linda.
Copyright Images: Pollinate Tomatoes by Hand AdobeStock_856279053 By ROMAN DZIUBALO


When your tomato plants get 2 1/2 feet tall, take off the bottom leaves far enough to allow air to circulate and keep away from watering the leaves. Choose the best 3-4 strongest stems and train them up , pruning out the rest carefully. Tie these up onto poles to spread out . This will bring in lots of sun and give great pollination. I was taught this method at one of my Master Gardner classes . It was an excellent class and I have used this method ever since . My plants can get over 5 ft. and produce huge crops. Adding more air to circulate really sets the blossoms for fruit. Toward the end of the season, I prune the top so everything below can ripen. Make sure to add calcium as they start to produce!
Hi Cheryl, oh I LOVE your comment! I would love to take a Master Gardener class. I have been gardening over 50+ years but I still love learning new stuff! Great tip today! Linda
Linda, Cheryl’s tip is right on. To add calcium I use my blender to grind egg shells into a powder then put some in the hole when I plant the tomatoes and more stirred gently in around the base of the plant.
To be sure my veggies can take up the nutrients in the soil (including calcium) I adjust my highly alkaline soil’s pH down to 6.4 or lower. I use sulfur, peat moss, compost and vermiculite or perlite to d this and I check the pH before I plant, about mid-season and after fall harvest before I plant my over-winter crops. If the pH is too high or too low the nutrients are no longer available to your plants.
Hi Ray, oh my gosh, gardening is so fun! I learn new things every single year. I have never planted 19 tomatoes in this tiny yard. But I have a friend who can’t garden this year (health issues). I planted so much more and I have to tell you, it feels awesome! I hope my dehydrator does not die, it’s about 8 years old and going strong but…..you never know. I love dehydrated tomatoes (sliced). They taste like candy, not chocolate, but sweet candy. LOL! Great comment, my friend. Linda
Cheryl, I’m adding your comment to my post, thank you my friend! Linda
Just a note about what I wrote above. The info. above is for indeterminate tomato plants that get tall. If you want smaller plants use the determinate variety that get about 3 ft. tall. You will have to clip off some of the leaves because these get very bushy and that keeps the sun out so you get fewer tomatoes. The also tend to set their fruit over a shorter period of time. Sometimes it is nice to plant both if you have the room. Remember, with both types. The more sun you get into the middle of the plant, the better the pollination and the more fruit you will have,
Hi Cheryl, I love this, thank you! I typically plant a few different ones so I have a variety of tomatoes. I need to watch for bacon and start stocking up for our first BLT’s! I can’t wait! Linda
We have a tomato plant growing in a container. We give it plenty of water, however when we leave it out in direct sunlight. the leaves and stems droop a lot. What are we doing wrong?
Hi Karl, define plenty of water first of all. My tomato plants are doing well, BUT I have to water them every single day because the buckets dry out so fast. Did you use the specific soil for “containers”, it has stuff in it that helps it from drying out so fast. Let’s figure this out. Linda
Linda, we water them every day. The plants are in the same container they were in when I bought them at Walmart. the thing is that when we bring them inside, they perk up!
Hi Karl, I live in Southern Utah and I do not have to bring my 5-gallon buckets inside. Hmmmm. The temperature here is 90 degrees during the day. It has to be the soil, or maybe put them so they are not in direct sun? My buckets are in direct sun all day. What size containers are they in? They must be the right size or they wouldn’t perk up inside your home. I planted 5-inch tall tomato plants in 5-gallon buckets and they are producing tomatoes right now. Actually, about 2 weeks ago, they are still green. It has to be the soil, that’s my guess. Your house is cooler and is not putting stress on the plant inside. Linda
Top ‘O The Morning to you, Linda. We live in NE Utah (Vernal, to be specific). Yesterday, the high temperature was 84, tomorrow it will be 62 and 60 on Monday. A real roller coaster here in the spring. As far as the soil goes, the tomato plants came with soil in the bucket. Right now, there are several buds that are opening up and there is one tomato that’s starting to grow. We’ve decided to keep up with the container gardening since the soil in the backyard is lousy. Life is good!
Hi Karl, oh, Vernal is a great place! Sorry to hear the soil is bad. Life is good if that plant produces tomatoes!! Linda
Good Morning,
Well the container the tomato plant is in is definitely not a 5-gallon bucket. We have a few more tomatoes growing since I last made a comment. One is ripening slowly. Currently, temps are in the 90s with occasional dips into the 80s. We are going to try pruning some of the leaves/stems back to see if that will help. I have to water the plant several times a day when it gets really hot.
Hi Karl, I agree, the heat is hard to grow tomatoes in 5-gallon buckets. I’m still harvesting a few every day in mine. It for sure takes extra care. I will add more perlite and vermiculite next year. The heat here is now 102-110 degrees, my whole garden is suffering. The heat is rough, I need to put my garden shades on today. I will keep trying different varieties, this year I put Early Girl in two 5-gallon buckets. The good thing is I’m growing enough to give us BLTS’s every single day. Life is good! Linda
This is one of your very best articles. The information on preventing (or curing) end rot is excellent. Sometimes that can also be caused by a lack of magnesium–which can be cured by adding Epsom Salts. I mix 1 tsp with one gallon of water and pour some in the hole while i’m transplanting. But you can also pour it around the plant after it’s in the ground.
Your tomato propagator spray should work on cucumbers, melons and squash as well as tomatoes.
I use Dr Q’s Filthy Rich Compost along with my homemade stuff in my raised beds and it’s excellent, but in my large containers I’ve switched over to Happy From potting soil. The Dr Q’s simply drains and dries out too fast for use in containers (even when mixed with perlite and vermiculite). But in my raised beds where it’s mixed with other soil and other compost as well as perlite and vermiculite, it works great.
I’ve been getting cherry tomatoes for two weeks now and will be harvesting my first cucumbers next week. All my squash and melons are thriving, though none have flowered yet. I’ve sprinkled DE all around to help control cucumber beetles and other insect pests as my Marigolds and Nasturtiums haven’t come up yet. Aside from chives, most of my herbs aren’t up yet either, but it was a 6 year old seed experiment–part of live and learn. I’ve ordered new seed as a backup to the seeds I saved last fall.
I’ve refilled several large containers (24-28″ diameter by 24″ tall) with Happy Frog in preparation of future transplanting, but since we’re getting our first 100F day tomorrow and Tuesday I’ll wait to put anything in them. Time to pull out the shade cloth.
Hi Ray, thank you for your kind words, my sweet friend. I love hearing about your garden!! SQUEAL! Great tip on the magnesium!! Linda
When a tomato has blossom rot, you can usually salvage some of the tomato. Just cut off the rot part off and you can use the rest of the tomato. When you cut it off, check to be sure you get all the rot off. If you notice any black on the tomato, cut more off. We have done that for years and never got sick from eating the good part of the tomato. An other great article from you Linda.
Hi Chester, thank you for you kind words, my sweet friend. Yes, I still use the tomato, I’m glad you brought this up. I try to catch them before the brown gets any larger. Great reminder, thank you, Linda