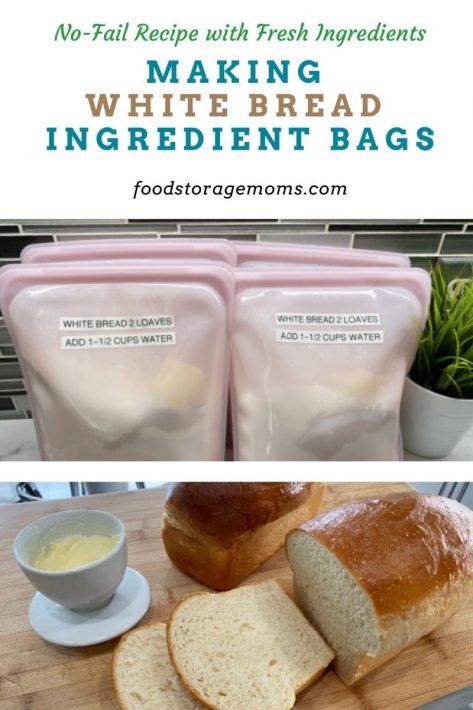
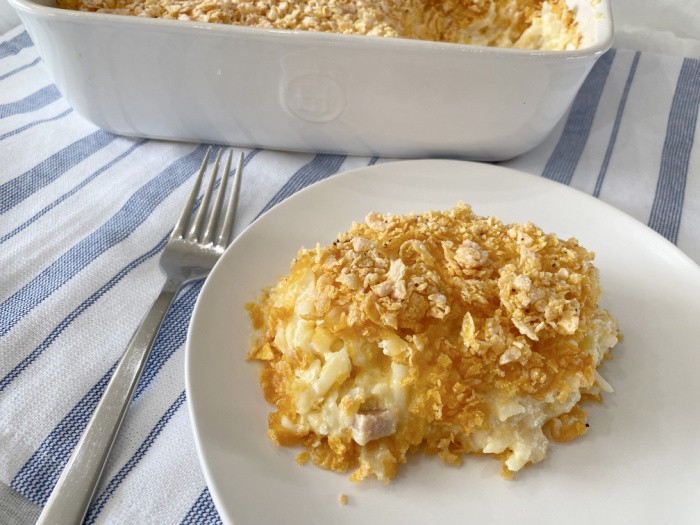
Making White Bread Ingredient Bags
This post may contain affiliate links. We may earn a commission if you purchase via our links. See the disclosure page for more info.

Today, it’s all about making white bread ingredient bags. Here’s the deal, there is no question that making bread from scratch will save us money. I have made bread in a large bowl, a Bosch mixer, and now I make more bread in my Zojirushi Bread Maker. This model makes 2-one-pound loaves. The pans I use are similar to these, they are smaller pans than what our moms used to use. Fat Daddio Bread Pans They are one-pound loaves.
Sometimes just dragging out the white flour bucket, the white granulated sugar, the dry instant milk, salt, and Saf Yeast can be a bit overwhelming. I make bread every single week, and I love making it. But sometimes, I just want a bag full of ingredients that I can add to a bowl, a bread machine, or a bread mixer, and then just add the water.
You can use 1/2-gallon freezer bags or slowly buy some reusable 1/2-gallon silicone bags. I know I can always make homemade bread for the family to stretch the main meal. Let’s be honest, almost everyone loves homemade bread right out of the oven, right?
I have started making this recipe because it doesn’t require eggs. If we ever have a shortage of eggs, this recipe will work great for homemade bread. The best part is, it’s delicious. Did I say, it’s another no-fail bread recipe? If you have fresh ingredients, this is one more great bread recipe.
We have a large family that gets together often and this recipe is the one we always make when the family comes over for weekend lunch or weekday dinner. I love having white bread ingredient bags in the freezer ready to grab and start making bread in less than 5 minutes. All you do is add water, how easy is this?
Please remember, I don’t bake my bread in the Zojirushi Bread Maker, even though I could. I only mix, knead, and let the dough rise in the machine before I remove the dough to mold the loaves, and then bake the loaves in my conventional oven. This has been the best prepper machine purchase I have ever made, literally. I love this machine. Yes, it needs power, but I must live for today and enjoy my life as best I can.
Making White Bread Ingredient Bags
Kitchen Items You Will Need:
- Measuring Cups
- Measuring Spoons
- Funnel
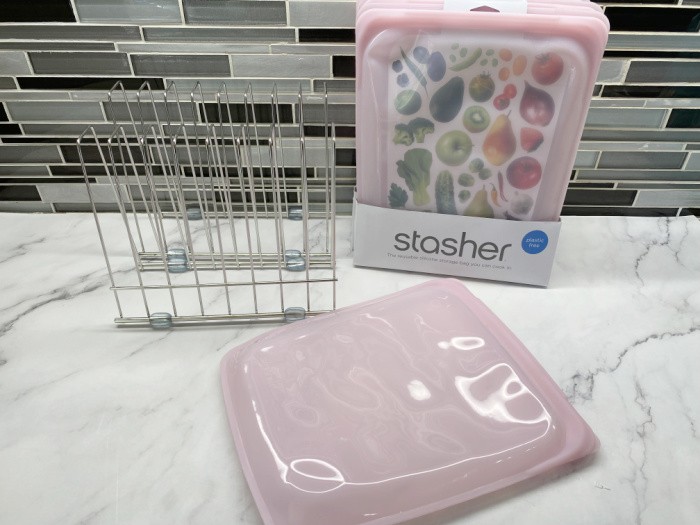
- 1/2-Gallon Baggies or Stasher Silicone 1/2-Gallon Bags
Making White Bread Ingredient Bags
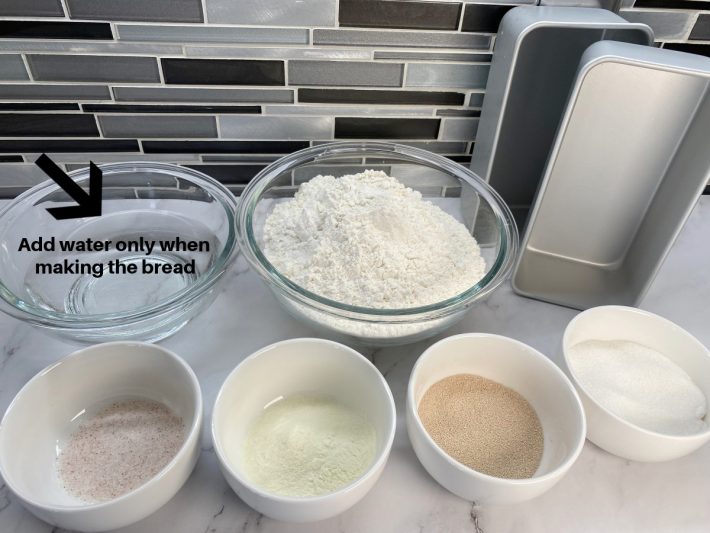
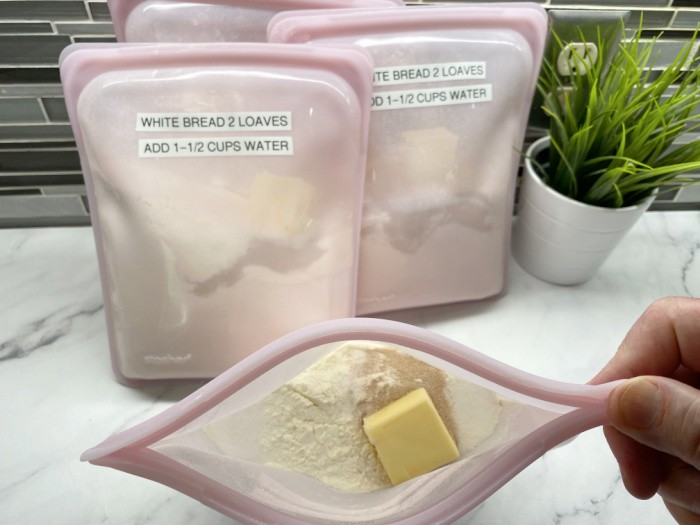
Step One: Gather Ingredients
Gather the ingredients, white flour, white granulated sugar, dry instant milk, salt, SAF Yeast, and butter. We do not add the water NOW, this picture is for ingredients you will use. You will add the water when you decide to make the bread.
Step Two: Wash the Bags
I bought several sets of these silicone bags from Amazon and had to return them because they didn’t work. I finally found these Stasher silicone bags and they are the best size ever. What I love about these silicone reusable bags is that they are microwavable, dishwasher safe, and great for the refrigerator. You can even use them in the oven on an oven-safe tray with the seal open for up to 400 (400°F) = 204°C). I won’t use them in the oven, I just wanted some reusable, plastic-free bags.
They are free of BPA and BPS and comply with the FDA and European food-grade standards. So there you have it, I want to use fewer baggies, and less waste, one bag at a time.
I also purchased the “stand” to drain the baggies after I hand-washed them. I actually bought two of them. Reusable Storage/Drying Racks
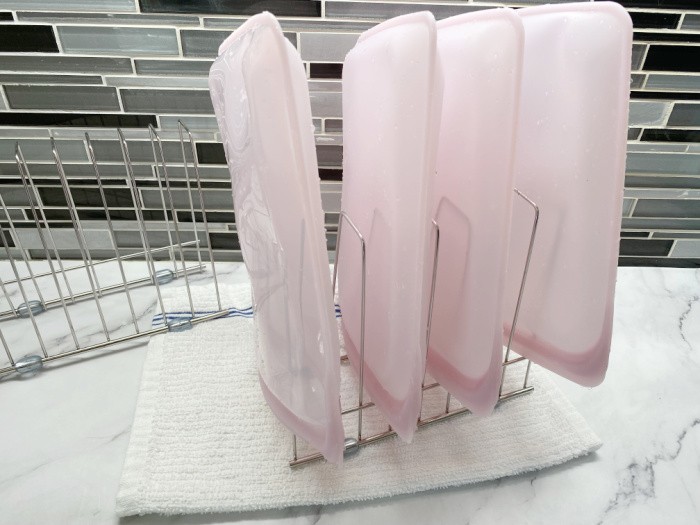
Step Three: Let the Bags Dry
I washed them by hand and rinsed them before placing them on the racks to dry. Please note, because I will freeze the white bread ingredients, I won’t need to wash them in between filling them. I will put the empty bags back in the freezer to store until I refill all four bags again. These are so awesome!
Step Four: Label the Bags
I did label them with my label maker, but a magic marker would work. I highly recommend this Brother P-Touch Label Machine, I use it for so many things.
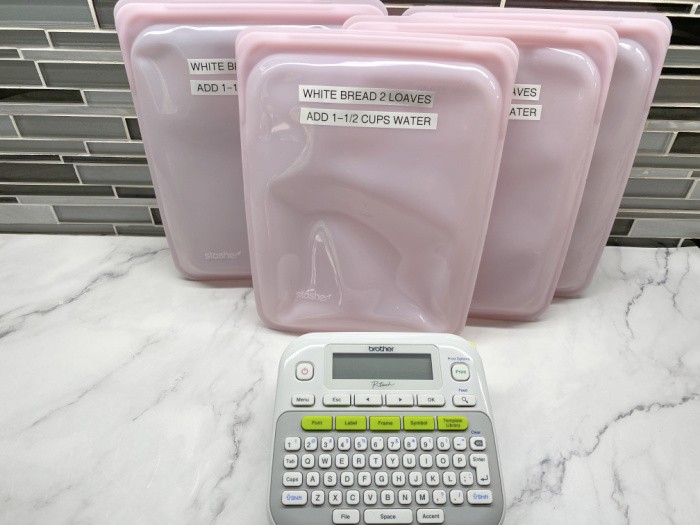
Step Five: Fill the Bags
I used a canning funnel to fill them. Oh, how I love having bags ready to go!
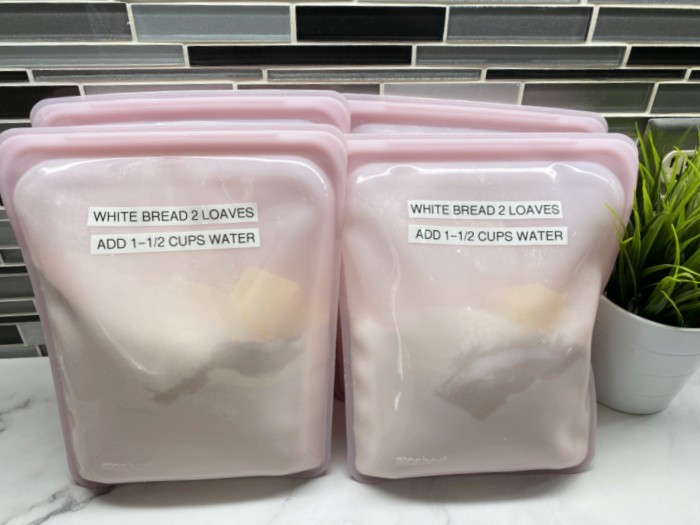
Step Six: Seal the Bags and Freeze
After filling them, I loaded them in the freezer.
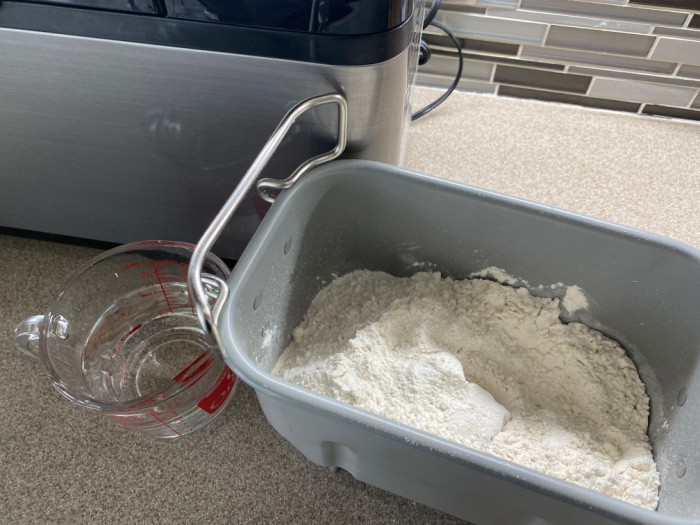
Step Seven: When Ready To make Bread Add 1-1/2 cups of Water
This is all you do when you make bread with these bags. You can use a Zojirushi Bread Maker, a mixing bowl, a Bosch bread mixer, or even a 6-quart KitchenAid mixer since the batch is so small. In case you missed this post, Bread Machine Bread-How To Make It
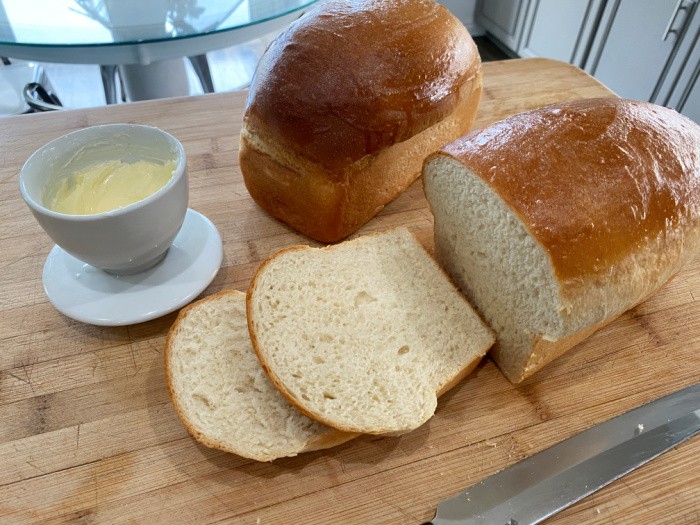
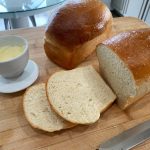
Finished Product
Life is good when you know how to make bread, my friends. My girls were raised on homemade bread, and they now make bread for their kids, yes, it’s a generational thing for us!
Heidi’s Bread Machine Recipe
- 1-1/2 cups water
- 4 cups bread flour
- 1/4 cup sugar
- 2 tablespoons dry instant milk
- 2 teaspoons salt
- 2 tablespoons butter
- 1 tablespoon Saf Instant yeast
-
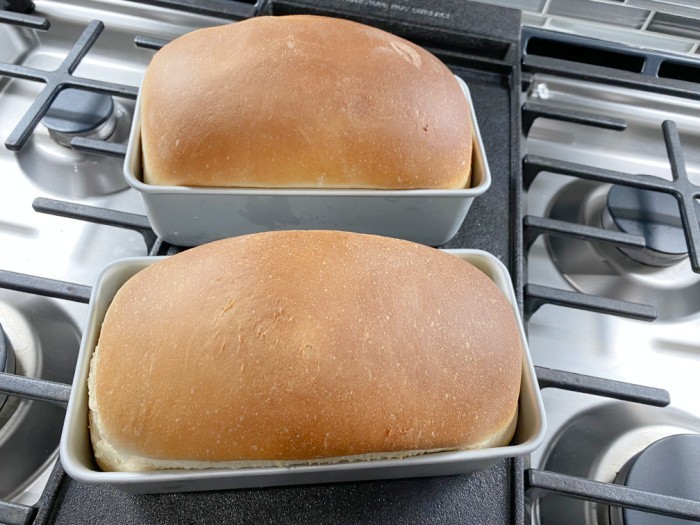
Add the ingredients listed to the Baking Pan in the order listed. Press the COURSE button and select Course No. 11 (for DOUGH ONLY), and press the START button. After it stops, remove the dough from the Dough Bread Pan. Use a dough scraper to cut the dough into two equal-sized pieces for the two loaves. I use bread pans this size: 7.75 x 3.75 x 2.5 Inches. Grease your bread pans, place the dough in them, and cover with plastic wrap. Let rise until double the size. Remove the plastic wrap. Preheat your oven to 350°F (176°C). Bake for 28-30 minutes or until baked through.
PLEASE CHECK YOUR BREAD MAKER BRAND'S INSTRUCTIONS.
-
1. Set the Baking Pan into the Main Body and close the lid.
2. Insert the Power Plug into an electrical outlet.
3. Press the "COURSE" UP button until it reaches Course #11 (for DOUGH ONLY), this is what I did today.
4. Push the Start button.
5. You'll also see the word "Rest" next to #11 telling you that it is in the "rest" phase as the unit warms up the ingredients.
6. This "rest" phase should last about 20-25 minutes.
7. You'll hear the unit move into the "knead" phase as the kneading blades start spinning to knead the dough.
8. The screen will change from "rest" to "knead" during this period.
9. After a few minutes, the unit will make a buzzing sound, and you'll notice the word "add" flashing on the screen. This is the appropriate time to add any ingredients you want to your dough, like nuts, raisins, etc. You can open the lid, add the desired additional ingredients, and close it without changing any settings.
10. Once the knead phase is complete, you'll see the word "rise" on the screen next to #11. This is the phase where the yeast kicks in and does its thing.
11. When there are approximately 30 minutes remaining in the dough-making process, you'll see the time setting change from the estimated completion time to 30 minutes, which means there is that much time remaining. This clock setting will change in 1-minute increments until the dough-making phase is finished. When I could see the dough was ready through the glass opening in the lid, I skipped this step. I turned off the machine and unplugged it.
12. After it stops, you remove the dough from the Dough Bread Pan.
13. Use a dough scraper to cut the dough into two equal sizes and then mold them into two loaves of bread. (I use bread pans this size: 7.75 x 3.75 x 2.5 Inches.)
14. Place the loaves into your greased bread pans, cover with plastic wrap. and let double in size.
15. Remove the plastic wrap.
16. Preheat your conventional oven to 350°F 176°C and bake for 28-30 minutes or until baked through.
PLEASE CHECK YOUR BREAD MAKER BRAND'S INSTRUCTIONS.
- 3/4 cup water
- 2 cups white flour or white bread flour
- 1/8 cup white granulated sugar
- 1 tablespoon dry instant milk
- 1 teaspoon salt
- 1 tablespoon butter
- 1/2 tablespoon Saf Instant Yeast
-
Add the ingredients listed to the Baking Pan in the order listed. Press the COURSE button and select Course No. 11 (for DOUGH ONLY) and press the start button. After it stops, remove the dough from the Dough Bread Pan. Use your hands to mold a loaf of bread. I use bread pans this size: 7.75 x 3.75 x 2.5 Inches. Grease your bread pan and place the dough in it and cover with plastic wrap. Let rise until double the size. Remove the plastic wrap. Preheat your oven to (350°F) = 176°C). Bake for 28-30 minutes or until baked through.
PLEASE CHECK YOUR BREAD MIXER BRAND'S INSTRUCTIONS.
-
1. Set the Baking Pan into the Main Body and close the lid.
2. Insert the Power Plug into an electrical outlet.
3. Press the "COURSE" UP button until it reaches Course #11 (for DOUGH ONLY), this is what I did today.
4. Push the Start button.
5. You'll also see the word "Rest" next to #11 telling you that it is in the "rest" phase as the unit warms up the ingredients.
6. This "rest" phase should last about 20-25 minutes.
7. You'll hear the unit move into the "knead" phase as the kneading blades start spinning to knead the dough.
8. The screen will change from "rest" to "knead" during this period.
9. After a few minutes, the unit will make a buzzing sound and you'll notice the word "add" flashing on the screen. This is the appropriate time to add things you want in your dough, like nuts, raisins, etc. You can open the lid, add the desired additional ingredients, and then close the lid without changing any of the settings.
10. Once the knead phase is complete you'll see the word "rise" on the screen next to #11. This is the phase where the yeast kicks in and does its thing.
11. When there are approximately 30 minutes remaining in the dough-making process, you'll see the time setting change from the estimated completion time to 30 minutes, which means there is that much time remaining. This clock setting will change in 1-minute increments until the dough-making phase is finished. When I could see the dough was ready through the glass opening in the lid, I skipped this step. I turned off the machine and unplugged it.
12. After it stops, you remove the dough from the Dough Bread Pan.
13. Use your hands to mold them into one loaf of bread. (I use bread pans this size: 7.75 x 3.75 x 2.5 Inches.)
14. Place the loaf into your greased bread pan, cover with plastic wrap and let double in size.
15. Remove the plastic wrap.
16. Preheat your conventional oven to (350°F) = 176°C) bake for 28-30 minutes or until baked through.
PLEASE CHECK YOUR BREAD MIXER BRAND'S INSTRUCTIONS.
What if I don’t have a bread maker or bread mixer?
- 1-1/2 cups water
- 4 cups bread or white flour
- 1/4 cup sugar
- 2 tablespoons dry instant milk
- 2 teaspoons salt
- 2 tablespoons butter (let soften)
- 1 tablespoon SAF Instant Yeast
-
1. Combine all of the ingredients in a large mixing bowl. Stir with a Danish whisk or large wooden spoon.
2. After mixing, scoop the bread dough onto a floured countertop and knead for about 7-8 minutes.
3. Cover the bread dough in a greased bowl with plastic wrap.
4. Let the dough rise until doubled in size.
5. Punch down the dough, divide the dough into two loaves, and place these in greased pans (this recipe makes two-pound loaves).
6. Let the dough rise again (using the same plastic wrap) until it doubles.
7. Preheat your oven to (350°F) = (176°C). Remove the plastic wrap. Bake for 28-30 minutes or until baked through. Let cool on cooling racks. Enjoy.
Can I make this recipe Gluten-Free?
Unfortunately, I have never had good luck making gluten-free bread unless I add ingredients I don’t want to stock. It’s cheaper to just buy the GF loaves at Costco or Sam’s. With the few family members, we have with gluten tolerance issues, buying them from the store has been my approach for the past few months
Can I use freezer containers?
You can for sure, whatever you have will work if they will hold 5+cups of ingredients.
Can I use mason jars?
Well, this was my dilemma, I couldn’t use quart mason jars. Please remember that the recipe calls for 4 cups of flour, quarts only hold 4 cups total, so no room for additional ingredients if needed. Darn, I looked high and low for containers that would work, but would not take up much space. So I bought these 1/2 gallon silicone bags. They are perfect and take up very little space.
Final Word
I hope you enjoyed my white bread ingredient bags post. I really want people to get excited about cooking from scratch and baking bread. When times are tough, bread is a great filler for any meal. Don’t let yourself be intimidated, give this storage approach and recipe a try, then you’ll feel better prepared to feed your family in good times and bad. Stay safe, and stay healthy. May God Bless this world, Linda


This is such a helpful post. Thank you! While we like white bread we actually prefer using 1/2 white flour and 1/2 wheat flour. Would there be any issues making that substitution for make ahead ingredient bags?
Hi Elaine, I would try it for sure. I freeze my ground whole wheat flour for another recipe. I don’t freeze the whole wheat recipe in bags because it has lemon juice, honey, and olive oil. I would try 3 cups white flour and one cup whole wheat first, just because whole wheat flour is much drier. If that works, I would do the 1/2 white flour and 1/2 wheat flour on the next batch. Just thinking out loud here. Now I want to try it!! Great idea, Linda
If we use powdered butter, do you think this could shelf stable?
Hi Camille, it’s the yeast I worry about. I keep my monthly SAF Yeast in the frig and the rest in the freezer. Thank you for the 5 stars, my sweet friend. You should use powdered butter but I would still put it in the freezer. I have never had my bread fail, it may be an old wives tale but I’m very protective of my Saf Yeast. Linda
I thought I was the only one who did this. When making bread and all the ingredients are out, it is a snap. Then, the next time, when I might be dragging all I have to do is put the water in.
Hi Janet, this is the first recipe I have found that does not require eggs. This is a time saver! Great minds think alike! I love hearing you have done this!! Linda
Good morning Linda, I’d like to know about the butter as well. Also, I’m guessing this recipe can be used even if you don’t have a bread making machine. Am I correct? I’m going to try the 1/2 gallon mason jars (vacuum sealed) or regular freezer gallon zip lock bags as I don’t have the space in my freezer to store much. Thanks for the post for doing this time saver. Pam
Hi Pam, thank you for the 5 stars, my sweet friend!! I’m sure you can adjust the powdered butter in exchange for the real butter. It wouldn’t take that much extra water to hydrate the brand you have of powdered butter. Yes, I stressed this recipe will work in a bowl, a bread mixer, a bread maker, or even a 6-quart KitchenAid. It only makes two loaves. I was thinking about using 1/2 gallon jars, but they would take up too much room in my freezer. It goes back to yeast, I have to protect it in the freezer or frig. I would not store these on your pantry shelves, it’s just me. Linda
We use Powdered butter so we don’t even have to keep it cold and we just use food saver bags we do not use anything but the sealer for sealing them or he uses zip loc bags and just reuses them
Hi Gwen, I used to use baggies and reuse them as well. Whatever works for you is awesome. Linda
Linda, I have not made bread in 40
Years. I have Rheumatoid Arthritis. I don’t have a bread machine. Could I let my Kitchen Aid do my needing. Then turn it out form it and let it rise before the bake?
This recipe sounds great
Thank you
NancyGlenn
Hi Nancy, do you have the 6-quart KitchenAid? It’s only two loaves or I could cut the recipe in half for you!!! What size do you have? We can make this work for you, my friend! Linda
This is a great idea although I read somewhere that freezing flour affected the gluten . Do you still have the same rise ?
Also can you freeze whole bags of flour for any length of time ?
Thanks
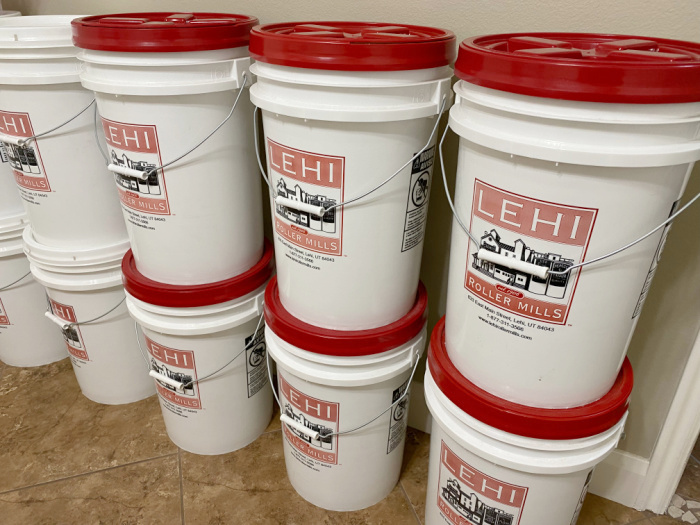
Hi June, I’m not sure about “freezing flour affected the gluten”. I freeze my wheat gluten and dough enhancer in the freezer for over a year, maybe two until I use it all. My bread never fails. I’ve also been making bread for over 60 years now. But I only use flour less than 12 months old, I rotate, bake, and rotate. I buy flour in 25-50 pound bags, I could never put those bags in my freezer, there is never any room. I only buy flour from Costco. When I get home I place it in 5-gallon buckets with Gamma Lids. The wheat gluten and dough enhancer and my freshly ground whole wheat flour go straight in the freezer after I purchase the packages of wheat gluten and dough enhancer and the SAF Yeast as well. I hope this helps. Linda
Thanks for that info . I’ll try that .. what is dough enhancer ?
I make bread every week too never used dough enhancer how does it improve the bread ?
Thanks
Hi June, I use dough enhancer and wheat gluten in my whole wheat bread recipe. I grew up with wheat bread “bricks” my mother made. Then I started teaching classes at a Bosch bread store and learned all about dough enhancers and wheat gluten. Dough enhancers and wheat gluten make the bread have a great texture and fluffy bread. I use a dough enhancer when I make cinnamon rolls or dinner rolls. It’s totally a personal preference. I love to play with bread dough, can you tell? I love love love to make bread. Linda
So if I choose to bake it in the bread machine you just let it run the complete course through? So my machine I just found at a thrift store does 2 lb. loaves, this would work perfectly?
Hi Emily, how exciting you found one at the thrift store. Mine is a 2-pound (I make Two one-pound loaves). What brand did you get? I do not bake it in the machine. I let it rest, mix, knead and rise and pull out the dough. I push “11” which means I only want it to rest, mix, knead, and rise. I have pictures on how to do it if you bought the same brand. https://www.foodstoragemoms.com/bread-machine-bread/
This is such a great idea Linda! I will certainly get busy making up some bread-making kits. I have tried your other bread and roll recipes and they are so good. I even ordered the smaller bread pans from Amazon that you use.
I meant to give the 5-star rating!
Hi Paula, aww, thank you, my friend!! Linda
Hi Paula, oh I’m so excited for you to make bread with these packages. I want to make it as easy as possible for people to make bread. I’m over the moon that my family loves this recipe (which is my daughter’s) and it does not need eggs. It’s so fun to grab a bag and start making bread!! Mark and I prefer the smaller loaves because remember they do not have preservatives. I have to laugh because we eat both loaves when the family comes!! Linda
Linda:
Our Walmart carries 1/2 gallon jars and 1 gallon jars. I am going to buy some little by little for storage here in our home. I think I will try to make the bread mix in the bags for my Food Savor machine. I know they would not be reusable but I can’t afford the bags you mentioned. I will also have to half the recipe because my bread machine will only make a 1# loaf.
I make rolls mostly because then the bread does not go to waste . I do make some bread because I like it for sandwiches The bread machine you recommend is great but at this time it is not in our budget.
Hi Jackie, thank you for the 5 stars, my sweet friend. Oh, they have cheaper bread makers, I bought this one because a reader mentioned she bought one. You can make this recipe by hand, well, not my hands they hurt too much. If you have a bread machine that makes ONE one-pound loaf, use that machine and use quart mason jars. I will make a new recipe card for you to print. What you have will work!!!! Give me 5 minutes to make a one-loaf recipe. Linda
What about us people who do bread the old fashion way (not in a bread maker?) Instructions, please?
Hi Ceri, thank you for the 5 stars. I’m so glad you brought this to my attention. I just added the recipe instructions on how to mix, knead, let rise, and bake by hand. Enjoy, Linda