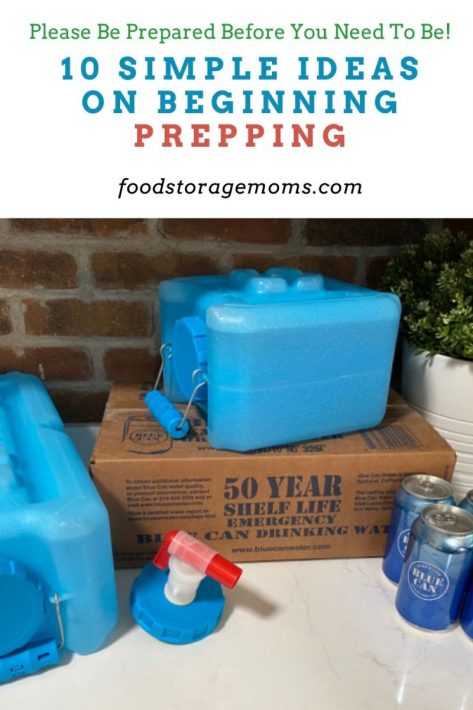
10 Simple Ideas on Beginning Prepping
This post may contain affiliate links. We may earn a commission if you purchase via our links. See the disclosure page for more info.

If you’ve recently learned about prepping and its advantages, you might want to learn some basics to start prepping at home with your family. Preparing for potential emergencies like natural disasters is essential, and a war would be another reason.
You never know what can happen, whether it’s floods, tornadoes, earthquakes, wildfires, or hurricanes. Stocking up on essentials can help you be ready for most challenges. Check out these ten simple ideas on beginning prepping and becoming more self-reliant, which are easier than you might think!
I’m updating this post because I realize I have new followers who may need help. Please feel free to share anything on my website if you teach emergency preparedness classes, want to inform neighbors, or get extended family members involved. We all started small and added the needed items as our budget allowed.
10 Simple Ideas on Beginning Prepping
1. Start Collecting Non-Perishable Foods
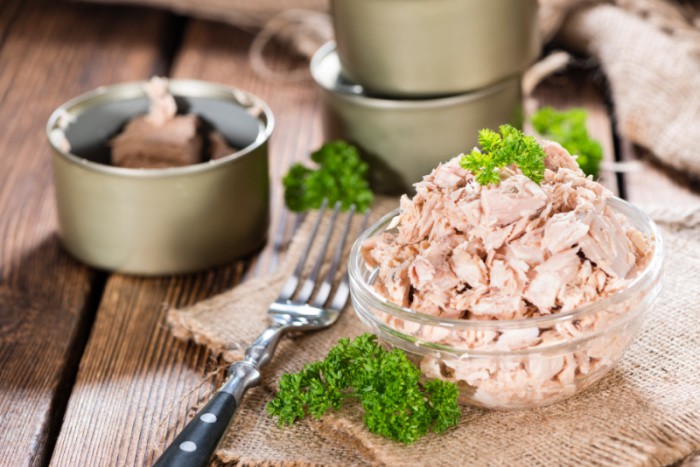
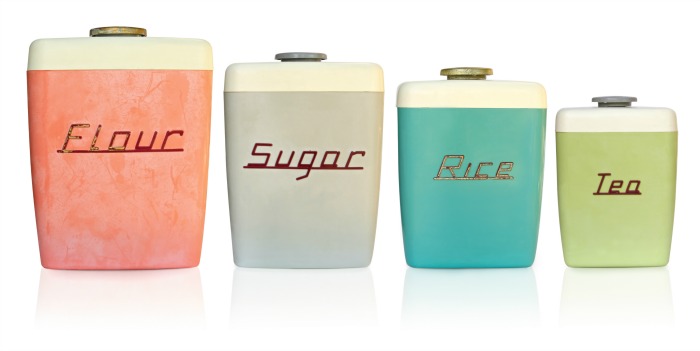
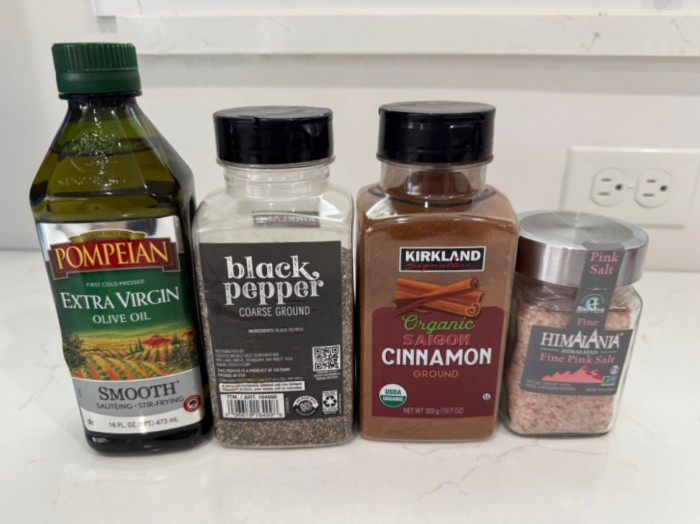
As a prepper, it’s always a good idea to start collecting non-perishable foods at home. These foods included canned meats, tuna, peanut butter containers, protein bars, and more. You don’t need to run out and buy the first non-perishable foods you can find. Instead, try to catch these items while they’re on sale. Right now, many stores are holding clearance sales of canned goods. It’s a great way to get started.
If you grab them on sale, you’ll save money and add them to your stockpile simultaneously. Don’t waste money on food you know your loved ones won’t eat, even in an emergency! This may be one of those simple ideas on beginning prepping, but it’s important because you don’t want food to go to waste. During a disaster, you and your family still need good nutrition as a means to stay healthy and alert
2. Store Plenty of Water For Everyone in the Household
Storing water is a must. You’ll need it to stay hydrated, but it can also come in handy for boiling pasta, rice, and other ingredients you can eat in an emergency. If you store water, you need to do it the right way.
Don’t place it in old milk jugs. While it may seem like a good idea, it’s not because those jugs can easily break over time, causing the water to leak and get everywhere.
It’s best to store your water in quality containers with lids to keep it free of dirt and debris. I have a few ideas I want to show you. Some of you know about these, I’m sure. But for those who are getting started and may not be familiar with various products, I want you to have some options to choose from. I store water in many ways; that’s what we need to do.
Please keep your water safe by storing it on two by 4’s to keep it off the ground or concrete. You don’t want chemicals to leach into the water container(s).
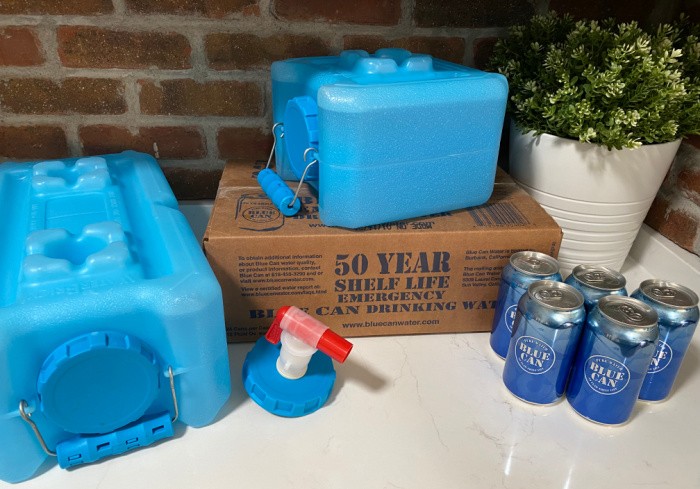
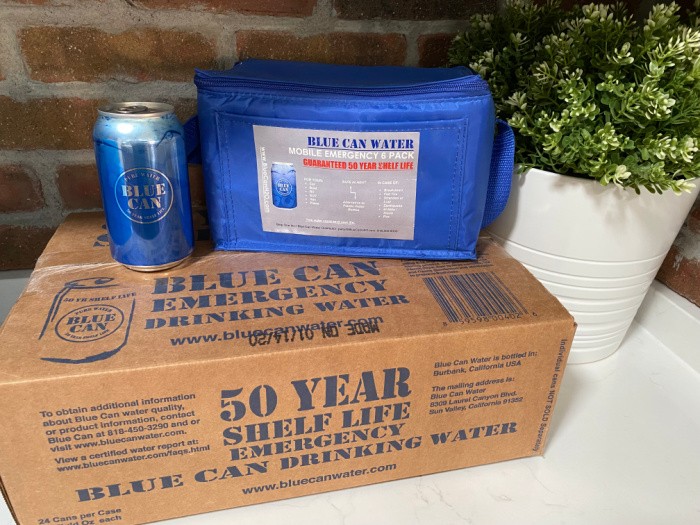
Blue Cans
You may want to look at these Blue Cans. They are truly my favorite long-term water storage containers. They are good up to 145 degrees outside, but depending on where you live, they could freeze. Brownells sold out of them, so we can no longer get them there.
They taste better right out of the can than any stored water I have. These don’t need the product Water Preserver, which you add to your stored water so it doesn’t go bad for up to five years. The Blue Cans have a 50-year shelf life and are the best ever.
Yes, they may be a little pricey, but price isn’t an issue when you need water to survive. I want you to know how much I love this product. Please google for places where they are available to purchase closest to your area.
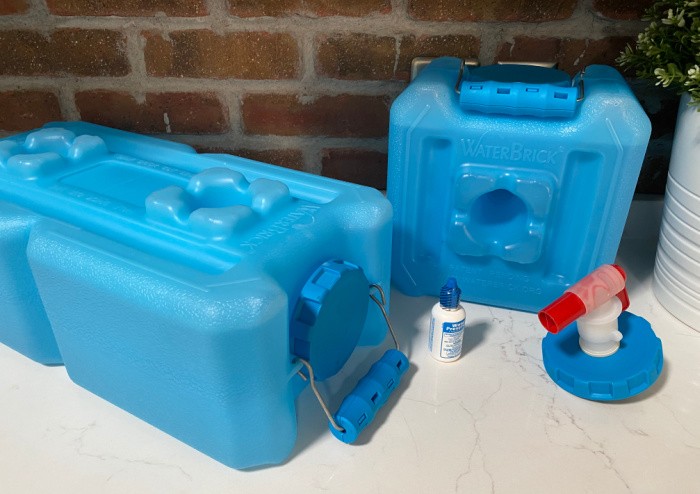
WaterBricks
I love WaterBricks, I have several of the 3.5-gallon ones and a few of the 1.6-gallon size. The larger units are more practical because you can carry one in each hand to balance them. They each weigh about 27 pounds if filled with water. WaterBricks and Spigot.
I used to have a guest room with 16 of the larger ones under a queen bed, so I had 56 gallons under that bed. No one knew they were there. WaterBricks are really handy because they’re designed to be stacked. You can see the ridges and grooves for stacking purposes in the picture below.
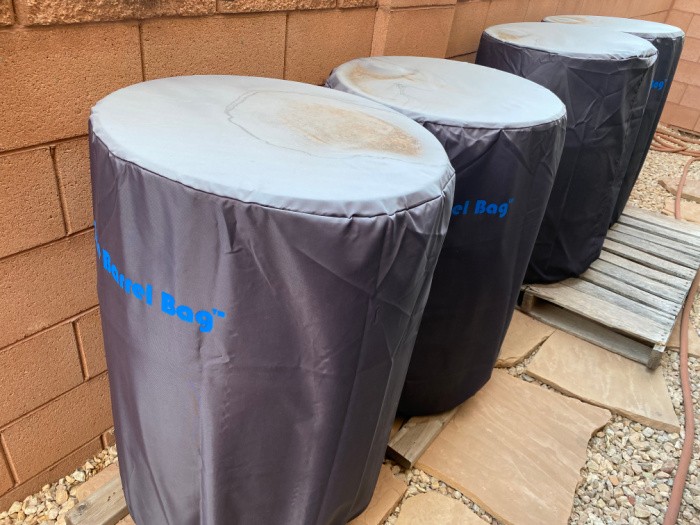
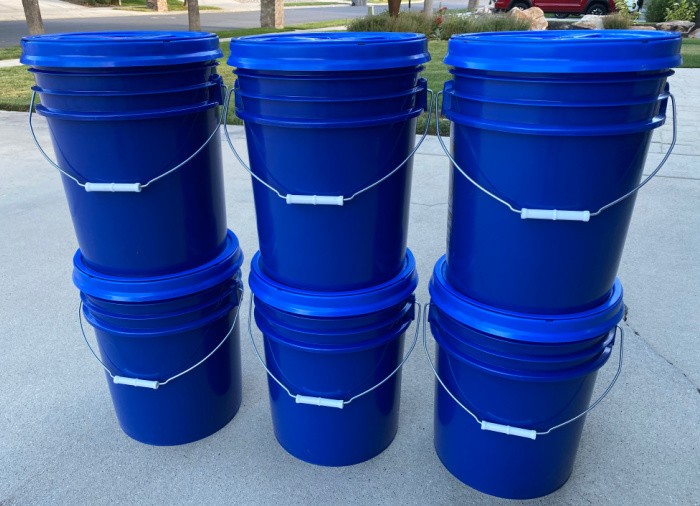
55-Gallon Barrels
I have four 55-gallon barrels on the side of my house. They are from my early days of prepping. They are inexpensive and need a pump to get the water out. When I lived in the desert, I covered them with UV water barrel covers to protect the plastic.
55-gallon UV Water Barrel Covers. I have only replaced them once in 15 years. This water may best be used for hygiene purposes but could also be used for cooking and drinking if needed. As a precaution, you may want to use a quality water filter to properly filter the water or even boil it if you’re nervous before you consume it in food or as drinking water. As mentioned above, I use Water Preserver in these, so I only have to change the water every five years.
As a note, many government agencies suggest one gallon of water per day per person in your family. I have always to my readers a more realistic number is four gallons per person per day. That should cover needed hydration, provide water for cooking, give you some to do limited laundry if required, and also for some sanitation and personal hygiene, even if it’s just a sponge bath. And don’t forget some water for your pets.
Some people use unscented bleach or water purification tablets to treat their water. Other than Water Preserver, I like products from Big Berkey and PortaWell.
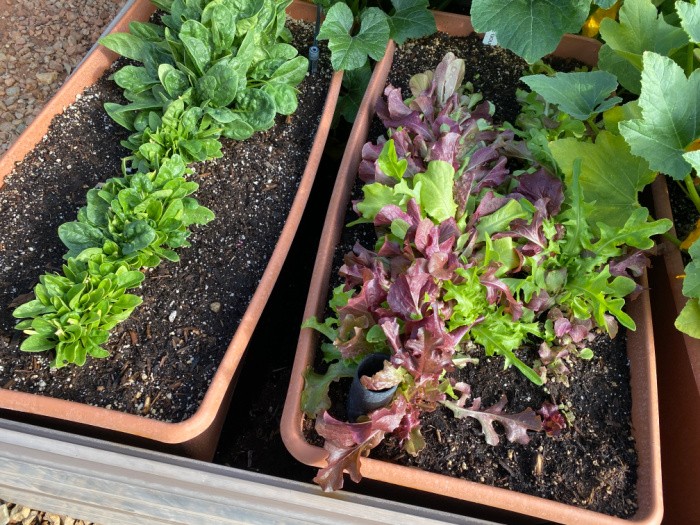
3. Build a Garden in the Backyard
Focus on building your garden in the backyard. If you’re growing different fruits, vegetables, and herbs, you can access fresh food in an emergency. You can start small, especially if you have little gardening experience or growing space.
If you’re unsure what to grow, think of the vegetables and fruits you eat and add to recipes more often than anything else. Those are the best fruits and vegetables to grow if they work in your location.
Consider planting lettuce, potatoes, tomatoes, berries, and other produce you can use in an emergency. These pictures show some of the items we typically have growing in our garden a few years ago.
I update an annual post every month, outlining what you can plant in that particular month based on your growing “zone.”
4. Use Coupons to Get Must-Have Prepping Items
When you know that you need specific items while prepping, such as mason jars with lids for canning and storing food or flashlights to help you out when the power goes out, make a list of those items. Then, start looking through sales flyers or newspaper ads to see which stores are offering the items you want and need at discounted prices. The goal is to find what you need at a discounted price to save more money.
You don’t need to rush out and spend all your money in a day to get the prepping essentials. Take your time and collect what you can based on family size, budget, and storage space. This tip is essential when it comes to simple ideas for beginning prepping.
5. Get a Storage System Set Up in a Convenient Spot
Invest in a sound storage system that you can place in a convenient spot, such as the basement. It’s out of sight and out of the way, but you can use it to hold some of the most critical items, including bottled water and canned foods.
It would help to have a safe place to put your things to prevent them from getting damaged. You can buy sturdy, reliable, and spacious plastic or metal shelving units. We keep our storage food on metal shelves from Costco. I really like them because they are sturdy and have wheels so I can move them. They almost fill one small bedroom in our home.
The prepping gear that isn’t affected by temperature changes, like our 72-hour kits (bug-out bags), Sun Ovens, Dutch ovens, cooking fuel sources like charcoal, etc., are on the same kind of shelves but located in our garage. UPDATE: (now our 72-Hour Bags are in our home).
6. Buy Batteries While They’re on Sale
If you’re going to start prepping, you’ll need to have plenty of batteries. If you don’t have a power source, batteries are a must-have because you can put them in flashlights to see where you’re going and what you’re doing. Try to buy batteries when they’re on sale.
Batteries can be found at many different stores, including your local home goods store and grocery store, but it’s best to get them when they’re available at a discounted price. While the brand doesn’t necessarily matter, you might want to choose a brand known for its reliability. I love the Members Mark batteries from Sam’s Club. Thank you, Harry for the tip on Sam’s Club.
Please invest in some solar items as well. Many new devices use a portable solar panel to run or charge their batteries. Solar Lanterns or Solar Flashlights: Make sure you rotate batteries as needed. There is nothing worse than grabbing some in an emergency only to find your stored batteries are depleted.
Please consider getting a hand-crank radio for your home or evacuation shelter. This way, you can stay informed and not have to carry too many batteries in your inventory for needed communication in a disaster. It is a great addition to your family’s emergency kits.
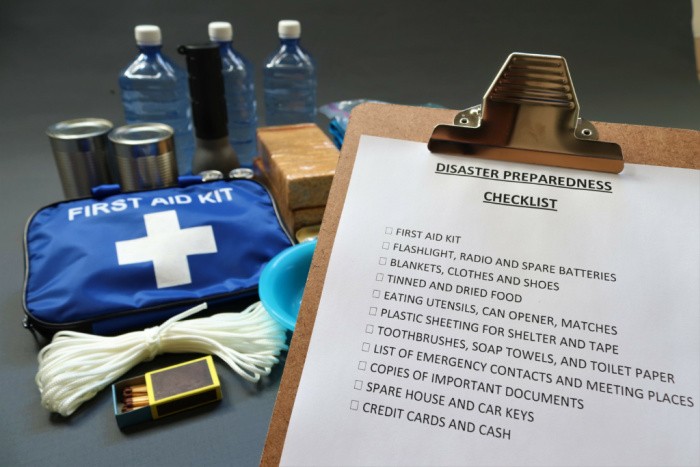
7. Put Multiple First-Aid Kits Together
Work on putting multiple first-aid kits together using quality first-aid supplies. If you have several people living in the household, having a first-aid kit for each person is best. Over time, you can collect different items for the kits, such as rubbing alcohol, bandages in assorted sizes, gauze pads, ointments, allergy medication, and other helpful first-aid products.
Some families have members with special health needs who require medical supplies others don’t use. Consider their needs as you gather supplies for short—and long-term storage.
It’s always good to have these items in case someone gets injured or is in pain. In case you missed this post, First Aid: What You Need To Survive
I highly recommend these books: Bugging In by Raymond White and The Survival Medicine Handbook
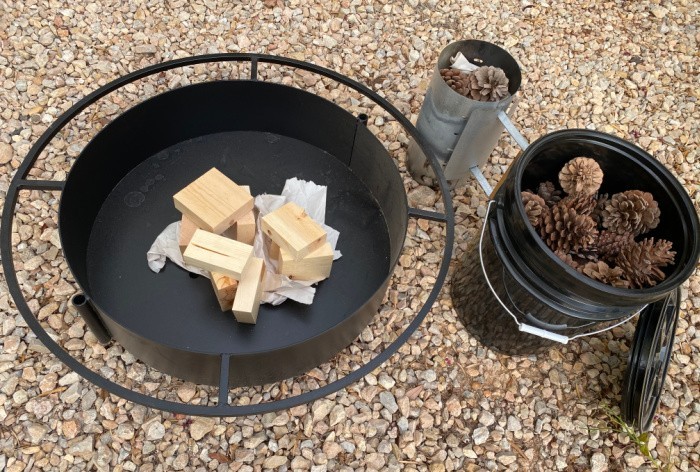
8. Invest in the Right Cookware
Try to buy the best cookware for emergencies. You can find portable grills, emergency stoves, pie irons, and other products that you can use to prepare meals without a traditional power source. You might also want to invest in wood for fires in emergencies. If you have a garage, you can store the wood there until you’re ready to use it. Pie Irons for Cooking
Please invest in cast-iron pans and a 6-quart cast-iron Dutch Oven. You can survive with a cast-iron Dutch oven if you have charcoal and matches stored or fire starters of some kind.
You’ll also need dishes to serve the food you prepare. I always have paper plates and other disposable products available.
Harry mentioned that if cast-iron pans are too heavy, a great alternative is carbon steel pans. Carbon Steel Pans or a Carbon Steel Griddle
9. Work on Eliminating Your Debt
Try to get out of debt. Being prepared isn’t just about having water, food, and a first-aid kit; it’s also about getting your finances in order so you can still meet your financial obligations when you are out of work or if your home or car is damaged.
You can start with your smallest debt and work up to the most significant debt to get everything paid off within a reasonable amount of time. Once you’ve eliminated most or all of your debt, you’ll feel better prepared for the future. You can also start saving some extra cash in a safe at home to become more financially secure.
10. Learn How to Start Canning
Don’t forget to learn how to start canning different foods at home. It can save you money in the long run when you’re trying to build your stockpile of foods your family will eat. Learn about different canning methods, such as pressure canning.
You can get the supplies needed and get started by canning some of your favorite foods, including vegetables, jams, fruits, and meats. Please invest in one of these canning books: USDA Canning Guide or The Ball Canning/Preserving Book.
Final Word
These helpful ideas are worth considering if you’re just getting started with prepping. As you start putting together a survival kit, you don’t need to rush out and spend your last dollar on essential prepping items. Consider making a checklist of what you need, taking your time, and getting items while they’re on sale to save more money.
You can focus on slowly, but steadily, building your stockpile until you feel comfortable with what you have at home. What are some simple ideas for beginning prepping you’d like to share? May God bless this world, Linda.


Linda, this is another good post! I have a water brick and want to get several more. I just have to bide my time. LOL Larry’s not big on prepping like I am. He thinks stocking water is silly. He’ll be glad I stored some when we need some.
Hi Deborah, I get it, he is not alone. So many people learn very quickly when they have to drive to the city to get ONE 24 pack of water for their entire family after a disaster. I get thirsty saying that! LOL! Just order a few here and there. You know what we need to do and he will be so thankful when you pull those out after an unforeseen disaster. Linda
Train on what you don’t know, attend meetings and conferences as things open back up and get in shape because it’s hard during emergencies and events.
Hi Matt, great reminder, we must be in good shape, physically and mentally. It’s all about learning! Great comment, Linda
That’s what I’m planning on doing. We do have some 5 gallon bottles, but that’s not going to be enough.
Great comment Matt. That’s what I’m trying to do.get back in top shape. It’s just a long process for this almost 70 year old. LOL Especially since I’ve been having a lot of lower back pain. Even standing at times seems it to “catch” and hurts. I know I need to see a doctor, but I already have appointments every month through August. And that’s just so far.
Just be the best you that you can be. I’m not 30 and in the army anymore either.
Matt, great comment, you rock! Linda
Hi Deborah, I’m 71 and exercise…..LOL! Need I say more. I get geared up to walk, and I don’t. LOL!
Linda
Deborah, I’d like to suggest you get an Internal Medicine doctor, if you can. There’s less ‘referral’ to other doctors when you find a good one. Another idea is to ask for a Nurse Practitioner, rather than a general practitioner doctor. They seem to listen and Hear our complaints far better than most doctors. And know what tests to order. It is dang hard to try to just maintain our health, let alone get in better shape with each passing year. I did something recently that helps me to actually Do a bit of exercise: I put it on my To Do list each day! I try to have a daily to-do list anyway, so I just added an exercise to it. Ex: lift a can of beans 10 times with each arm while sitting (it’s like doing weight lifting for the young, lol). Next days lists include walking to the mailbox carrying a small bag of trash (my bins and mailbox are next to each other quite aways from my home), or walking in place while watching half an hour of local news. You get my point, I’m sure. Thing is, it’s very important to set time aside for doing physical activity that can, at the least, maintain current strength. I’m doing a lot more of exercising than I did before, just by putting it on my daily to-do list. Hope these ideas help.
Wendy, we had an interest before the doctor we have now. All he did was take x-rays of the chest, and blood work every 3 months. He missed my having Chronic Kidney disease. And thyroid disease.
Deborah, the best person to tell your medical history is you. I learned long ago that doctors don’t have the time to review medical history before they see you. Frankly, the ‘histories’ are online but Not easily read, including by a doctor. Lol, because every dang appt/diagnoses is interspersed with the meds ordered, when dispensed, tests ordered, test results, blah blah. I’ve looked at my chart online and understand why my internal medicine doctor knows very little about my history. It’s my job to tell her about things, maybe long ago, but which can affect me now.
Linda, kudos on this article, especially the parts on water storage. I think the first step in Prepping is to realize it is the duty of every adult human being to protect their family during any emergency. Taken in this light, Prepping is just good, common sense.
Hi Ray, I totally agree with the water storage. I’m amazed when I see people on the news lined up to get a 24 pack of water. I don’t get it. I really don’t. Plus it tastes awful. LOL! Linda
Linda, when Jane and I lived in Las Vegas we stored 36 pack cases of Arrowhead water. (That was before I got our Aquarain 400 filtration/purification system). When we moved to Kingman, I brought that old stored water along. After being stored in a closet for 6 years it finally started to taste like plastic so I used it to water my garden beds.
But I didn’t think six years was bad at all, so when we next go to Costco, I’ll stock us up with a few more cases. You can’t have too much water stored if you live in a desert and don’t have a well.
Hi Ray, is the Aquarain 400 deal like reverse osmosis or like a Big Berkey? You know I love to hear stuff like this. You are so right we can never have too much water stored living in the desert!! Linda
Linda, it’s like the big berkey but better in that it is tested far more rigorously. I talk about it in Bugging In. I’ve had mine for ten years now and I’m still using the same filter with no end of its usefulness in sight. They can be cleaned up to 200 times. The device is an amazing money saver. It’s been used to filter raw sewage to perfectly safe, potable water after the filter was abraded to 10% below it’s useful life. Check out the links in the chapter on Water.
Hi Ray, WHAT????? Oh my gosh!!! I. have got to check that out! Berkey sent me mine, but I need to check out the one you are talking about in your book. If the filter can be cleaned, that’s a game-changer. I’m loving your book by the way. I LOVE LOVE LOVE it! If anyone wants to read Ray’s book, here it is. Linda https://amzn.to/35bNmWQ
Lots of great advice & tips in this post.
I think if folks aren’t knowledgeable about herbal medicine & the useful wild edible and medicinal plants growing, it would be helpful to start studying!
Attend herbal conferences, take classes with herbalists etc. A day may come when we can’t get to a doctor!
Hi Amy, I agree about herbal medicine and edible and medicinal plants. I would have to say Leanne who is in this group is an expert on them. Thank you for your kind words. Linda
I sent this to my son and daughter-in-law. They do have some things but, they have lived overseas for the last 6 years. So I am hoping that this will help them.
HI Brenda, I totally understand about living overseas and not wanting to ship stuff around the world. Hopefully, this list can get them started. Just a little at a time will work. Thank you for sharing it. Linda
Linda, thank you once again for promoting my book. I hereby grant you permission to use information from it, with proper attribution.
For those who don’t have my book here’s the link to AquaRain products. Just click on the link and start checking out their products. Don’t get me wrong Berkeys are good, but most of the people I know who have Berkey’s have put Aquarain filters in them.
https://www.aquarain.com/
Hi Ray, thank you for sharing the link! I love it! Linda
This is the third day in a row I haven’t gotten the articles. Trying renew the subscription.
Hi Teacher of Grands, I’m so sorry to hear this. I have had two complaints now you’re the third. One finally got it when her AOL account worked. I’m trying to figure out why, thank you for letting me know. Linda
Hi Teacher of Grands, I unsubscribed you, and then subscribed you. Let’s hope that works. Thank you for your patience. Linda
Everything has been going into the spam folder. No idea why they said it was. Clicked report not spam. And did the confirmation notice so we shall see .
HI Teacher of Grands, I hope clicking it’s not spam works, I’m so sorry. Thank you for letting me know, Linda
I was without water for 4 weeks. My pipes froze with – 3 weather one week as hundreds of families did.
I used 3 (30) gallon drums.
I am just one in my household and I was very conservative.
Just to let you know how much water is needed in emergencies.
HI JayJay, oh my gosh, your story is a blessing to all of us. 90 gallons in 4 weeks, one person. I haven’t seen -3 degree temperatures in years!!! You were conservative with your water and still used approximately 3 gallons per day if my math is correct. So my suggestion of 4 gallons per person is not too far off. The American Red Cross recommends one gallon per person per day. I disagree. American Red Cross-Page 7
Linda,
A reminder on Number 8-Cookware. If you find the cast iron pans are too heavy, an alternative is to get quality carbon steel pans. They are lighter and are seasoned much like cast iron.
Hi Harry, thank you for the reminder, I am going to add a link for one of those carbon steel pans. Thank you, Linda
Linda,
I have a manual siphon to get the water out of 55 gallon barrels. Who knows if you’ll have power when you need your water?
Have begun harvesting plums. The flesh is sweet but the skins are somewhat bitter. If I leave them on the tree to fully ripen the birds will get them all, so I picked a batch and am setting them on the E facing window sills to ripen further. They are perfectly edible now except for the skins.
We’ve had cooler weather this week and my cucumbers are producing. The variety that is doing best is a hybrid called Sweet Success. I’m harvesting them at 12″ and they are basically seedless and sweet. I’m growing them in large containers. This fall I’ll bring a cutting inside, root it and keep it going in my mini-greenhouse until next spring–like I did the Sweet 100 tomato last year. It’s a way to make even hybrid crops sustainable.
Hi Ray, we used our pump on our 55 gallon barrels to empty them and my sister took them to Las Vegas. We couldn’t load anymore on the U-haul. Those cucumbers and plums sound delicious! I’m not sure if or when we can start a garden. It’s really hard living on this property. Life is different now, Linda
Linda,
I feel for you and your situation, but a couple of containers, even if you have to hand water them would give you tomatoes and cucumbers. And sprouting seeds like alfalfa, clover, and broccoli can be done in mason jars inside. Better than nothing. Just sayin’.
Hi Ray, I will try some containers next year. I will try the sprouts, great reminder. Linda