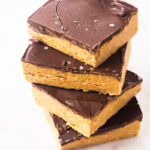
No-Bake Peanut Butter Bars that are rich in protein. Made with simple ingredients in just 10 minutes, no oven required.
- 2 cups creamy peanut butter
- 3/4 cup honey
- 2 1/2 cups quick oats makes 2 ¼ cup oat flour
- 1/2 tbsp vanilla extract
- 1 cup mini chocolate chips heaping
- 2 tbsp creamy peanut butter
- flaky sea salt to taste
-
Line a 9½-inch square pan with parchment paper, leaving some overhang so you can lift the bars out later.
-
Add the quick oats to a blender or food processor and blend until they resemble a coarse flour. It does not need to be perfectly powdery.
-
In a microwave-safe bowl, combine 2 cups of peanut butter and the honey. Microwave in 30-second intervals, stirring between each, until smooth and easily stirrable, about 90 seconds total.
-
Stir in the oat flour and vanilla extract until a thick, cookie dough-like mixture forms.
-
Transfer the mixture to the prepared pan and press firmly into an even layer. Freeze for 20 to 25 minutes to firm up the base.
-
In a microwave-safe bowl, combine the chocolate chips and peanut butter. Microwave in 30-second intervals, stirring between each, until smooth, about 90 seconds to 2 minutes.
-
Pour the melted chocolate over the peanut butter base and spread evenly. Sprinkle the top with flaky sea salt.
-
Freeze for 60 minutes, or until set. Let stand at room temperature for 5–10 minutes before slicing into bars.
-
Use the parchment overhang to lift the bars out of the pan, then cut into 12 large or 16 small squares.