Garden Soil, Supplies, And Tips

Have you always wanted to plant a garden but didn’t know where to start? Today, I want to walk you through what you need to grow a successful garden. How many of you have heard or said this statement, “What can I do to make my garden grow?”
Well, today we are going to talk about the things I know based on my own experience and from researching this subject. Of course, I would love you to share your ideas about how you make your garden grow as well. Thanks in advance because we all can learn from each other.
I decided I had to make a plan for my backyard so I could live off my land, or at least try to live off my small plot of soil. I have had a garden for well over 50 years so I have learned the good, the bad, and whatever else about a garden. Today I want you to think about growing a garden if you aren’t already. Let’s get the process started. SEEDSNow
Garden Soil, Supplies, and Tips
1. Soil
The first thing we need to think about is the general condition of our soil and where the perfect spot may be to grow fruits and vegetables. First of all, we need a lot of sunshine, so look for a great spot in your yard. If you take a shovel and you can’t dig very deep, then more than likely your tomato roots can’t grow deep into the soil either.
I quickly learned that this beautiful red clay soil that people love to admire and explore by hiking and biking all over the mountains of Southern Utah is not the greatest soil for growing many plant varieties, or at least without some additives.
I know people love using manure, but I don’t have farm animals or a truck, so that’s not going to work for me. I know that my soil is “clay” that can dry out very hard and clod up, so not the greatest for roots to grow deep down in the earth.
About 14 years ago when we first bought this house, I tried growing tomatoes in 20 by 20-inch pots. I used a water drip system and everything I was told to use to be successful. It didn’t work, the heat here is too extreme for tomatoes in pots. So I checked that off my list.
But a few years ago, I learned I can grow potatoes in those very large pots. It was a cartwheel moment for me when I dug my first potato! I was literally thrilled as I dug potato after potato and placed them in my hod basket. You need to understand, I have grown potatoes before in large yards, but I have a very small yard here and it’s a bit trickier, but it can be done!
I soon realized that unless I bought a tiller (we sold ours years ago) we would not be able to grow any food items that I desired in this hard cement-like clay soil. No, I’m not buying a tiller. I bought Miracle Grow soil and filled some raised garden beds and the change in my success rate was amazing. Here are the depths you need for certain vegetables based on quality soils:
Shallow-rooted vegetables
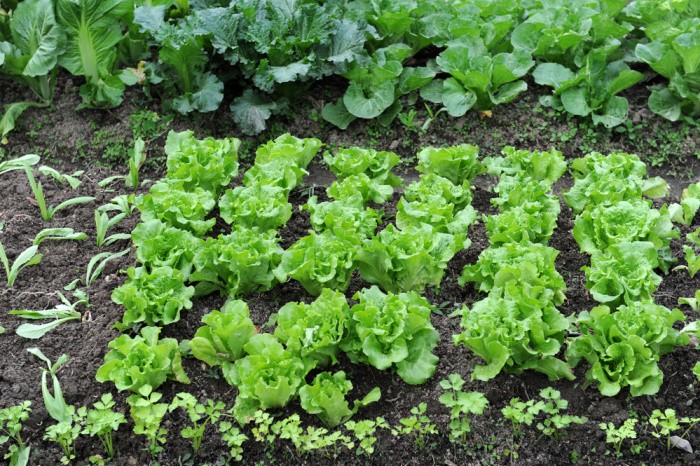
Shallow-rooted veggies require 12 to 18-inch soil depth for the roots to grow healthy and strong. Shallow-rooted veggies are lettuce, radishes, cauliflower, onions, chives, potatoes, and of course, herbs.
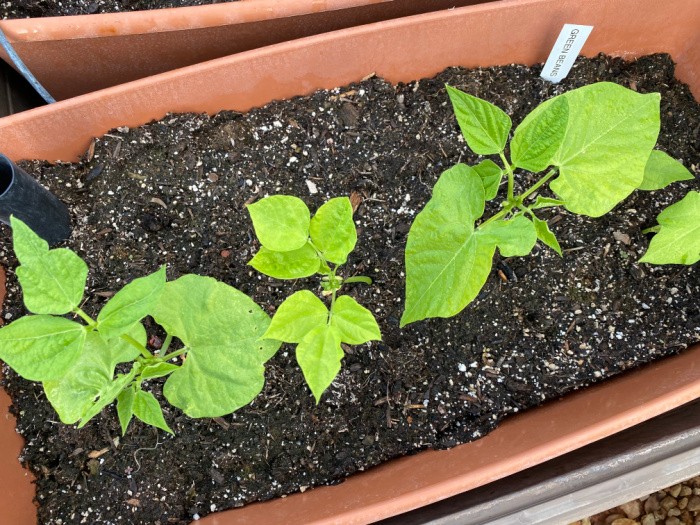
Medium-rooted vegetables
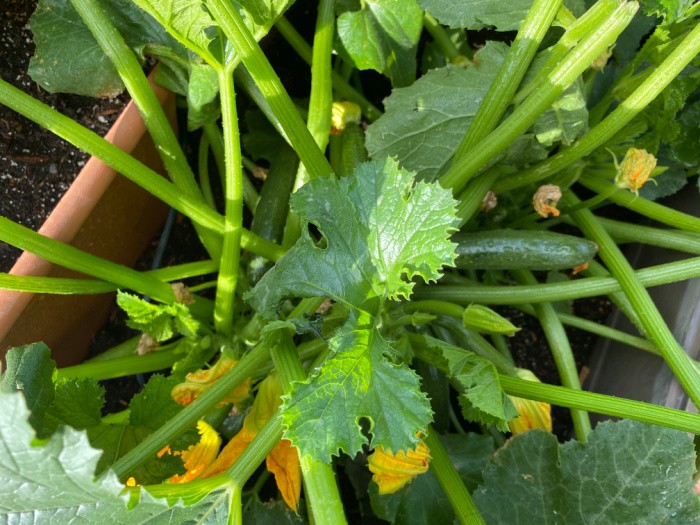
Medium-rooted veggies require 18 to 24-inch soil depth for the roots to grow healthy and strong. Medium-rooted veggies are like beans, cantaloupe, summer squash, and cucumbers.
Deep-rooted vegetables
Deep-rooted veggies need 24 to 36 inches of soil depth to grow healthy and strong. Deep-rooted veggies are sweet potatoes, tomatoes, and rhubarb. Note that I have had success with my raised garden boxes with a soil depth of only 18 inches. I have found that I need to spread them out some so they don’t conflict with each other.
Can you see why people have to till gardens to get the soil loose and loamy? I use a shovel and a rake in my raised garden beds. I have had a garden for 50 years with great soil, so I had to learn how to grow stuff here in Southern Utah.
Check the pH level
A worthwhile test of your soil quality is to check the ph level of the soil. The soil needs to be moist and the probe needs to be clean and shiny. You can use a piece of steel wool to polish the probe if it gets rusty. Please remember to test several sections in your garden. You basically place the probe into the moist soil or water runoff and check the numbers. If you know your soil type you can modify it to grow the veggies you want to grow. Easy peasy.
Some plants prefer acidic soil while others prefer alkaline soil. You can amend the soil with a few tips. Here are a few ideas for amending your soil: sawdust from untreated wood, shredded newspaper without the glossy pages, coffee grinds (fresh), two-year-old manure that’s been composted, etc. Be careful with coffee grinds, I put too much in and had to buy calcium to counteract it.
These are the pH numbers you want:
1. pH 7 is neutral soil
2. pH below 7 is acidic
3. pH above 7 is alkaline soil
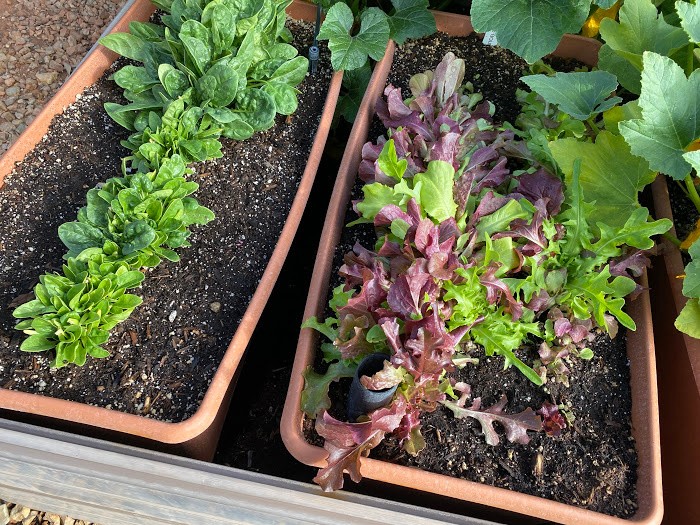
2. Raised Garden Beds
The backup plan to using the regular yard soil was to try raised garden beds. I decided to start with 18-inch deep raised garden beds. Generally speaking, tomatoes need 24 inches for prime growth, but as mentioned mine have 18 inches of root space and they have grown very well.
I started with four raised garden beds that were 4 feet by 4 feet and 18 inches deep. Then the next year I bought two more raised gardens. I now have seven raised gardens. I purchased two more for next spring since they were on sale and the company seems to be coming up with a newer style next year.
Yes, they are pricey and you have to buy soil to put in them. I only buy Miracle Grow soil, as I stated above. They are 4 feet by 4 feet by 18 inches deep raised beds and it takes 10 two cubic foot bags to properly fill them.
Yes, it’s not as cheap as using the regular soil in your yard, but I know I can grow my own food in less-than-optimum soil and weather conditions. I bought mine over a number of seasons so it worked out well within my garden budget.
3. Fertilize Your Garden
I only use Miracle Grow fertilizer, but then I only have 7 raised garden beds.
4. Buy Heirloom/Organic/Non-GMO Seeds
Here’s the deal, if you start with quality seeds or plants you can produce so much more in your garden. If you want to remember the term heirloom seeds, think pioneer. These seeds have been around for years and years. You can save the seeds and use them each growing season year as long as you have healthy plants. They might even pop up next spring without saving seeds. This is where I buy seeds: SeedsNow
Ballard’s Nursery ( LaVerkin, Utah) gave me a list of seeds and information about them. I am condensing the list, as always. I like the nitty-gritty, not a lot of fluff, so to speak. Here is my condensed list of seed information, simplified from Ballard’s:
Open-pollinated Seeds:
These seeds are produced by allowing a large number of plants to freely cross-pollinate for several generations. Only similar plants are allowed to contribute pollen and make seeds for the next generation. The offspring that do not conform to the desired traits are culled before they can contribute pollen. These are the best seeds!
Hybrid Seeds:
These seeds are produced by crossing two open-pollinated varieties. The parent types are generally highly inbred, so they will express their genetic traits uniformly. Hybrids tend to be more vigorous than open-pollinated varieties (known as hybrid vigor). You can save seed from hybrid plants, but because the parent plants are no longer inbred, their offspring may display a wide variety of genetic traits and the resulting crop may not be uniform.
Storing Seeds:
If you keep your seeds dry and as cool as possible, you can use the same seed (in most cases) for several years. Put them in an airtight container in the refrigerator or other cool storage areas ( a storage temperature of 40-50 degrees is ideal). It is not necessary to vacuum pack or freeze your seeds to obtain fairly good storage results. When you are ready to use the seed, remove the container from storage and let it warm up before opening to minimize condensation on the inside of the container.
Long-Lived Seeds:
These may be expected to maintain good viability for 5 years or more. Beets, broccoli, Brussels sprouts, cauliflower, cabbage, collards, kohlrabi, chicory, endive, escarole, radicchio, cucumber, kale, lettuce, melons, mustard, peppers, radish, rutabaga, sunflower, tomato, and turnip are examples.
Medium-lived seeds:
These may be expected to maintain good viability for 3 years. Beans, carrots, celery, chard, corn, eggplant, parsley, peas, pumpkin, and squash fall in this category.
Short-lived seeds:
These are generally not recommended for use for more than one season, but will usually still be acceptable the second year if kept cool and dry. Leek, onion, parsnip, spinach, and cilantro are examples you can try.
5. Epsom Salt Helps Your Garden Grow
Epsom salt is great for tomatoes and peppers because they are usually magnesium deficient. You use one tablespoon per hole when planting tomato or pepper plants. As the tomatoes or peppers grow we need to add one tablespoon of Epsom Salt per foot and work into the soil.
Roses are usually magnesium deficient, so use one tablespoon per gallon and spray on your roses if you think they need some magnesium. Epsom salt is great for some flowering shrubs as well, like evergreens, since it improves the flowering process. I even use it on my trees. I learned it from my weed/fertilizer guy. I had one tree that was struggling and I added Epsom salt and it’s green and doing very well. The mixture solution for trees is 2 tablespoons per nine square feet of the root base. I am doing this every three to four months. I also water my trees for one hour every 2 weeks in the summer. Only once a month in the winter. Here again, this is why it’s critical we know our soil. If we test our soil we will know what our plants need.
Epsom salt contains magnesium and sulfur, two essential nutrients for plants. Magnesium is found in chlorophyll that turns sunshine into food for our plants.
Garden Soil Amendments:
Garden soil is just like us in many ways. We will grow stronger if we eat the right foods. Your garden needs fertilizer or soil amendments such as these:
Unco Industries Wiggle Worm Soil Builder Earthworm Castings Organic Fertilizer, 15-Pound![]()
Miracle-Gro Nature’s Care Organic Bone Meal, 3 lb.![]()
Espoma VM8 8-Quart Organic Vermiculite![]()
Where I Buy My Seeds
BUY SEED HERE: Seeds Now

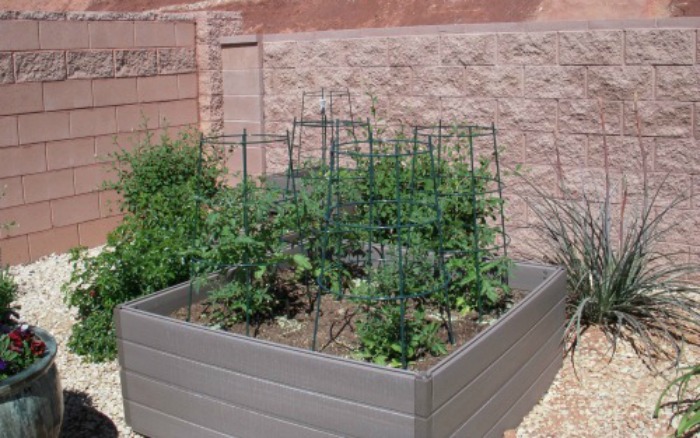
Tomato Cages
Here is a picture of my raised garden beds and the tomato cages I purchase from Glover Nursery in South Jordan, Utah. I have had these for at least 15 years, they do not fall apart. They are the only ones I will buy. If you live near this nursery I highly recommend this brand called “Sturdy Cages”.
Tomato and Pepper Blossom End Rot (brown spot):
This disease is caused by too much water (overstressed) or too much nitrogen, in most cases. Plants need calcium because they have a calcium deficiency.
Your tomato plants need calcium. You can buy a spray when the flowers first appear. You can also add crumbled eggshells deep into the soil to help with the calcium levels. Here again, we need to check our pH levels.
Final Word
Please plant a garden, I’m feeling an urgency to make sure people learn to produce their own food. If you have access to a community garden that would be awesome. I’m lucky enough to have a small yard where I can produce enough vegetables for our family using the space in my backyard. We will be canning and pressure canning even more vegetables this fall. Please be prepared for the unexpected. I strongly believe hard times are coming.


Linda ~ I wish I had a spot to grow a garden but I live in an apartment complex. I do have a balcony but it only gets good afternoon sun and even that is blocked by the balcony wall! I do grow some things in pots but many things don’t do well in pots. I have seen a number of ideas on Pinterest but I don’t have the room or the ability to hang things so some of the ideas are worthless to me. AND, growing in pots is a learning experience to say the least. I also use Miracle Grow potting soil in my pots.
A couple of years ago I planted a cherry tomato plant and made the “mistake” of using Epsom salt in the pot. Well, the “mistake” was that the plant took over EVERYTHING!! The plant was so huge that I thought I was going to have to purchase a chain saw to cut it down at the end of the season. I had so many tomatoes that people around me were starting to say NO to me when I asked if they wanted tomatoes!! I also planted some sage using Epsom salts too! I could not believe the size of the leaves!! They were huge.
So, this year, I am planning to grow a Roma tomato, some Italian herbs and make my own sauce. But that will probably be all that I can manage on my balcony.
Hi Leanne, oh my gosh, the chainsaw story!! I have the giggles! I love growing Roma tomatoes, they are meatier and great for salsa and sauces! Love your comment! Linda
My tomatoes were a fail last year, so I am going to take your Epsom salt advice. They were in self-watering buckets, but the heat is too brutal here as well. Thanks also for giving specific instructions–very helpful!
Hi Roxanne, I have had fails on zucchini, it happens. But I will not give up. Who can’t grow zucchini, right? Good grief. My tomatoes in the pots did not work. The pots got way too hot here in Southern Utah. It takes practice and the weather changes all the time. Keep prepping, Linda
Great article. Thanks for all the tips because I needed them!
However, I would like to point out that using miracle grow fertilizer and soil is defeating the purpose of using organic seeds and methods. Miracle grow is owned by Monsanto and cannot be trusted to be safe.
Hi Kandis, wow, I didn’t know Monsanto owned Miracle Grow, OUCH! Thanks for the tip! Linda