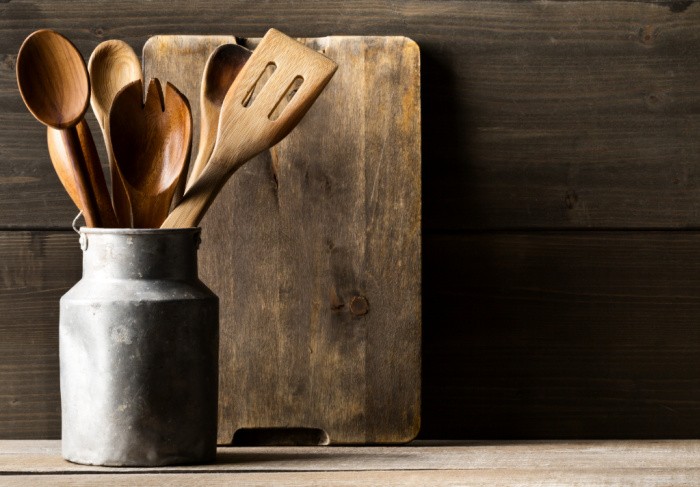
How to Care for Wooden Utensils

Let’s talk about how to care for wooden utensils. Today’s modern kitchen should always have an arsenal of wooden utensils for a handful of different reasons. They’re not only beautiful and extremely versatile, but cheap and very durable. Wooden utensils are great for mixing the batter, stirring a sauce, and scraping burnt pieces off of a pan. In case you missed this post, How to Stock Your Pantry for Under $100
Unlike plastic, they won’t melt, and you also won’t burn your hands using them as you do with metal utensils when they’re exposed to high heat. I even dare to mention that they’re great at getting your point across as well.
I use an 11-Inch Danish Whisk almost every single day. The 11-inch size fits inside my wide-mouth quart jars to stir whatever I need to stir.
How to Care for Wooden Utensils
If you don’t know how to properly care for your wooden utensils, you’ll have a harder time keeping them looking vibrant and smooth. They also won’t have the protection they need to keep them from splitting or cracking, forcing you to toss them out.
How to Properly Clean Wooden Utensils
There are a few mistakes that people often make when it comes to wooden utensils, and these can have a dramatic effect on how long they last. Simply washing or drying them in an incorrect manner over a period of time can be the devastating difference-maker.
As it turns out, properly caring for your wooden utensils is extremely easy to do when you know what you’re doing. Cleaning your wooden kitchen utensils properly can greatly extend their life. Simply follow these three easy steps to keep your wooden utensils looking snazzy.
Rinse Immediately
Once you’re finished using a particular wooden utensil, go ahead and rinse it off immediately in warm water. Be sure that you don’t soak it.
Wash Them By Hand (Always)
Putting your wooden utensils in the dishwasher is one of the biggest mistakes that you can possibly make. They’re not meant to soak in extremely hot water for such a long wash cycle. The heat drying cycle we often use is also damaging to the wood. These issues can result in gray and fuzzy utensils over time, greatly shortening their life span.
Your utensils will certainly lose their attractive appeal. So always wash your wooden utensils by hand, and avoid the dishwasher at all costs.
Use a Milder Dish Soap with Hot Water
While using hot water and mild dish soap, you have the option of scrubbing your wooden utensils with a washcloth or a soft bristled brush.
Set Them Up to Dry
Go ahead and towel dry your wooden utensils once you’ve rinsed away all the suds. When wood has become wet, there’s the possibility that it could expand and contract if it doesn’t dry properly, which you certainly don’t want.
By propping up your wooden utensils, it will allow the airflow to help evenly dry them so damage to the wood is less likely to happen.
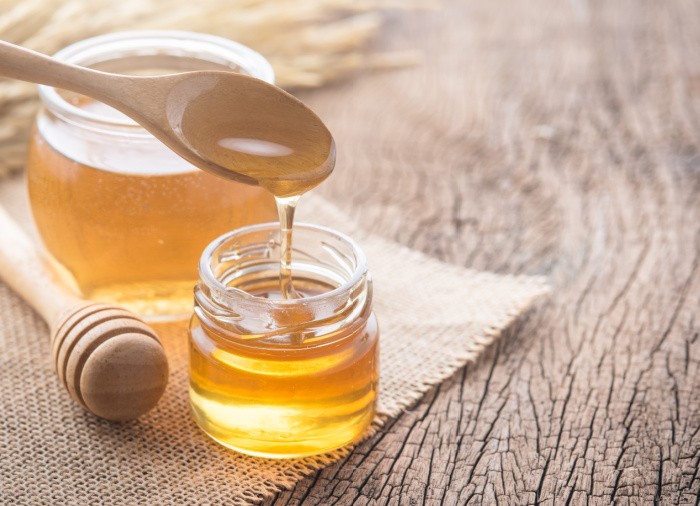
Apply a Coat of Oil to Your Wooden Utensils
One of the best ways to keep your wooden utensils looking nice is to add a coat of oil to them every once in a while. Some suggest about once every 6 months.
This also helps to create a protective barrier, which helps to prevent cracks, splitting, and fading. One last thing that it does, is that it creates a resistance to absorbing odors and stains.
Use the Right Oil
Of course, you don’t want to use just any oil to coat your wooden utensils. This can be harmful to you and your family, or at the very least, add an offensive smell to your food. Avoid using varnishes, polyurethanes, and also food-based oils such as vegetable or olive oil. These could cause your utensils to go rancid over time, and your food to taste not so good.
Choose oils like beeswax, because it won’t be harmful to you to eat, and it still adds a nice shine to your wooden utensils. Just keep in mind that beeswax softens under hot temperatures, so if you’re mixing a chili or soup with it, that oil protection will come right off.
Some people also use petroleum-based oils (mineral oil) on their utensils. You may be skeptical about this, but it’s actually safe when it comes to your food. It’s odorless, won’t leave a sticky residue, while adding protection, resulting in a longer life for your wooden utensils.
I have several wood cutting boards so I use the same John Boos Mystery Oil on my Danish Whisks and all my wooden spoons.
How to Oil Your Wooden Utensils
Just like washing wooden utensils, applying oil to them the correct way is also extremely simple. Just add a small amount of oil directly on the utensil’s surface and then wipe it with a clean rag until the entire utensil is covered. Then allow it to sit for about 15 to 20 minutes.
Some people prefer to let them soak overnight, which is fine too. Finally, take a different clean rag and use it to buff the wood and to remove any oil residue. You should be happy with the final result.
Fighting Stains
When you have a tough stain on a particular utensil, apply roughly a teaspoon of baking soda onto it. Then squeeze lemon juice over the surface in order to make a paste.
Sometimes adding coarse salt to the mixture will help with abrasion. Take a cloth and work the paste into the wood, in the direction of the grains. Then rinse well with water. You can repeat a few times, if you need to.
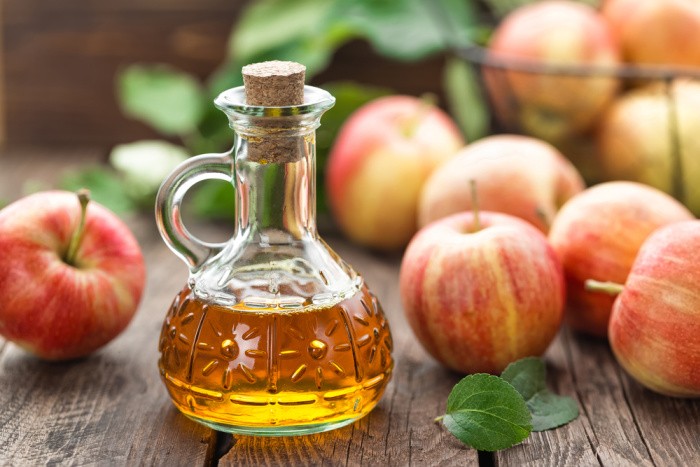
Removing Odors
Sometimes you may notice a slight odor that’s coming from your wooden utensils. To remove odors, you’ll need to fill a bowl with equal parts of hot water and vinegar mixed together.
Place the wooden utensil in the solution and allow it to sit for nearly a half-hour. Go ahead and rinse it off and use a towel to dry it immediately.
If the smell of vinegar is a bit much for you, some prefer to add a teaspoon of lemon juice to solve this problem. Like I said earlier, it’s not good to allow wooden utensils to soak in water, but this method is okay to treat odors and keep mold away.
Final Word
If you take proper care of your wooden utensils, there’s really no reason that they shouldn’t last you many years, if not a lifetime. I’ve heard stories of one generation passing their wooden utensils down to the next generation, which showed the amount of care that they gave them.
What are some other tips and ways to care for wooden utensils that you may know about that weren’t discussed above? I’d love to hear from you. What tips can you add for how to care for wooden utensils? May God Bless this world, Linda.
Copyright Images: Wooden Kitchen Utensils AdobeStock_204010755 By Shawn Hempel


I have a recipe for Spoon butter that I use on my cutting boards and wooden utensils. It has beeswax in it, plus other items. I love it. I applied it and left it overnight then buffed it. Everything looks new. Even my cheap wooden ones.
Hi Deborah, please share the recipe!! You know I love stuff like this. Linda
Spoon Butter
You want a 1:3 ratio of beeswax to oil. For this batch, I used:
1 cup Grapeseed Oil
1/3 cup of Beeswax Pastilles (These ones are organic, and affordable)
You can also use a chunk of beeswax instead of the pastilles, and measure the proportions by weight – but these little pellets just make it so easy. Aside from that, all you need is a glass jar that will sit comfortably in a saucepan, or a small double-boiler. I used one of my thirsty wooden spoons for stirring, since I figured it just gives the moisturization process a head start.
Pour your oil and beeswax into the jar, and set it in a pan half-filled with water, over low heat. You’ll want to stir fairly continuously, but this is going to take a while. Go make a cup of coffee or some hot cocoa.
Eventually, those little beeswax pastilles will start to clump together, and you’ll know you’re not far off.
If you’re making these as gifts, and not leaving the butter to firm up in the melting jar, you’ll want to make sure that your cute little gift containers are clean, dry, and ready for pouring the liquid butter into.
Keep stirring the concoction until every tiniest bit of beeswax is melted, and you have what looks like perfectly clear oil.
The butter will shrink just a smidge, rather than expand, as it cools. So go ahead pour the melted butter into your jars, filling them as full you want them.
While they cool, it’s a good chance to make labels. Feel free to *download these ones if you like. Printing on natural or festive-looking cardstock works well!
Once the butter fully cools and sets, you can put the lids on, and decorate those little cuties. Get out the scrap basket and have fun – this is the best part!
Hi Deborah, I love love love making stuff like this! It’s kind of like making melt and pour soap. That was a little addicting to me. I kept wanting to make more flavors and colors!! LOL! Thanks for sharing the instructions! Linda
I love making and using melt and pour soap. I have 8-10 pounds that need to be scented. Icing a bit. I have some really cute molds, too. Larry bought me several new ones for Christmas. I have a mermaid, a pig and several with roses on them. I make Jasmine scented for myself. I got some Jasmine perfume in Hawaii in 2019. I still love it. That and White Shoulders perfume are my favorites over all.
I may have used coconut oil. I’ve used it before on my cutting boards. It doesn’t get sticky or rancid.
Hi Deborah, good tip on the coconut oil. Linda
I use walnut oil on my wooden utensils but will get the grapeseed oil and make some Spoon Butter! Walnut oil is very expensive – a friend gave me a small bottle and it is nearly gone. I have several wooden utensils that are hand carved and I do not want them to get damaged.
Hi Leanne, oh, I learned another thing, Walnut Oil!! Thank you, I love learning new things. Hand-carved wooden utensils are the best. I have seen them, they are so beautiful. Love it, Linda
HI Linda, As old as I am, I can’t believe that I never realized that a wooden utensil would need to be “oiled to preserve it”, Guess what I’m going to do tonight?
My daughter gave me a beautiful handmade “cutting board” made of several colored woods. It is a favorite thing, because it is so pretty and because my daughter gifted it to me.
Think I’ll also get busy and make a batch of Spoon Butter.
Take care, Suzanne
Hi Suzanne, I learned about oiling cutting boards and wooden utensils when I worked at a Kitchen Store. So fun! Linda
Linda, If you use mineral oil it should be food grade. I’ve always used food grade mineral oil on my wooden utensils and cutting boards. Works like a charm and I re-oil at most once a year unless they show signs of drying out or wear. Been doing it for decades.
Hi Ray, if we keep them oiled they will last a lifetime! I have several cutting boards and they look like new if we keep them oiled! Linda
Insightful post indeed!
You are completely right, To keep your wooden utensils glowing and in the best possible condition, about once a month rub them with mineral oil.
Hi Forest Decor, thank you! Once a month keeps them in great shape! Linda
Thank you so much for your knowledge. This will help alot.
Hi Aeris, thank you for your kind words, Linda