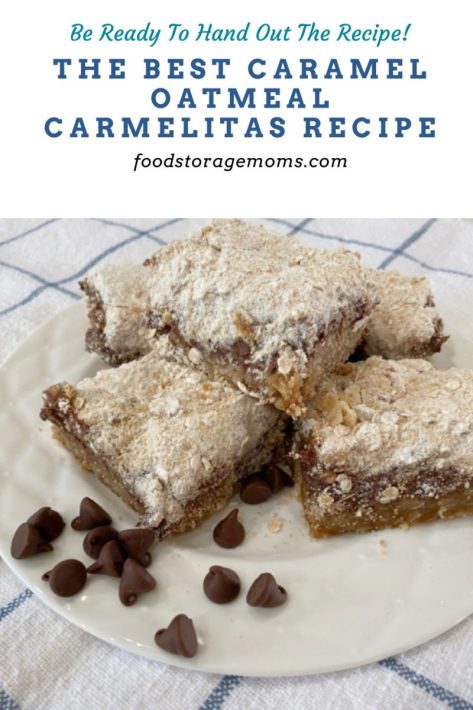
Caramel Oatmeal Carmelitas Recipe

Who is ready to try something new and delicious? The holidays are quickly approaching and it’s the perfect time to try out lots of yummy recipes, particularly some of my favorite desserts! The Best Caramel Oatmeal Carmelitas are simply my favorite dessert bar! Don’t worry, they’re a very impressive recipe for you to take to all those holiday gatherings. I originally posted this in June 2018! Boy, that seems like a long time ago.
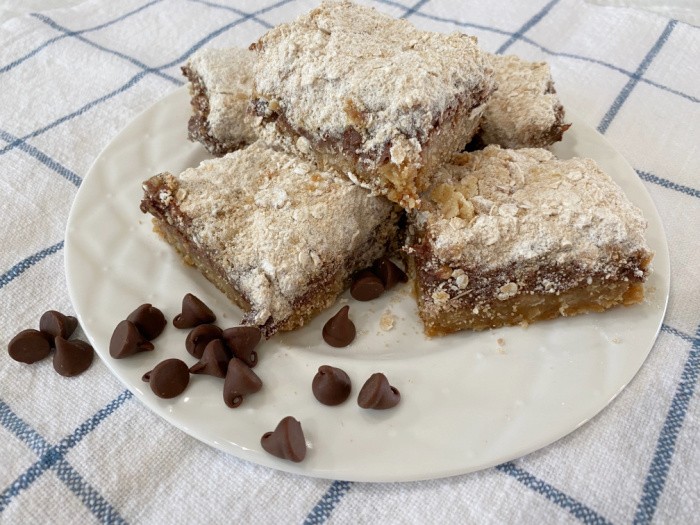
This is truly the best Caramel Oatmeal Carmelitas recipe ever! Whether you make them for a get-together or because you want to eat the whole batch yourself, there’ll be no judgment from us! My daughter, Stacie, shared this recipe with the family and we all loved it! Be ready to hand out the recipe, trust me, people who bake will want to make these time and time again.
What are Caramel Oatmeal Carmelitas?
In order to describe Caramel Oatmeal Carmelitas, I want you to close your eyes. Picture a chewy caramel treat that is so tasty and gooey! When you bite into it, you get the full taste of caramel, nuts, and chocolate. Of course, I think these taste best if they are left in the fridge for a few hours. If you eat them right out of the oven you’ll need a fork!
Some people refer to these as cookie bars, and I guess they are. Carmelita bars are what I’ve always called them. The word Carmelita is actually a Hebrew word that means garden, orchard, or vineyard of God. Based on how they taste and incorporate flavor from the ingredients, I think it’s a great description.
However, as with any other treat, these Caramel Oatmeal Carmelitas barely make it to the next day! The chewy gooey deliciousness is something that everyone just seems to love.
Kitchen Items You May Need To Make These
- Large Bowl
- Baking Dish
- Measuring Cups
- Measuring Spoons
- Hand Mixer or Danish Whisk
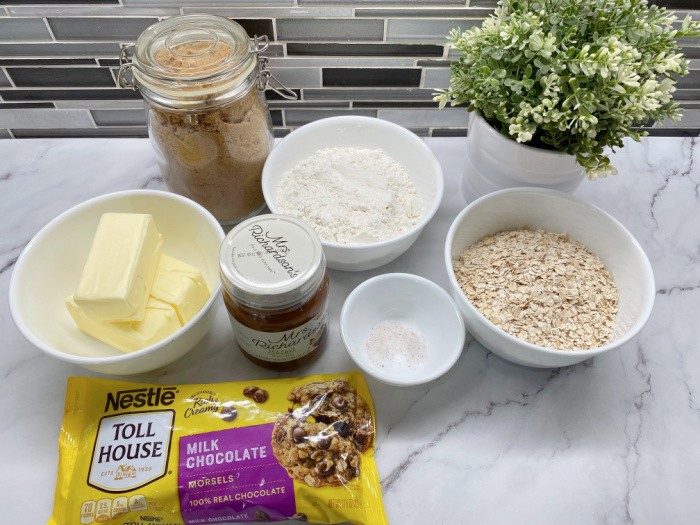
Caramel Oatmeal Carmelitas Ingredients
- Oatmeal: Oatmeal adds fiber, and texture to baked goods. Oats have been a food staple for centuries.
- Butter Salted or Unsalted: Due to the fat content, butter helps to produce softer Carmelitas than those made with margarine, and enriches the flavor; it helps to keep the Carmelitas from crumbling. Butter prevents the eggs or any moist or wet ingredients from evaporating, which creates moist, soft, and velvety Sugar Cookies. Due to the added salt in this recipe, you don’t need to use butter that contains added salt. It also reduces the amount of sodium in the recipe, for those who are concerned with sodium content.
- Mrs. Richardson’s Caramel, Butterscotch, or Sea Salt Caramel: it adds some additional sweetness to any dessert.
- Chocolate Chips: 11.5-ounce Bag of Milk Chocolate Chips (yes, they used to be 12 ounces). They add sweetness to any dessert-type recipe.
- Brown Sugar: Used to maintain moisture, creating a softer cookie texture, and adding sweetness and flavor.
- Flour: You can use all-purpose flour, but I find the Sugar Cookies come out fluffier with white bread flour. And, for those who like nutritional information, my bread flour has more protein than other flour varieties, which I appreciate when making any of my pastries or bread recipes.
- Baking Soda: Adds carbon dioxide to the dough which helps to create a delicious soft and chewy cookie.
- Salt: Used to enhance the flavors of the other ingredients and to offset the flavor of the sugar.
Caramel Oatmeal Carmelitas Recipe
Step One: Gather the Ingredients
Preheat oven to (325°F) = (162°C) degrees, grease a 9-inch by 13-inch pan and set aside.
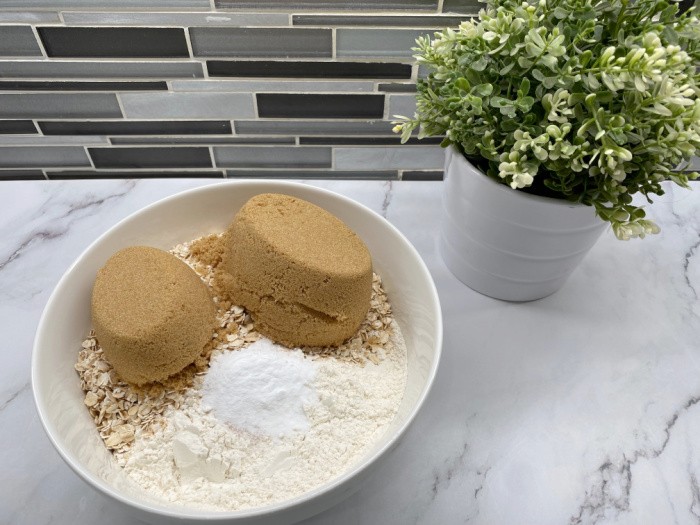
Step Two: Combine Ingredients
Combine the flour, oatmeal, brown sugar, soda, and salt in a medium-sized or large bowl.
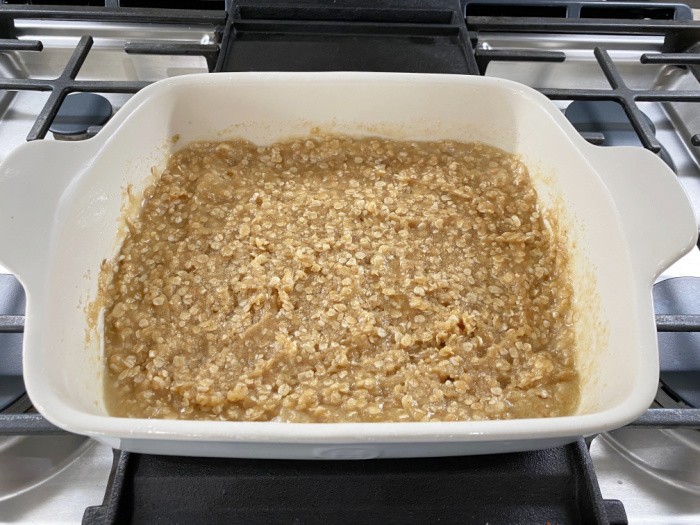
Step Three: 2/3 Flour Mixture
Scoop 2/3 of the flour mixture into the pan and flatten smoothly with your hand or spoon. (Set the other 1/3 of the mixture aside for later).
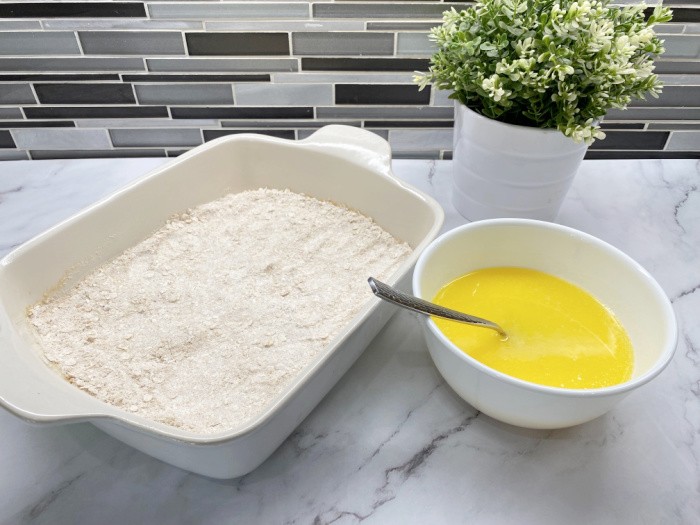
Step Four: Melt the Butter
Melt the butter, drizzle it over the flour mixture, and mix everything thoroughly. Bake this pan for 20 minutes.
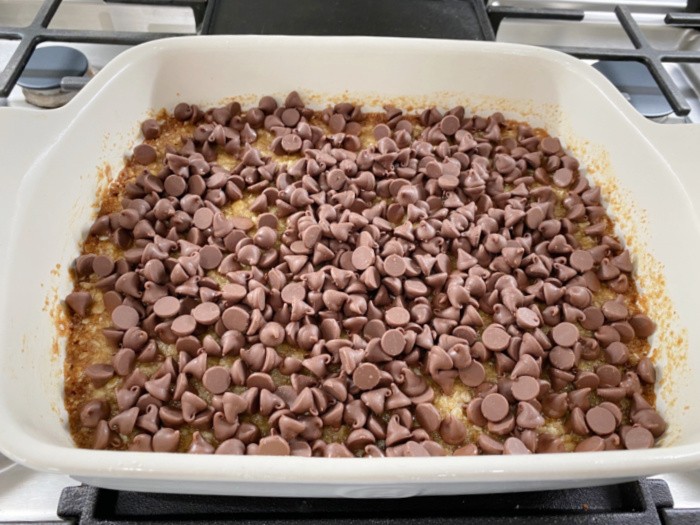
Step Five: Chocolate Chips
After baking, immediately remove the pan from the oven but leave the oven at (325°F) = (162°C) degrees. Next, sprinkle the chocolate chips over this layer.
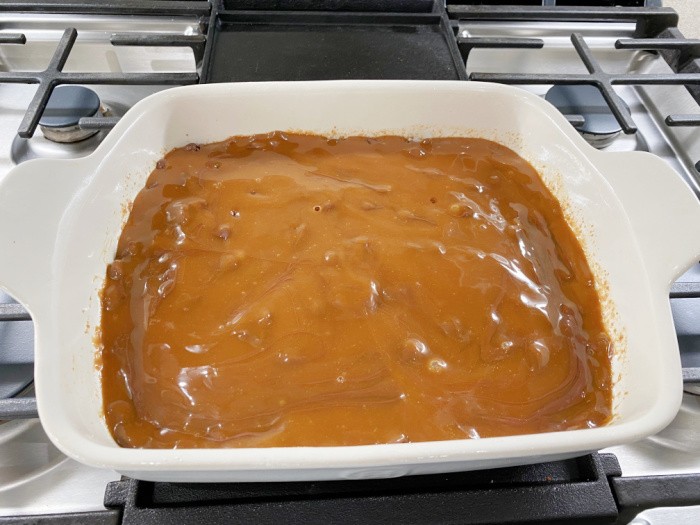
Step Six: Soften the Caramel Sauce
Soften the caramel jar without the lid for about one minute in your microwave or a hot saucepan of water. Pour the caramel over the chocolate chip layer and spread evenly with a spoon.
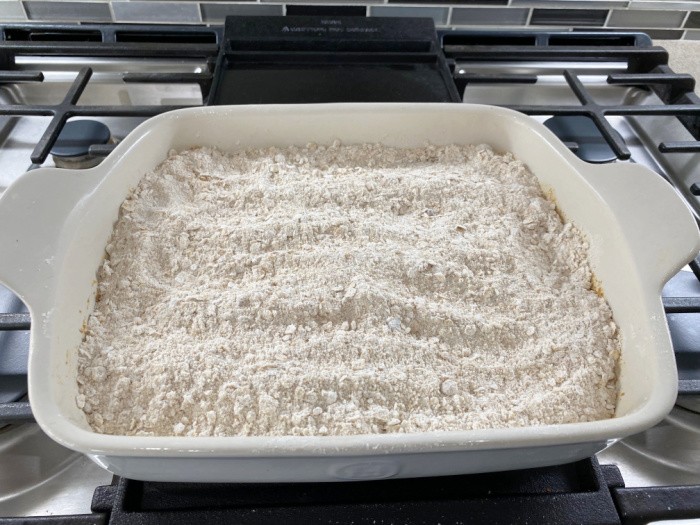
Step Seven: Crumble Flour Mixture On Top
The last step is to crumble the remaining flour mixture over this layer. Break up any large chunks and spread evenly to cover the caramel layer. This step provides a nice crust topping for the bars.
Step Eight: Bake for 20 More Minutes
Bake for another 20 minutes. Remove from oven and let it cool before cutting into squares. I set mine in the refrigerator to set up so they would be ready to cut sooner.
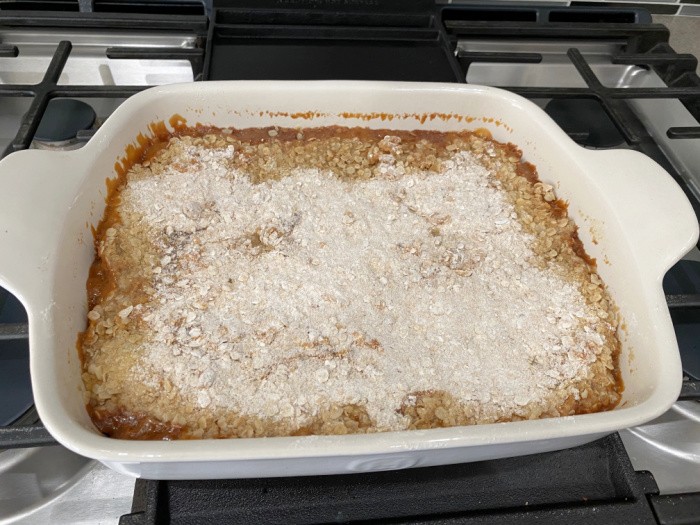
Finished Product
Caramel Oatmeal Carmelitas Recipe
- 1 jar Mrs.Richardson's Butterscotch Caramel Sauce, or Sea Salt Caramel Sauce, Butterscotch Sauce
- 11.5 ounces of milk chocolate chips
- 2 cups flour
- 1-1/2 cups brown sugar
- 2 cups old-fashioned oatmeal
- 1 teaspoon baking soda
- 1/2 teaspoon salt
- 1-1/2 cups butter
-
Preheat oven to (325°F) = (162°C) degrees, grease a 9-inch by 13-inch pan and set aside.
-
Combine the flour, oatmeal, brown sugar, soda, and salt in a medium-sized bowl.
-
Melt the butter, and pour it over the flour mixture, and mix thoroughly.
-
Scoop 2/3 of the flour mixture into the pan and flatten smoothly with your hand or spoon. (Set the other 1/3 of the mixture aside for later). Bake this pan for 20 minutes.
-
After baking immediately remove the pan from the oven but leave the oven at (325°F) = (162°C) degrees.
-
Next, sprinkle the chocolate chips over this layer.
-
Soften the caramel jar without the lid for about one minute in your microwave or a hot pan of water.
-
Pour the caramel over the chocolate chip layer and spread evenly with a spoon.
-
The last step is to crumble the remaining flour mixture over this layer. Break up any large chunks and spread evenly to cover the caramel layer.
-
Bake for another 20 minutes. Remove from oven and let it cool before cutting into squares.
What to Drink With Oatmeal Carmelitas?
I’ll tell you that hot cocoa is awesome with Caramel Oatmeal Carmelitas. If you don’t like hot cocoa, then maybe a nice tall glass of milk will do the trick.
I always need something to drink with my desserts, especially these Carmelitas. If you’re still looking for something to drink with this dessert, get a nice warm cup of coffee, it makes for a great combination every time.
Caramel
While you can use caramel sauce as I do, you can also use caramel squares or bits. It’s all a matter of preference. Some of you may find that using storebought caramel sauce is easiest, some of you may even go for making your own homemade caramel sauce from something like Kraft caramels.
Chocolate Chips
I’ve always liked these bars with milk chocolate chips, but some of my family members prefer either semi-sweet chocolate chips or chips made from dark chocolate. Either way, the Carmalita bars will taste awesome.
Nuts
To add unique flavors to these bars, consider adding some nuts at the same time you add the chocolate chips. When I’ve done that, I usually use pecans due to their great flavor. You can also try walnuts or peanuts if you prefer.
Storage
Once you make these Caramel Oatmeal Carmelitas, you don’t want any of them to go to waste. Storage options are pretty straightforward. I like to store mine in an airtight container. Once they are in the container, you can keep them at room temperature and store them right on the counter. If you like yours a little cold, store them in the refrigerator.
Freezing
If you choose to freeze the Caramel Oatmeal Carmelitas, you can! Again, put them in an airtight container. You can store these delicious treats for up to 3 months. Although, good luck getting them to last that long in your freezer! My husband, kids, and grandkids eat them so quickly.
Another post: Best Chocolate Cake Ever
Final Word
I hope you try this recipe, it’s really a good one! If you have never made Caramel Oatmeal Carmelitas, now is the time. This recipe is so delicious and a favorite around here. May God bless this world, Linda.
Copyright Images: Chocolate Oatmeal Caramel Bars AdobeStock_85371666 by By manyakotic


OMG, these look amazing, Linda! Hmm, I know how to make caramel sauce and I know how to make butterscotch sauce, but I’m going to have to figure out how to make them as one. *G* Maybe I could just make both and mix them together.
Hugs to you… Mare